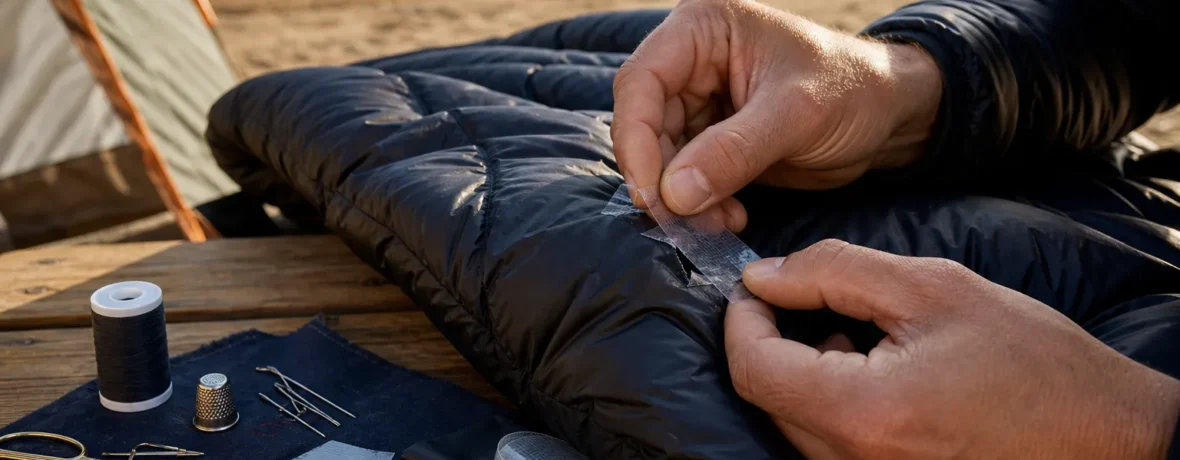
To patch a down jacket, seal the tear before more feathers escape: push loose down back inside, clean and dry the shell, cut a rounded repair-tape patch that overlaps the hole by 1/2 inch [1.3 cm], press it flat for 30 seconds, and let it bond overnight.
What should you do first when a down jacket tears on the trail?
Stop the feather leak before you keep hiking. Down migrates fast through even a pinhole, and every feather you lose is warmth you do not get back.
First, do not pull feathers out. If a feather is poking through the shell, pinch it from the inside and draw it back into the baffle. Patagonia gives the same advice in its guide to fixing small holes in down jackets: do not yank down through the fabric.
Then protect the tear from wind, rain, grit, and pack straps. If you cannot do a clean patch right away, cover the hole with a temporary strip of repair tape, medical tape, or even a clean bandage until camp. The goal is simple: keep the insulation inside and keep dirt out of the adhesive zone.
- Get out of the wind if feathers are escaping.
- Push down back into the baffle with clean fingers.
- Brush off grit, pine needles, and crumbs.
- Dry the shell before you stick anything permanent to it.
- Keep the damaged area away from shoulder straps, hip belts, and sharp gear.
What do you need to patch a down jacket?
You need repair tape, clean fabric, pressure, and patience. A tiny trail kit can fix most punctures, ember holes, and straight tears before they turn into shredded nylon.
For most hikers, peel-and-stick nylon repair tape is the cleanest answer. GEAR AID’s down jacket repair guide recommends repair tape for rips, tears, and holes in nylon jackets, and the method works because it avoids sewing through slippery ultralight fabric.
| Repair item | Best use | Trail or home? |
|---|---|---|
| Precut repair patch | Fastest fix for pinholes and small tears | Trail and home |
| Roll of nylon repair tape | Custom patches for odd shapes and longer rips | Trail and home |
| Alcohol wipe | Cleaning oil and dirt before patching | Best at home, useful on trail |
| Small scissors | Rounding corners so patches do not peel | Trail and home |
A smart repair kit weighs less than a snack. Pack two or three precut patches, one 6-inch [15 cm] strip of repair tape, a mini alcohol wipe, and folding scissors or a knife. Keep it in a small zip bag so the adhesive backing stays clean.
How to patch a down jacket on the trail?
Patch it with peel-and-stick repair tape if the fabric is dry enough to hold adhesive. Trail fixes do not need to look pretty; they need to stop down loss and survive the hike out.
- Move out of the weather. Wind steals feathers and rain weakens adhesive. Step behind a tree, tent wall, boulder, or your hiking partner.
- Push down back inside. Use clean fingers or the blunt end of a tent stake. Do not stuff aggressively or you may widen the tear.
- Flatten the shell. Lay the damaged spot across your knee, a pot lid, a sit pad, or a flat rock wrapped in clothing.
- Clean the fabric. Brush away dust. If you have an alcohol wipe, clean a patch zone at least 1 inch [2.5 cm] beyond the tear on every side.
- Let it dry. Adhesive hates moisture. Wait until the shell feels dry to the touch.
- Cut the patch. Make it wide enough to overlap the damage by 1/2 inch [1.3 cm] on all sides. Round every corner.
- Apply from one side to the other. Peel half the backing, anchor one edge, then smooth the patch across the tear. Push air bubbles outward.
- Press hard for 30 seconds. Use your palm, a spoon, or the smooth side of a water bottle. Body heat helps the adhesive grab.
If you are patching a long rip, line up the torn edges first. Do not stretch the fabric. A stretched patch may pucker when the jacket relaxes, and puckers catch on brush, pack straps, and seat belts.
For a damp jacket, make a temporary cover instead of a forever fix. A strip of tape will still reduce feather loss, but replace it at home after the jacket dries fully.
How to patch a down jacket at home?
At home, slow down and make the patch cleaner, larger, and longer-lasting. You have better light, better scissors, and enough time for the adhesive to bond.
- Inspect the damage. Check both the outer shell and the lining. Look for hidden punctures near seams, cuffs, pockets, and zipper garages.
- Do not wash an open hole. Seal the tear first. Washing an unpatched jacket can move down into the machine, clump insulation, and enlarge the rip.
- Clean around the tear. Use a damp cloth for dirt. Use a little isopropyl alcohol on shiny body-oil areas, then let the fabric dry.
- Trim loose threads only. Do not cut intact shell fabric. Use sharp scissors and stop as soon as the edge is tidy.
- Choose the patch shape. Oval and circle patches peel less than rectangles. If you cut a rectangle, round the corners.
- Size the patch correctly. For a 1/4-inch [6 mm] hole, use a patch at least 1 1/4 inches [3.2 cm] wide. For a 1-inch [2.5 cm] tear, use a patch at least 2 inches [5.1 cm] long.
- Apply steady pressure. Press from the center out. No bubbles. No wrinkles. No feather trapped under the adhesive.
- Let it sit overnight. Hang the jacket somewhere warm and dry. Do not stuff it into a pack right away.
If the color match bothers you, clear tape is less obvious on some fabrics, while black or colored nylon tape often looks cleaner on matte shells. Function comes first. A neat patch that stays put beats an invisible patch that fails.
Should you sew, glue, or tape a down jacket repair?
Tape is best for most shell tears. Sewing can work on seams and liners, but needle holes in the outer shell can leak feathers and create a dotted tear line.
Use the least invasive repair that will hold. Puffy jackets use thin shell fabrics because ounces matter. That same fabric can fray, stretch, or split if you force a needle through it without backing.
| Method | Use it for | Skip it when |
|---|---|---|
| Repair tape | Pinholes, ember holes, small rips, clean shell tears | The fabric is wet, oily, or shredded |
| Seam sewing | Open stitching on existing seams | The tear crosses baffled insulation chambers |
| Fabric glue | Tacking tiny frays under a patch | You need a flexible, invisible, high-stress repair |
| Professional service | Large tears, lost down, zipper failure, complex baffles | You only have a clean pinhole |
If you sew a lining tear, use a fine needle and tiny stitches. Keep tension light. For an outer shell tear, place a patch over the area after stitching to seal needle holes and reinforce the fabric.
Can you patch a seam, baffle, or burn hole?
Yes, but the repair depends on the damage. A clean ember hole is easy; a torn baffle seam needs more care.
Burn holes are common around camp stoves and fires. First, check whether the fabric around the hole is stiff, melted, or curled. Trim only brittle edges that will keep a patch from lying flat. Then cover the entire damaged zone with a rounded patch that extends 1/2 inch [1.3 cm] past the weak fabric, not just past the visible hole.
Baffle damage is trickier. If a seam between insulation chambers has opened, down may shift away from the spot it is supposed to warm. A surface patch can stop feathers from leaking, but it may not restore the internal structure. If the baffle is torn for more than 2 inches [5.1 cm], send the jacket to the brand or a repair shop.
For seam-edge holes, clean the area well and use a patch that crosses the seam by at least 1/2 inch [1.3 cm]. Press into the seam valley with a spoon handle or the rounded cap of a water bottle. If the patch bridges over the seam without contact, it will peel.
How do you keep a patch from peeling?
Clean fabric and rounded corners do most of the work. Peeling usually starts with dirt, body oil, sharp patch corners, or a patch placed where the jacket flexes constantly.
- Clean wider than the patch. Oil from hands, sunscreen, and snacks weakens adhesion.
- Dry the shell completely. If the jacket feels clammy, wait.
- Round the corners. Sharp corners catch first.
- Use a large enough patch. Aim for 1/2 inch [1.3 cm] of overlap on every side.
- Apply pressure. Press hard for 30 seconds, then press again after a few minutes.
- Avoid stuffing it immediately. Give the adhesive overnight before compressing the jacket.
- Double-patch high-stress tears. For some cuff, pocket, and hem repairs, patching the inside and outside can help.
GEAR AID’s Tenacious Tape instructions also emphasize pressing the patch from the inside of the repair outward to reduce bubbles and wrinkles. That small move matters. Bubbles become lift points, and lift points become peeled corners.
When is down jacket repair a job for a professional?
Use a pro when the jacket has lost insulation, torn baffles, major seam damage, or a rip larger than your patch can stabilize. A surface patch fixes shell fabric; it does not replace missing loft.
Send the jacket to the manufacturer or a technical repair shop when you see any of these problems:
- A tear longer than 2 inches [5.1 cm] in a high-stress area
- Loose down pouring out instead of a few feathers escaping
- A torn internal baffle that lets insulation migrate
- Damage across a zipper, pocket, cuff, hood, or hem drawcord
- Fabric melted into a hard, wrinkled patch larger than a quarter
- Multiple holes clustered under a hip belt or shoulder strap
REI’s guide to patching a down jacket points hikers toward professional repair for large rips or jobs that require replacing lost down. That is the right call if the jacket is expensive, nearly new, or part of your cold-weather safety system.
How do you wash a patched down jacket without wrecking it?
Let the patch bond first, then wash gently according to the care label. A fresh patch should not go straight from your repair table into a washer.
Wait at least overnight after patching. Longer is better if the repair sits on a cuff, pocket, or shoulder where the shell flexes. Before washing, check the patch edges with a fingertip. If an edge lifts, press it back down or replace the patch before water gets under it.
Use a down-specific cleaner rather than standard detergent. Nikwax says to follow the garment care label and use a down cleaner in its Down Wash instructions. Standard detergent can leave residue that hurts loft and water repellency.
- Close zippers and hook-and-loop tabs before washing.
- Wash only after the patch has bonded.
- Use a front-loading washer when possible.
- Use down wash, not regular laundry detergent.
- Dry low and slow until the insulation is fully lofted.
- Store the jacket uncompressed after it dries.
After washing, inspect the patch again. If the edges stayed flat, you are set. If one corner lifted, trim off that patch and apply a larger one over clean, dry fabric.
What mistakes ruin a down jacket patch?
Most bad patches fail before the tape ever touches the jacket. The usual culprits are dirt, wet fabric, tiny patches, and rushed pressure.
Do not slap tape over mud and call it fixed. Do not use duct tape as a permanent repair unless you have no other option. It can leave gummy residue that makes a later clean repair harder. Do not cut a patch the same size as the hole. The adhesive needs clean fabric to grip, not just damaged fabric to cover.
Also avoid over-handling the sticky side. Skin oil transfers fast. Peel the backing only when you are ready, touch the adhesive as little as possible, and anchor the patch once. Repositioning weakens the bond.
The sneakiest mistake is patching over trapped down. A feather under the patch creates a ridge. That ridge lets water, grit, and air work under the edge. Push every feather back inside before you seal the shell.
Related reading
- How to Wash a Down Jacket in a Washing Machine
- What Is a Down Jacket? Fill Power, Baffles and Warmth
- How to Wash a Rain Jacket and Keep It Waterproof
- How to Wash a Down Sleeping Bag and Restore the Loft
FAQ
Can you patch a down jacket permanently?
Yes, a clean repair-tape patch can last for years on a low-stress area. For cuffs, shoulders, pocket edges, and seams, treat tape as durable but not invincible and inspect it after washing or heavy use.
What is the best tape for a down jacket?
Nylon repair tape made for outdoor gear is the best all-around choice. Pick a flexible peel-and-stick patch, cut it with rounded corners, and overlap the damage by 1/2 inch [1.3 cm].
Can I use duct tape on a down jacket?
Use duct tape only as an emergency trail fix. It can stop feather loss for the day, but it often leaves sticky residue and should be replaced with proper repair tape at home.
Should I pull out feathers sticking through the shell?
No. Pulling feathers out can enlarge the hole and draw more down through the shell. Pinch the feather from inside the jacket and pull it back into the baffle.
Can I sew a rip in a down jacket?
Yes, but sewing is usually better for seams and liners than for the outer shell. If you sew the shell, cover the stitch line with a patch afterward to seal needle holes.
How big should the patch be?
Make the patch at least 1/2 inch [1.3 cm] larger than the damaged area on every side. For high-stress spots, go larger and round the corners so the patch has fewer edges to catch and peel.