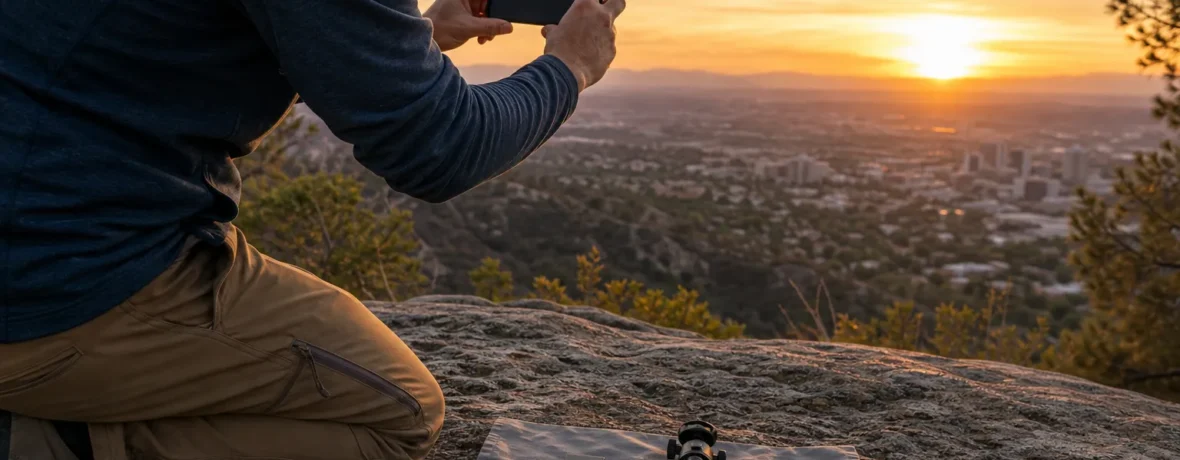
Use these hiking photography tips to make stronger phone photos: clean your lens, shoot during the first or last 2 hours of daylight, keep horizons straight, include one clear subject, use exposure lock, and take 3 angles before moving on. Yes, your phone is enough if you use it with intent.
Here’s the straight take: most hikers do not need a bigger camera. They need fewer rushed snapshots. Your phone can make excellent trail images because it is always in your pocket, boots-on, sweat-ready, and fast. The weakness is not the sensor. The weakness is how we use it.
Trail photography fails when you point the phone at “the view” and hope the view does the work. It rarely does. Mountains flatten. Forests turn messy. Waterfalls blow out into white streaks. Your friend becomes a dot in a canyon. Then you blame the phone.
Don’t. Blame the habit.
Good hiking photos are built from decisions: where you stand, what you leave out, what the viewer should notice first, and when you press the shutter. Gear helps at the edges. Seeing helps every time.
What are the best hiking photography tips for phone users?
Start with light, composition, and restraint.
The best phone photo on a hike is usually not the biggest scene. It is the clearest scene. One subject. Clean edges. Good light. No random trekking pole stabbing into the frame. No half-visible hiker cut off at the ankle. No finger grease turning the sun into a fog machine.
- Clean the lens before every photo stop. Use a shirt hem only if it is dry and grit-free. A microfiber cloth is better.
- Turn on the grid. Use it to keep the horizon level and place the subject off-center when that feels stronger.
- Tap to focus. Tap the hiker, flower, cairn, ridge, or waterfall detail you want sharp.
- Adjust exposure before shooting. On most phones, tap the subject, then slide exposure down slightly for bright skies or snow.
- Take three versions. Shoot wide, medium, and close. One will usually be much better than the others.
- Stop walking. Plant your feet. Breathe. Frame. Then shoot.
- Delete later, not on trail. Save your battery and your attention for the hike.
This is the position: a phone used slowly beats an expensive camera used lazily. The trail rewards patience. So does the frame.
How do you take better hiking photos with your phone?
Move your feet before you move the zoom slider.
Digital zoom is tempting. It is also where many phone images start to fall apart. If you want the hiker larger in the frame, walk closer when it is safe. If you want the peak to look more dramatic, step sideways until foreground and background line up. If the scene feels flat, crouch down and bring in a rock, boot track, fern, or trail curve.
Phone cameras are strongest when you give them depth. A trail photo with foreground, middle ground, and background feels like a place. A photo with only distant hills often feels like wallpaper.
Try this simple structure:
- Foreground: flowers, boot prints, granite, snow texture, a map, a pack, a stream edge.
- Middle ground: a hiker, tent, bridge, switchback, lake shore, animal track.
- Background: ridgeline, clouds, forest, canyon wall, sunset color.
Do not add foreground clutter just because you can. Use it only when it points the eye into the image. A branch across the frame is not composition. It is a branch in the way.
What phone camera settings should hikers use on trail?
Use the simplest settings that solve real trail problems.
You do not need to turn your hike into a camera menu. Set the phone up before the trailhead, then mostly leave it alone. The goal is faster decisions with less fiddling.
| Setting | Use it for | Trail advice |
|---|---|---|
| Grid | Straight horizons and cleaner framing | Leave it on all the time. |
| Exposure control | Snow, bright clouds, backlit hikers | Darken slightly to protect highlights. |
| Portrait mode | People, gear, flowers, trail details | Use when the subject is close and the background is busy. |
| Panorama | Wide ridgelines and canyon views | Move slowly and keep the phone level. |
If your phone offers RAW capture, use it only when you plan to edit later and have enough storage. For most hikers, standard photo mode is fine. Better timing and better framing will do more than a larger file.
Keep Live Photos, motion photos, or burst modes in mind for people moving through a scene. A hiker stepping across rocks, crossing a bridge, or cresting a pass often looks awkward in one frame and perfect half a second later. Shoot a short burst, then pick the frame where the legs, arms, and posture look natural.
What is the best light for hiking photography?
The best light is low, angled, and soft.
For most hikes, that means early morning and late afternoon. The first 2 hours after sunrise and the last 2 hours before sunset give you longer shadows, warmer color, and more shape in the land. Midday can work, but it is harder. Overhead sun turns faces harsh, blows out pale rock, and makes forests look chaotic.
Clouds are not bad news. Bright overcast light is excellent for forests, waterfalls, mushrooms, moss, wildflowers, and portraits. It lowers contrast and lets your phone hold detail in both shadows and highlights.
Use light like this:
- Front light: sun behind you, subject evenly lit. Safe and clear, but can look flat.
- Side light: sun from left or right. Best for ridges, dunes, bark, rock, and texture.
- Backlight: sun behind the subject. Great for silhouettes, glowing grass, mist, and rim light.
- Open shade: subject shaded but facing bright sky. Good for people and close details.
When the sky is much brighter than the land, tap the bright area and lower the exposure until the clouds have detail. The shadows may look dark. That is fine. A moody image with a good sky often beats a washed-out image with everything visible and nothing interesting.
How do you compose hiking photos that do not look flat?
Put a subject in the scene and give the viewer a path to it.
Big landscapes need scale. Add a person on a ridge, a tent below a wall, a boot on a slab, or a trail bending toward the pass. The subject tells the viewer where to look. The surroundings tell them why it matters.
Use leading lines when they are already there: trails, rivers, shorelines, shadows, logs, ridges, boardwalks. Do not force it. A strong line that leads nowhere is just a graphic trick.
Watch the edges of the frame. This one habit separates careful photos from sloppy ones. Before you shoot, scan all four edges. Are there cut-off heads, random backpacks, trash, trail signs, bright white branches, or a stranger’s elbow? Shift 1 foot [0.3 m]. Crouch. Step higher. Clean the frame.
For people, leave space in the direction they are facing or walking. A hiker staring into a valley needs room in front of their gaze. A runner moving left to right needs space to move into. Crowding the edge creates tension, and not the good kind.
How do you photograph people while hiking without making them look awkward?
Give them something to do.
Standing stiffly in front of a view is the fastest route to a dull trail portrait. Ask your hiking partner to adjust a shoulder strap, look toward the next switchback, sip water, check the map, tie a shoe, walk away from you, or walk through the frame. Movement looks natural because hiking is movement.
Keep faces out of harsh overhead sun when you can. Use shade, hats, or backlight. If the face is too dark, tap it on the screen and raise exposure slightly. If the background blows out, move the person so the light is more even.
For stronger hiking portraits:
- Step back and include the trail environment.
- Shoot from chest height for a natural look.
- Crouch slightly when you want the person to look strong against a ridge or sky.
- Avoid wide-angle close-ups of faces; they can distort features.
- Take the photo before the person gets impatient.
Also, ask before posting. Trail friendships last longer when you do not publish someone’s sweaty suffer-face without permission.
How do you keep your phone safe and charged on a hike?
Protect the phone like it is navigation gear, because it often is.
Your phone may be your camera, map, emergency contact tool, weather checker, and flashlight. Treating it like a casual pocket toy is bad trail management. Cold, heat, water, drops, and constant screen use all punish battery life.
Carry the phone where you can reach it, but not where it can bounce out. A hipbelt pocket, chest pocket, or zipped pants pocket works better than the top of an open side pocket. In rain, use a waterproof pouch or a zip-top bag. In winter, keep it closer to your body to reduce cold drain.
Bring a small power bank for longer hikes, cold days, or routes where the phone is part of your navigation plan. Download maps before leaving service. Put the phone in airplane mode when you do not need a signal. Turn the screen brightness down when conditions allow.
A dead phone takes no photos. Worse, it gives you fewer options if the day goes sideways.
How do you edit hiking photos on your phone?
Edit lightly and make the scene look the way it felt, not like a cartoon.
The best hiking edits usually fix three things: exposure, color, and crop. Start there. Do not drag every slider to the edge. Oversaturated greens, radioactive sunsets, and crunchy clarity make trail photos look cheap fast.
A practical editing order:
- Straighten. Fix the horizon first. Crooked lakes are hard to forgive.
- Crop. Remove dead space and distractions near the edges.
- Adjust exposure. Brighten shadows only when needed.
- Recover highlights. Pull back bright skies, snow, and water.
- Set color. Warm it up or cool it down with restraint.
- Add contrast carefully. Too much contrast crushes forest detail.
- Sharpen last. Use a light hand, especially on trees and rock.
If the original photo is weak, editing will not save it. It may make it louder, but not better. The cleanest workflow is still simple: shoot with intention, edit with restraint, export, and move on.
What should hikers know before photographing wildlife, parks, and fragile places?
No photo is worth stressing wildlife, trampling plants, or breaking local rules.
This is where hiking photography needs a firmer backbone. The shot is not more important than the place. Stay on durable surfaces, avoid cutting switchbacks, and follow the National Park Service Leave No Trace guidance. If getting the photo requires crushing alpine plants or stepping into a closed restoration area, the photo is already bad.
For wildlife, use distance and patience. The National Park Service wildlife watching guidance tells visitors to check local rules, stay back, never feed animals, and use binoculars or zoom lenses for closer views. As of November 2026, NPS guidance says many parks require at least 25 to 50 yards [23 to 46 m] from most animals and 100 yards [91 m] from predators such as bears and wolves; always follow the specific park rule where you are.
Permits can matter for commercial work. As of November 2026, the National Park Service filming and photography permit guidance says all commercial filming and some non-commercial filming, still photography, and audio recording require permits in park areas. If you are shooting paid work, brand content, models, large setups, or anything beyond normal personal hiking photos, check the land manager before you go.
For ordinary personal trail photos, the ethic is simple:
- Do not block the trail for a long photo session.
- Do not fly a drone where drones are banned or where they disturb people or wildlife.
- Do not geotag fragile or easily damaged locations.
- Do not move rocks, flowers, nests, bones, antlers, or cultural objects for a cleaner frame.
- Do not pressure a tired or nervous hiker into posing near an edge.
The best outdoor photographers make the place look good and leave it whole. That should be the standard.
What is a simple phone photography checklist for hiking?
Use a short checklist so you shoot better without slowing the group.
Before the hike:
- Charge phone to 100 percent.
- Free storage space.
- Clean lens and case.
- Turn on grid.
- Download offline maps if needed.
- Pack power bank and cable for longer days.
- Carry a small microfiber cloth.
On trail:
- Stop walking before shooting.
- Check the light direction.
- Pick one subject.
- Scan the frame edges.
- Tap to focus.
- Adjust exposure.
- Shoot wide, medium, and close.
After the hike:
- Back up favorites.
- Delete obvious misses.
- Edit lightly.
- Ask before posting photos of other hikers.
- Share locations with care.
That is enough. You do not need a 47-step ritual. You need repeatable habits that survive sweat, weather, bugs, hunger, and the friend who keeps saying, “Are you done yet?”
Related reading
- Night Hiking: Tips, Gear and Safety After Dark
- Top Tips for Hiking Safely: Trail Safety That Actually Prevents Incidents
- Best Fitness Tips for Hiking Preparation: An 8-Week Plan That Works
- Type 2 Fun: Why Hard Hikes Feel Good Later
FAQ
Is a phone good enough for hiking photography?
Yes, a modern phone is good enough for most hiking photography. It is strongest for landscapes, people, trail details, panoramas, and quick documentary shots, but it struggles with distant wildlife and very low light.
Should I use zoom for hiking photos?
Use optical zoom if your phone has it, but avoid heavy digital zoom. When it is safe, move closer or reframe the scene instead of pinching in until the image turns soft.
What is the best time of day for hiking photos?
Early morning and late afternoon are usually best. Low-angle light gives mountains, forests, and desert terrain more shape, while midday light often looks harsh and flat.
How do I make mountain photos look bigger on my phone?
Add scale and depth. Put a hiker, trail, lake, trees, or foreground rocks in the frame so the viewer can read distance instead of seeing a flat wall of peaks.
How many photos should I take on a hike?
Take enough to give yourself options, but do not let the camera run the day. A good habit is 3 to 5 frames at each strong scene: wide, medium, close, vertical, and one with a person for scale.
What is the biggest mistake in hiking photography?
The biggest mistake is shooting too fast. Slow down for 10 seconds, clean the lens, choose one subject, check the edges, and adjust exposure before tapping the shutter.