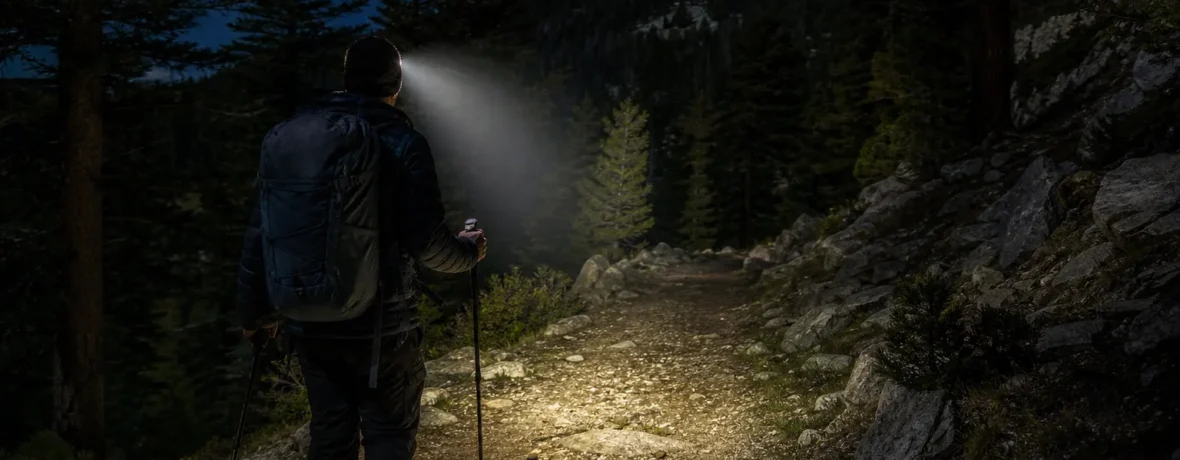
What are the best night hiking tips? Choose a familiar trail, start with 2–4 miles [3.2–6.4 km], carry two lights, tell someone your route and return time, pack the Ten Essentials, slow your pace, use red light when you can, check weather, and turn back before small problems become big ones.
What are the best night hiking tips?
Keep your first night hike short, familiar, and boring on purpose.
Darkness changes the trail. Rocks hide in shadow. Blazes disappear. A harmless creek crossing feels louder. Your pace drops. That is part of the fun, but it also means you need tighter habits than you use at noon.
- Pick a trail you already know. Your first after-dark route should be a trail you have walked in daylight, not a mystery line on an app.
- Start near sunset, not at full dark. Let your eyes adjust while you are already moving. Twilight gives you a soft handoff.
- Keep it short. A 2–4 mile [3.2–6.4 km] loop or out-and-back is plenty for a first run.
- Carry two lights. A headlamp plus a backup flashlight beats a dying phone every time.
- Pack extra warmth. Night air can feel sharp once you stop sweating.
- Tell a real person your plan. Send your trail name, route, start time, turnaround time, vehicle location, and when to call for help.
- Use a turnaround time. If you planned to turn around at 8:30 p.m., turn around at 8:30 p.m. even if the overlook is close.
- Walk slower than you think you need to. Shorter steps save ankles.
- Stay on the trail. No shortcutting switchbacks. No wandering after sounds. No “let’s see what’s over there.”
- Cancel for storms, dense fog, wildfire smoke, unsafe roads, or sketchy trail reports. The mountain will still be there.
The National Park Service recommends carrying the Ten Essentials for outdoor trips, including navigation, illumination, extra clothing, first aid supplies, food, water, and emergency shelter. For night hiking, illumination and navigation move from “nice backup” to “core survival gear.”
Is night hiking safe?
Yes, night hiking can be safe if you plan conservatively and respect the dark.
The biggest risks are simple: slips, wrong turns, weather, wildlife surprises, road crossings, and delayed rescue if something goes wrong. None of those require panic. They require preparation.
Night hiking is not the best time to chase personal records, test new boots, explore faint social trails, or squeeze in a long route after work because you feel restless. Choose terrain that gives you room to make a mistake without paying hard for it. Wide trails. Clear tread. Gentle grades. Obvious junctions. Cell service is a bonus, not a plan.
Hike with a partner when you can. Solo night hiking demands a higher margin: shorter route, better communication, warmer layers, a satellite messenger in remote areas, and a firm turnaround time. If you are nervous before you leave the trailhead, listen to that. Nerves can be useful data.
The National Park Service’s after-dark guidance says not all parks are open at night and recommends checking hours, making a trip plan, bringing more than one light source, and wearing bright or reflective clothing near roads or traffic areas. Read the official NPS after-dark safety tips before planning a park hike.
What gear do you need for night hiking?
You need lighting, navigation, layers, water, food, first aid, and a way to communicate if plans break.
Do not build your kit around fear. Build it around the most likely problems: your light dies, the temperature drops, you miss a turn, you roll an ankle, your hike takes 90 minutes longer than planned, or you wait in place for help.
| Gear | Why it matters after dark | Smart choice |
|---|---|---|
| Headlamp | Keeps both hands free for poles, scrambling, maps, or a fall | 200–400 lumens for maintained trails; fresh batteries or full charge |
| Backup light | One light is none if it fails | Small flashlight or second headlamp stored where you can reach it |
| Map and compass | Phones fail, freeze, fall, or lose signal | Paper map plus offline digital map |
| Warm layer | Stops get colder fast at night | Fleece, puffy, wind shell, hat, and gloves when conditions call for them |
| First aid kit | Small injuries are harder to manage in the dark | Blister care, wrap, gauze, tape, gloves, personal meds |
| Emergency shelter | Useful if you must wait out weather or injury | Space blanket, bivy sack, or light tarp |
Pack these extras for a cleaner night hike:
- Whistle
- Power bank and cable
- Reflective vest or clip-on light for road walks
- Trekking poles for rough tread
- Extra socks
- Water treatment if natural water is part of the plan
- Bug repellent in tick or mosquito country
- Small sit pad if you may stop for stargazing
- Trash bag for wet gear or emergency rain cover
How bright should a headlamp be for night hiking?
Use 200–400 lumens for most maintained trails, with a lower red-light mode for close work.
Brighter is not always better. A huge beam can flatten shadows, blind your hiking partners, burn battery, and wreck night vision. You want enough light to see foot placement 10–20 feet [3–6 m] ahead, plus a stronger setting for checking junctions, scanning blazes, or finding the trail after a break.
Look for these features:
- Red-light mode: Useful for map checks, snack breaks, and preserving night vision.
- Lock mode: Keeps the light from turning on inside your pack.
- Weather resistance: Rain happens after dark, too.
- Simple buttons: Tiny multi-click controls are annoying with gloves.
- Known runtime: Your light should last longer than the planned hike, not exactly as long.
A good rule: carry enough battery for twice your planned moving time. If the hike should take 2 hours, bring lighting that can run for 4 hours on a usable setting. Cold weather can drain batteries faster, so keep spares or a backup lamp in an inside pocket when temperatures drop.
How do you plan a night hiking route?
Plan the route in daylight before you ever walk it at night.
Pick a trail with clean access, legal parking, clear signage, and low consequence. Avoid exposed ridges, cliff edges, sketchy creek crossings, maze-like trail systems, and routes with heavy mountain bike use unless you know the area well.
Use this route-planning checklist:
- Confirm the trail or park allows after-dark access.
- Check the official land manager page for alerts, closures, fire restrictions, and parking notes.
- Download offline maps before leaving home.
- Mark the trailhead, junctions, turnaround point, and exit options.
- Check sunset, moonrise, moon phase, and cloud cover.
- Read recent trail condition reports, but do not treat them as official closure information.
- Choose a route with an obvious halfway point.
- Set a hard turnaround time.
- Leave a trip plan with someone who will act if you miss check-in.
A full moon on a clear night can make open terrain feel almost magical. Under tree cover, moonlight helps less. In canyons, dense forest, or heavy cloud, plan as if you will be hiking in full darkness.
How do you hike at night without getting lost?
Check your position before every junction, not after you feel lost.
Most wrong turns start small. You chat through a fork. You follow a wider path because it feels right. You chase a light that belongs to someone else. Then the trail feels odd, but you keep walking because turning around feels like admitting defeat. Do not do that.
Use a tight navigation routine:
- Pause at each junction. Stop moving before checking the map.
- Face the map the same way you face the trail. This reduces left-right mistakes.
- Confirm the next landmark. Creek, bridge, switchback, road, ridge, sign, or bend.
- Look back after turns. The trail looks different on the return.
- Track time. If the map says the next junction should come quickly and it does not, stop and reassess.
- Do not split the group. One confused hiker is easier than three scattered hikers.
If you think you are off route, stop. Eat something, add a layer, and slow your breathing. Then check your last known point. Backtrack if you can do so safely. Wandering “just a little farther” is how a minor mistake grows teeth.
What should you do if you see wildlife while hiking at night?
Give wildlife space, stay calm, and never move closer for a better look.
Many animals are more active at dawn, dusk, or night. You may hear more than you see: brush cracking, wings lifting, hooves moving away, coyotes calling, owls overhead. Most wildlife wants distance from you. Help that happen.
- Keep food sealed and inside your pack.
- Do not wear earbuds in both ears.
- Talk calmly in areas with limited visibility.
- Keep dogs leashed where dogs are allowed.
- Never feed wildlife.
- Do not shine a high beam into an animal’s eyes longer than needed.
- Back away slowly if an animal does not move off.
In bear, mountain lion, moose, or alligator country, read the land manager’s species-specific guidance before you go. Advice changes by animal and region. Bear spray may be recommended or allowed in some places and restricted in others, so check the official site for the area you are visiting.
How do you handle weather, cold, and lightning after dark?
Check the forecast before you go, then keep watching the sky while you hike.
Night hides weather. Clouds blend into the dark. Wind shifts feel subtle until they are not. Rain makes roots slick, creek crossings louder, and trail markers harder to see. Cold settles into low spots. Your plan needs a weather exit.
For lightning, be strict. The National Weather Service says no place outside is safe when thunderstorms are in the area; if you hear thunder, move to a substantial building or an enclosed hard-topped vehicle, and wait 30 minutes after the last thunder before resuming activity. Review the official NWS lightning safety guidance before hiking in storm-prone seasons.
Cold is sneakier. If you stop for photos, stars, snacks, or a map check, throw on a layer before you chill. It is easier to stay warm than to get warm once sweat cools. Avoid cotton next to skin in cool or wet conditions; choose wool or synthetic layers that manage moisture better.
Turn back for:
- Thunder
- Fast-building clouds
- Fog thick enough to hide markers
- Freezing rain
- Ice on rock, roots, bridges, or boardwalks
- Wind strong enough to drop branches
- Water rising at crossings
What should you wear for night hiking?
Wear layers you can adjust without stopping for long.
Your clothing should solve three problems: sweat, cold, and visibility. Start slightly cool at the trailhead. If you are warm while standing still, you may sweat hard once you climb. Sweat plus night air can chill you fast during breaks.
- Base layer: Wool or synthetic shirt; long sleeves help with bugs and brush.
- Midlayer: Fleece or light insulated jacket.
- Shell: Wind or rain shell matched to the forecast.
- Bottoms: Hiking pants or tights; avoid loose hems that snag.
- Socks: Wool or synthetic, with a dry spare pair in your pack.
- Footwear: Trail shoes or boots with grip you trust on wet roots and loose rock.
- Visibility: Reflective detail, bright colors, or a clip-on light if your route touches roads.
Use trekking poles if the trail is rocky, leafy, icy, or rooty. Poles give you extra contact points when depth perception gets weird. They also help you test mud, puddles, and shallow crossings before committing your weight.
How do you deal with bugs and ticks while night hiking?
Cover skin, use proven repellent, and check yourself after the hike.
Mosquitoes can be worse near water at dusk. Ticks can grab on from grass, brush, and leaf litter any time conditions suit them. Stay in the center of the trail where possible, wear long pants, and treat exposed skin and clothing with care.
The CDC recommends EPA-registered insect repellents and says clothing and gear can be treated with products containing 0.5% permethrin. Follow label directions, keep permethrin off skin, and let treated gear dry fully before wearing it. See the CDC’s tick bite prevention guidance for current recommendations.
After the hike, do a full tick check with good lighting. Showering and changing clothes make the check easier. Toss hiking clothes into a contained laundry bag until you can handle them properly.
What should you do if something goes wrong on a night hike?
Stop early, get warm, and make a clear plan before moving again.
Small problems multiply after dark because stress burns attention. A blister changes your stride. A missed junction drains time. A dying headlamp pushes you to rush. Rushing causes falls. Break that chain.
Use the STOP method:
- Stop. Do not keep walking while confused, cold, hurt, or angry.
- Think. Name the problem: lost, late, injured, cold, storm, dead light.
- Observe. Check map, weather, group condition, battery, water, and nearest safe exit.
- Plan. Decide: return, shelter, call for help, or continue only if the risk is controlled.
If someone is injured, keep them warm and off wet ground. Use a whistle or light signal if you need to attract attention. If you call 911, give the trail name, nearest trailhead, coordinates if available, injury details, clothing colors, group size, and your phone battery level.
When to see a doctor
Get medical help fast for severe symptoms, worsening symptoms, or any injury that blocks safe walking.
Night hiking can expose you to cold, heat, dehydration, falls, bites, stings, and allergic reactions. Do not diagnose yourself on the trail. Treat the situation as urgent if someone has confusion, fainting, chest pain, trouble breathing, severe bleeding, signs of stroke, a head injury with worsening symptoms, or a suspected fracture.
For cold-related illness, the Wilderness Medical Society publishes clinical guidance on accidental hypothermia and other wilderness conditions; their clinical practice guideline summaries are a useful reference for wilderness medical topics. On the trail, your job is simpler: stop exposure, add insulation, protect the person from wind and wet ground, and seek emergency help when symptoms are serious or do not improve.
After a tick bite, watch for rash, fever, chills, headache, muscle aches, joint pain, or swollen lymph nodes in the days and weeks that follow. Contact a healthcare professional if symptoms develop or if you are unsure how to remove a tick safely.
Related reading
- Hiking Photography: Better Photos With Your Phone
- Why Night Hiking Is Worth Trying
- Top Tips for Hiking Safely: Trail Safety That Actually Prevents Incidents
- Best Fitness Tips for Hiking Preparation: An 8-Week Plan That Works
FAQ
Is it better to hike at night with a flashlight or headlamp?
A headlamp is better for most night hiking because it keeps both hands free. Carry a small flashlight as your backup light, not your only light.
Should you use red light when hiking at night?
Yes, use red light for close tasks and breaks when you want to preserve night vision. Use white light on rough terrain, at junctions, near hazards, or whenever you need clearer depth and detail.
Is it safe to night hike alone?
Solo night hiking can be safe on familiar, low-risk trails with a strong plan. Keep the route short, tell someone your check-in time, carry backup light and navigation, and skip solo night hikes in severe weather or remote terrain.
What is the best time to start a night hike?
Start 30–60 minutes before sunset for your first few night hikes. You get enough daylight to settle into the trail, then your eyes adjust gradually as darkness comes in.
How far should a beginner night hike be?
Start with 2–4 miles [3.2–6.4 km] on a trail you already know. That distance gives you the feel of hiking after dark without turning the night into an endurance test.
Can you hike during a full moon without a headlamp?
No, carry a headlamp even on a bright full-moon night. Moonlight can vanish under trees, clouds, canyon walls, or fog, and you still need reliable light for emergencies, maps, and rough footing.