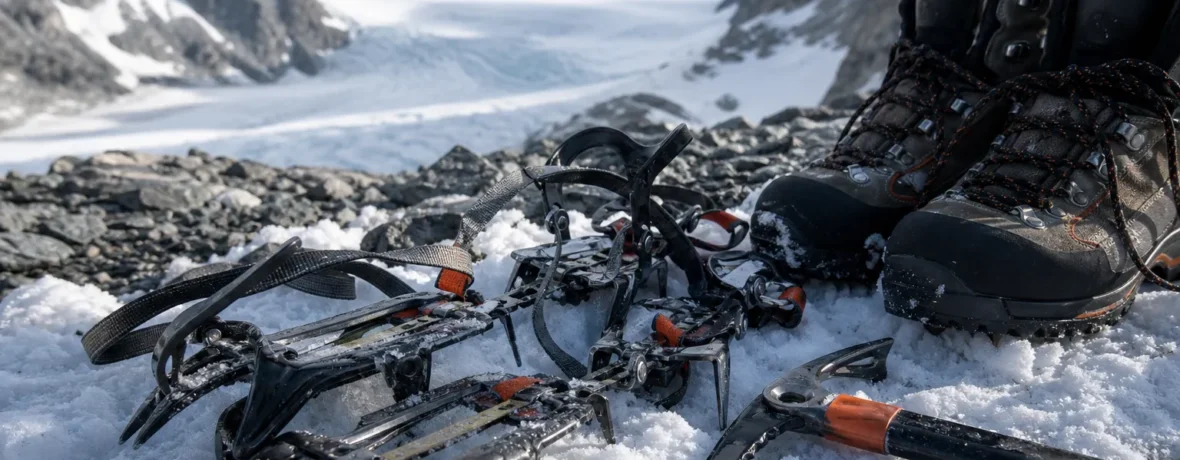
What are crampons? Crampons are metal traction devices that strap or clip onto boots, using 10 to 12 sharp points to bite into hard snow and ice. Hikers need them when slopes are steep, icy, exposed, or too firm for microspikes to grip safely.
If your winter hike stays on a packed, rolling trail, you may never need full crampons. If the trail turns into a frozen ramp, a wind-scoured ridge, or a hard snowfield where a slip could become a slide, they move from “extra gear” to “bring them or turn around.”
What are crampons used for in hiking?
Crampons are used to give your boots secure grip on hard snow, ice, and firm alpine terrain.
Think of them as teeth for your boots. A real crampon has a rigid or semi-rigid frame, metal points underfoot, and front points that help on steeper snow or ice. Those points penetrate surfaces that rubber soles smear across. That matters when you are crossing a frozen slope, climbing a couloir, or descending a trail that has thawed, refrozen, and turned into boilerplate.
The National Park Service winter hiking guidance recommends over-the-shoe traction devices for walking on ice and snow. For many hikes, that means light traction. For steeper, harder, higher-consequence terrain, it means crampons paired with the skill to use them.
Crampons do not make bad footing harmless. They add bite, not judgment. If the runout below you ends in rocks, trees, cliffs, or a long uncontrolled slide, traction alone is not a full safety system. You may also need an ice axe, helmet, avalanche education, and the sense to bail.
When do hikers need crampons instead of microspikes?
Hikers need crampons instead of microspikes when the snow or ice is hard, steep, exposed, or too slick for short spikes to hold.
Microspikes are excellent for packed trails, icy parking lots, frozen forest paths, and moderate grades. They are light, flexible, fast to put on, and easy to walk in. But most microspikes have short points connected by chains or plates. They grip well on low-angle ice and crust. They do not give the same penetration, edge hold, or front-pointing ability as mountaineering crampons.
Use this quick comparison:
| Traction | Best for | Not ideal for |
|---|---|---|
| Microspikes | Packed trails, low-angle ice, frozen dirt, rolling winter hikes | Steep snow, hard alpine ice, exposed traverses |
| Hiking crampons | Firm snow, moderate slopes, winter mountain trails | Vertical ice, mixed climbing, very flexible shoes |
| Mountaineering crampons | Steep snow, glaciers, couloirs, alpine routes | Casual icy sidewalks, bare rock-heavy trails |
| Snowshoes | Deep unconsolidated snow where you sink past the boot | Hard ice, steep firm slopes without crampon-style traction |
The Appalachian Mountain Club’s winter traction primer makes the same practical split: snowshoes help you float, microspikes help on packed icy trails, and crampons dig into snow and ice when you need maximum traction underfoot.
How do crampons attach to hiking boots?
Crampons attach with straps, step-in bails, hybrid bindings, or flexible linking bars, depending on your boot.
Boot compatibility matters more than brand loyalty. A crampon that wiggles, twists, or pops off is not “close enough.” It is wrong for that boot.
- Strap-on crampons: Work with many stiff hiking and mountaineering boots. Best choice for most hikers who do not own technical boots with welts.
- Hybrid crampons: Use a heel lever and a front strap or basket. They need a boot with a rear welt.
- Step-in crampons: Use front and rear bails. They need rigid mountaineering boots with front and rear welts.
- Flexible trail crampons: Fit some winter hiking boots and bend more than alpine models, but they are still sharper and more aggressive than microspikes.
Soft trail runners and flexible day-hiking shoes are a poor match for most full crampons. The shoe can bend while the metal frame does not, which can loosen the fit and fatigue your feet. Manufacturers such as Petzl separate crampon models by activity and boot interface for this exact reason.
How do you choose the right crampon for hiking?
Choose crampons by matching the terrain, snow surface, boot stiffness, and binding system.
Do not start with the most aggressive pair on the wall. Start with the hike. A rolling winter trail in the Northeast is not the same as a spring climb on Mount Shasta. A frozen approach trail is not the same as a glacier route. Buy for your real terrain, not your fantasy calendar.
Use these steps:
- Name the surface. Packed trail, hard ice, firm snow, crust, glacier, or mixed rock and snow?
- Check the slope angle. Low-angle trails usually favor microspikes. Steeper firm snow points toward crampons.
- Look at the consequence of a fall. If a slip becomes a long slide, treat the terrain as serious.
- Match your boots. Bring your boots when fitting crampons, or test the exact setup at home before any trip.
- Choose steel for durability. Steel points handle rock, ice, and mixed winter trails better than lighter aluminum.
- Practice before the trailhead. Adjust the length, strap them tight, walk in them, and learn how they feel.
Aluminum crampons save weight on ski mountaineering and snow travel, but they wear quickly on rock. Steel is heavier, yet it is the safer default for hikers who may hit frozen dirt, talus, roots, and mixed surfaces on the same route.
How do you walk in crampons without tripping?
Walk in crampons with a wider stance, flat feet, and deliberate steps.
Those sharp points are useful until they snag your pants, gaiters, laces, or the opposite boot. Most beginner crampon stumbles happen because the hiker walks normally, with feet close together and ankles brushing past each other. That is fine on dirt. It is sloppy with spikes.
- Keep your feet a few inches wider than normal.
- Place each foot flat so the points engage evenly.
- Shorten your stride on steep or awkward ground.
- Face uphill and kick steps only when the snow is firm enough to hold them.
- Turn around carefully; do not pivot fast on planted points.
- Use gaiters or snug pants to reduce snagging.
- Stop and clear snow buildup under the frames before it turns into a slick platform.
On moderate slopes, French technique—flat-footing with all points contacting the snow—is often the most efficient. On steeper terrain, front points may come into play, but that crosses into mountaineering skill. If you need to front-point for long sections, you should also know how to use an ice axe and self-arrest.
What should hikers carry with crampons?
Hikers should carry the gear that matches the risk of the icy terrain, not just the traction device.
Crampons are one tool. The full kit changes with route, season, remoteness, and avalanche conditions. For winter mountain travel, your checklist may include:
- Stiff waterproof boots that fit your crampons
- Warm socks and spare socks
- Gaiters to keep snow out and protect pants
- Ice axe for steep snow where a slide is possible
- Helmet for gullies, icefall, or rockfall zones
- Map, compass, GPS, and a backup power source
- Headlamp, even for day hikes
- Insulated layers, shell, gloves, and spare gloves
- Emergency shelter or bivy
- Repair kit with straps or cord for field fixes
REI’s crampon guidance is useful for understanding frame types, materials, and binding styles, especially if you are sorting out the difference between general mountaineering and more technical snow or ice travel.
Are crampons dangerous for beginners?
Crampons can be risky for beginners when the terrain is steep, exposed, or beyond their footwork skills.
The danger is not that crampons are complicated. The danger is that they can lure you farther onto terrain where falling is unacceptable. They also add sharp metal to your feet. A careless step can tear pants, cut gaiters, or trip you hard.
Start on low-angle snow where a fall has no serious consequence. Practice putting them on with gloves. Walk uphill, downhill, and across a slope. Learn how your points bite and how much pressure they need. Then build slowly.
If your route mentions glaciers, avalanche terrain, crevasses, exposed ridgelines, or mandatory ice axe use, get instruction before going. The American Alpine Club accident reports regularly show how wrong traction choices and winter terrain misjudgment can turn a hike into a rescue.
Related reading
- How to Use a Compass for Hiking
- How to Waterproof a Tent: Seams, Rainfly and Floor
- How to Choose a Sleeping Bag: Temperature Ratings, Fill and Shape
- What Is Merino Wool and Why Hikers Swear By It
FAQ
Do I need crampons for regular winter hiking?
No, not for most regular winter hiking on packed, low-angle trails. Microspikes are usually the better tool for icy trail walking, while crampons belong on harder, steeper, more consequential snow and ice.
Can I use crampons with hiking boots?
Yes, if the crampons are compatible with your boots. Strap-on models fit more hiking boots than step-in models, but the boots still need enough stiffness to hold the crampons securely.
Are microspikes the same as crampons?
No. Microspikes use short spikes or chains for traction on packed trails, while crampons use longer, sharper points and a stronger frame for firm snow, ice, and steeper terrain.
Should I buy steel or aluminum crampons?
Buy steel crampons for most hiking and mixed winter terrain. Aluminum is lighter, but steel lasts longer and handles rock, frozen dirt, and rough trail transitions better.
When should I turn around even if I have crampons?
Turn around when a fall would have serious consequences and you do not have the skills or tools to stop it. Also turn around if the crampons do not fit securely, the snow is balling badly underfoot, avalanche danger is present, or weather is closing in.