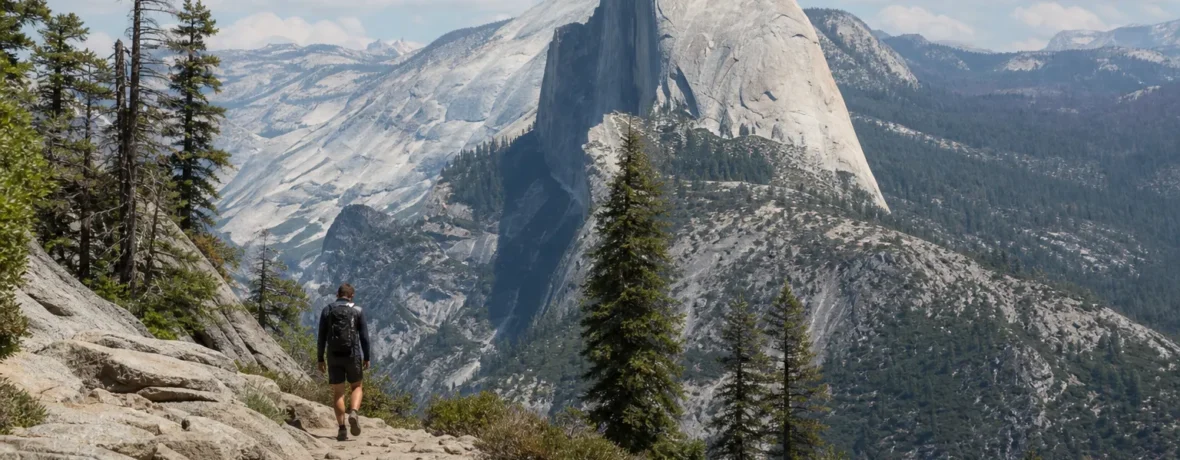
Here’s how to train for Half Dome: build to a 14- to 16-mile [22.5-25.7 km] hike with 4,800 feet [1,463 m] of gain, plus 2 strength sessions and 1 stair or hill workout weekly. Start 12 weeks out if you already hike; start 16-20 weeks out if you’re new.
How hard is the Half Dome hike?
Half Dome is very hard, even for fit hikers.
The standard day hike starts from Happy Isles in Yosemite Valley and climbs to a summit that sits 8,800 feet [2,682 m] above sea level. The National Park Service lists the Half Dome day hike at 14 to 16 miles [22.5-25.7 km] round trip with 4,800 feet [1,463 m] of elevation gain, depending on your route. The final section includes steep subdome steps and the famous cable route, where two metal cables help hikers climb the last 400 feet [122 m] to the summit. See the official NPS Half Dome day hike page for current trail details.
That combination matters. Distance wears you down. Climbing burns your legs. Descending hammers your knees. The altitude can make a normal pace feel rude. Then the cables ask for calm hands, strong calves, and enough upper-body endurance to move deliberately while tired.
Your training should prepare you for the whole day, not just the summit photo.
| Half Dome demand | What it feels like | Training target |
|---|---|---|
| 14-16 miles [22.5-25.7 km] | Long hours on feet | Build weekly long hikes to 10-12 miles [16-19.3 km] |
| 4,800 feet [1,463 m] gain | Relentless climbing | Do hills, stairs, step-ups, and loaded climbs |
| Steep descent | Quad and knee fatigue | Train downhill control and eccentric leg strength |
| Cables | Grip, balance, exposure | Practice grip, calves, core, and calm movement |
How to train for Half Dome in 12 weeks?
Train for Half Dome by combining long hikes, climbing workouts, strength training, and recovery for 12 steady weeks.
If you already hike 5 to 7 miles [8-11.3 km] without drama, a 12-week plan works well. If you are starting from the couch, give yourself 16 to 20 weeks. Do not fake this with one heroic weekend. Half Dome rewards boring consistency.
- Weeks 1-3: Build your base. Hike 4-6 miles [6.4-9.7 km] once a week. Add 2 shorter cardio sessions, 2 strength sessions, and one hill or stair workout. Keep the effort controlled.
- Weeks 4-6: Add climbing. Move your long hike to 7-9 miles [11.3-14.5 km]. Add 1,500-2,500 feet [457-762 m] of gain when terrain allows. Start carrying the pack you will use in Yosemite.
- Weeks 7-9: Get specific. Hike 9-12 miles [14.5-19.3 km] with long climbs. Practice eating every 60-90 minutes. Use trekking poles if you plan to use them on the trail.
- Week 10: Peak. Do your hardest training hike: 10-12 miles [16-19.3 km] with 3,000-4,000 feet [914-1,219 m] of gain, or the closest terrain you can find.
- Week 11: Taper. Cut volume by 30-40 percent. Keep short hills and light strength, but skip big fatigue.
- Week 12: Stay sharp. Do short walks, easy mobility, and one light stair session. Sleep. Pack early. Stop trying to get fitter in the final days.
Use effort as your governor. Most training should feel like you can talk in full sentences. A few hill intervals can feel spicy. None should wreck your week.
What workouts best prepare your legs for Half Dome?
The best Half Dome leg workouts are step-ups, lunges, squats, calf raises, and downhill hiking.
You need climbing strength and braking strength. Most hikers train the up and forget the down. Bad move. The descent from Half Dome is long, and tired quads can turn every step into a negotiation.
Do this strength session twice a week, leaving at least one easy day between sessions:
- Step-ups: 3 sets of 8-12 reps per leg
- Reverse lunges: 3 sets of 8-10 reps per leg
- Goblet squats or bodyweight squats: 3 sets of 8-12 reps
- Single-leg Romanian deadlifts: 2-3 sets of 8 reps per leg
- Standing calf raises: 3 sets of 12-20 reps
- Side planks: 2-3 holds per side
Start with bodyweight. Add weight only when your form stays clean. A backpack with water bottles works fine. You do not need fancy equipment. You need patient legs.
For downhill training, find a trail, stairs, stadium steps, or a steep paved path. Walk down slowly and quietly. No stomping. No flopping. Your goal is control.
How much cardio do you need for Half Dome?
You need enough cardio to hike uphill for hours without redlining.
A good weekly target is 3 aerobic sessions plus your long hike. The CDC’s adult physical activity guidance lists 150 minutes of moderate-intensity activity and 2 days of muscle-strengthening activity per week as a baseline for adults. Half Dome usually demands more than the baseline, but that guidance is a solid floor.
Build your week like this:
- 1 long hike
- 1 hill or stair workout
- 1 moderate cardio session, 30-60 minutes
- 1 easy cardio session, 30-45 minutes
- 2 strength sessions
- 1 full rest day
Good cardio choices include brisk walking, hiking, cycling, jogging, rowing, stair climbing, and incline treadmill work. If you live somewhere flat, use stairs, parking garages, treadmill incline, step-ups, and loaded walks. Flatland hikers can still train well. They just need to be more deliberate.
How do you train for the Half Dome cables?
Train for the cables with grip work, calf endurance, upper-back strength, balance, and exposure control.
The cables are not a gym climb, but they are physical. You pull, brace, step, wait, breathe, and repeat. Crowds can slow movement. Gloves help your hands, but they do not replace preparation. As of November 2026, Recreation.gov recommends protective gloves for the cables and reminds hikers not to leave gloves or trash at the base; check the current Half Dome permit page on Recreation.gov before your trip.
Add this 1-2 times a week after strength or cardio:
- Farmer carries: 3 rounds of 30-60 seconds
- Dead hangs from a bar: 3 short holds, stopping before form breaks
- Incline push-ups: 2-3 sets of 8-12 reps
- Band rows or dumbbell rows: 3 sets of 10-12 reps
- Calf raises: 3 sets of 15-20 reps
- Balance practice: single-leg stands, 30-45 seconds per side
Also train your head. If exposure makes you freeze, practice on safe local trails with heights, open slabs, lookout platforms, or steep staircases. Do not surprise yourself on the cables. Fear is easier to manage when it is familiar.
What should your longest training hike be?
Your longest training hike should be 10-12 miles [16-19.3 km] with 3,000-4,000 feet [914-1,219 m] of gain if you can find it.
You do not need to complete a full Half Dome simulation before Yosemite. You do need to prove that your feet, stomach, knees, shoulders, and pacing can handle a long mountain day.
Use your peak hike to test everything:
- Trail shoes or boots
- Socks and blister prevention
- Pack fit
- Water capacity
- Electrolyte plan
- Snacks and lunch
- Trekking poles
- Sun protection
- Rain layer
- Headlamp
Do not wear brand-new shoes on Half Dome. Do not test a new breakfast at 4 a.m. in Yosemite Valley. Do not discover that your pack rubs after mile 9. Training is where you make the mistakes cheaply.
What pace should you train for on Half Dome?
Train for steady movement, not speed.
Many hikers need a full day for Half Dome. The NPS suggests starting around sunrise or earlier and setting a firm turnaround time, such as turning around if you have not reached the summit by 3:30 p.m. The same NPS page also tells hikers to carry a real flashlight or headlamp with extra batteries, not just a phone light.
Your training pace should feel sustainable. Practice this simple rhythm on climbs:
- Short steps
- Quiet breathing
- No sprinting past strangers
- Micro-breaks before you crack
- Food before hunger gets sharp
- Water before thirst gets loud
Use the “all-day pace” test. If you cannot imagine holding the pace for 6 more hours, slow down. Half Dome is not impressed by your first 3 miles [4.8 km]. It judges the last 3.
What should you eat and drink while training for Half Dome?
Practice eating and drinking during every long hike.
Your stomach is part of your training plan. On long outings, eat small amounts early and often. Choose foods you can chew while tired: bars, tortillas, nut butter, jerky, trail mix, chews, dried fruit, salty snacks, or whatever your stomach accepts.
For fluids, train with the water capacity you expect to carry. Yosemite can be hot, and the climb is exposed in places. The CDC’s heat and health guidance describes heat illness warning signs such as dizziness, heavy sweating, headache, nausea, weakness, confusion, and loss of consciousness. Treat heat seriously during training and on the hike.
Do not rely on thirst alone during hard climbs in heat. Also do not force huge amounts of plain water without salts and food. A practical trail routine is simple: sip regularly, eat on a schedule, include salty food or electrolytes, and adjust for temperature, sweat rate, and effort.
What gear should you use during Half Dome training?
Train with the gear you will carry on the actual hike.
Your pack should not feel like a stranger on summit day. Load it during training with water, layers, food, first aid, headlamp, and rain gear. Work up gradually if the weight feels awkward.
- Broken-in trail shoes or hiking boots with good traction
- Moisture-wicking socks
- Comfortable day pack
- Water storage with enough capacity for a long, hot day
- Food you have already tested
- Rain shell
- Warm layer
- Sun hat, sunglasses, and sunscreen
- Headlamp plus extra batteries
- Map and compass or offline navigation
- Light first-aid and blister kit
- Gloves for the cables
- Trekking poles, if you like them for long descents
Use training hikes to refine, not collect. If something rubs, slips, squeaks, leaks, or annoys you after 2 hours, it will become a villain after 10.
Do you need a permit to hike Half Dome?
Yes, you need a permit to ascend the subdome steps or Half Dome cables when the cables are up.
As of November 2026, Yosemite requires Half Dome permits seven days per week when the cables are up. The NPS says the cables are normally up from the Friday before Memorial Day through the day after the second Monday in October, with exact dates dependent on conditions. Day-use permits are distributed by lottery through Recreation.gov: a preseason lottery in March and daily lotteries during the hiking season. The NPS also lists a maximum of 300 hikers per day beyond the base of the subdome. Check the official NPS Half Dome permits page before making plans.
As of November 2026, Recreation.gov lists a $10 non-refundable application fee per lottery application and a $10 recreation fee per awarded hiker. Permit rules and fees can change, so confirm details on Recreation.gov before you apply.
When to see a doctor
See a doctor before training if you have heart, lung, metabolic, balance, joint, or chronic medical concerns, or if hard exercise is new for you.
Half Dome training adds long cardio, loaded hiking, steep descents, heat exposure, and elevation. If you get chest pain, fainting, unusual shortness of breath, severe dizziness, new irregular heartbeat sensations, or symptoms that feel out of proportion, stop training and get medical guidance. This article cannot diagnose you.
Altitude can also affect hikers. Half Dome’s summit is high enough that some people may feel headache, nausea, unusual fatigue, dizziness, or poor sleep after fast ascent. The Wilderness Medical Society acute altitude illness guidelines cover prevention and treatment for altitude illness; talk with a clinician if you have a history of altitude problems or complex health conditions.
What are the biggest Half Dome training mistakes?
The biggest mistake is training only for mileage and ignoring elevation.
A flat 14-mile [22.5 km] walk is not the same as Half Dome. Useful training must include climbing, descending, pack weight, heat practice, and long time on feet.
- Starting too late: Give yourself enough weeks to build without panic.
- Skipping strength: Strong legs protect your knees on the descent.
- Training without a pack: Your shoulders, hips, and back need practice.
- Ignoring feet: Hot spots become blisters. Fix them early.
- Going too hard every workout: Fatigue is not fitness. Recovery builds the engine.
- Not practicing food: A bad stomach can end a good hike.
- Trusting phone light only: Carry a headlamp with extra batteries.
- Forcing the cables in bad weather: The NPS warns against attempting the cables when rock or cables are wet or storm clouds are in the area.
Related reading
- Half Dome Hike: Length, Time, Permits and Cables
- Half Dome Permit Lottery: Dates and Odds
- How to Train for a Long-Distance Hike
- How to Train for High-Altitude Hiking at Sea Level
FAQ
Can a beginner train for Half Dome?
Yes, a beginner can train for Half Dome, but 16-20 weeks is smarter than 12. Start with consistent walking, then add hills, stairs, strength, and longer hikes once your joints tolerate the workload.
How many days a week should I train for Half Dome?
Train 4-5 days per week, including one long hike, one hill or stair workout, two strength sessions, and one easy cardio day. Keep at least one full rest day so your body can adapt.
Do I need to lift weights for Half Dome?
No, but strength training helps a lot. Bodyweight step-ups, lunges, squats, calf raises, rows, and core work can prepare your legs and trunk without a gym.
How do I train for Half Dome if I live somewhere flat?
Use stairs, bridges, parking garages, treadmill incline, weighted step-ups, and repeated hill laps if you can find even a small slope. Flat walking builds endurance, but you still need climbing-specific work.
Should I use trekking poles on Half Dome?
Use trekking poles if they help your knees and balance during long descents. Train with them before Yosemite, and stow them securely before the cable section.
What if I am scared of the Half Dome cables?
Respect that fear and train for it. Practice on safe exposed trails, steep stairs, and grippy rock where a fall would not be serious; if you feel unsafe on summit day, turning around is the right call.