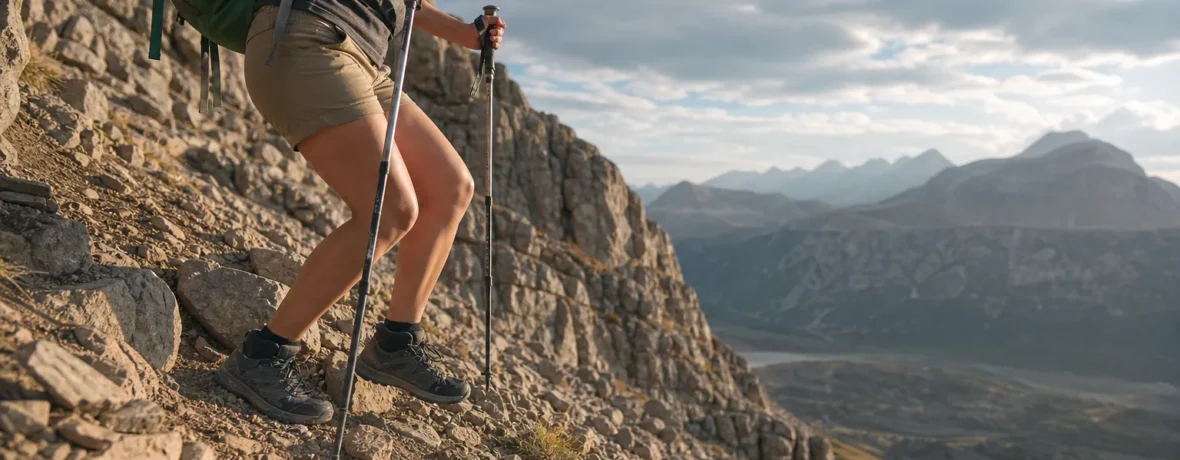
How to train for downhill hiking: build eccentric leg strength 2 days per week, practice controlled descents 1 day per week, add balance work, and increase downhill time by no more than 10% weekly. Yes, you can reduce knee strain—if you train before the trip and descend with short, steady steps.
Why does downhill hiking hurt your knees?
Downhill hiking hurts because your legs are braking your body on every step.
Going uphill feels like work. Going downhill feels like impact. Your quadriceps lengthen while under load, which is called eccentric contraction. That braking action controls your speed, keeps you from pitching forward, and asks your knees to absorb repeated force for thousands of steps.
Add a loaded pack, loose gravel, tired hips, long strides, and a steep trail, and your knees get cranky fast. A Wilderness & Environmental Medicine review specifically points to high knee loads during downhill hiking and recommends caution with pack weight and trekking poles for certain hikers with joint concerns.
The fix is not to “toughen up” your knees. Knees do not love being bullied. The fix is to train the muscles around them—quads, glutes, hamstrings, calves, feet, and core—so your whole lower body shares the work.
How to train for downhill hiking in 8 weeks?
Train downhill hiking with strength, balance, and specific descent practice.
If your trip has long descents, stair climbers and flat walks are not enough. They help your engine, but they do not fully prepare your legs for braking downhill with a pack. You need controlled lowering, single-leg work, and real trail practice.
Use this 8-week structure if you can already walk 3 miles [4.8 km] comfortably on rolling terrain. If that feels like too much right now, spend 2-3 weeks building easy walking first.
| Weeks | Strength focus | Downhill practice | Goal |
|---|---|---|---|
| 1-2 | Bodyweight squats, step-downs, glute bridges | 10-15 minutes on gentle grade | Learn control without soreness spikes |
| 3-4 | Add split squats, calf raises, light pack | 20-30 minutes, short steps | Build braking strength |
| 5-6 | Add weighted step-downs and lateral work | 30-45 minutes on steeper trail | Handle uneven ground |
| 7-8 | Maintain strength, reduce heavy lifting before trip | One hike close to trip conditions | Arrive strong, not trashed |
Keep at least 1 rest day between hard leg sessions. The CDC adult activity guidelines recommend 2 days of muscle-strengthening activity each week, which lines up well with downhill hiking prep.
What are the best exercises for downhill hiking?
The best exercises are controlled step-downs, split squats, squats, calf raises, and hip-strength moves.
Downhill hiking is mostly single-leg work. One foot lands, one knee bends, one hip stabilizes, one ankle adjusts. Train that pattern. Slow reps matter more than heroic weight.
- Step-downs: Stand on a 6-8 inch [15-20 cm] step. Lower one heel toward the floor in 3 seconds, tap lightly, then stand back up. Do 2-3 sets of 6-10 reps per side.
- Split squats: Take a staggered stance and lower straight down. Keep your front knee tracking over your second or third toe. Do 2-3 sets of 8-12 reps per side.
- Goblet squats: Hold a dumbbell or loaded pack at your chest. Sit down and back, then drive up through your feet. Do 2-3 sets of 8-12 reps.
- Single-leg Romanian deadlifts: Hinge at the hip while one leg reaches behind you. Keep your hips square. Do 2 sets of 6-8 reps per side.
- Standing calf raises: Rise onto your toes, pause, and lower slowly. Do 2-3 sets of 12-20 reps.
- Lateral band walks: Put a resistance band above your knees or around your ankles. Step sideways with control. Do 2 sets of 10-15 steps each direction.
Use a weight that lets you finish each set with clean form. The CDC explains that strengthening work should feel hard near the end of a set, often in the 8-12 repetition range for one set or more. For hikers, 2-3 sets usually gives better trail carryover.
How do you hike downhill without knee pain?
Use shorter steps, slow your pace, and keep your knees slightly bent.
The biggest downhill mistake is overstriding. A long step lands your heel far in front of your body and turns your leg into a brake pedal. That slams force up the chain. Shorter steps keep your center of mass over your feet and let your muscles—not your joints—do more of the work.
- Take quick, short steps instead of long lunges.
- Keep your knees soft, not locked.
- Lean slightly forward from the ankles, not from the waist.
- Place your whole foot when the trail allows, instead of stabbing the heel.
- Use switchbacks instead of cutting straight down.
- Step sideways for very steep, loose sections.
- Stop for 60-90 seconds before your legs turn shaky.
- Tighten your pack so it does not swing with every step.
Do not chase speed on descents. Fast downhill hiking can feel efficient for 10 minutes, then ruin the next 3 miles [4.8 km]. Smooth is better. Quiet feet are better. If your shoes are slapping the ground, slow down.
Do trekking poles help knees on downhill hikes?
Yes, trekking poles can help by sharing load with your arms and improving balance.
Poles are most useful on long descents, loose tread, creek crossings, and trails with high steps. They give you two extra points of contact and help you control momentum before your knee has to catch it.
For downhill travel, lengthen poles slightly from your flat-ground setting. Plant both poles just ahead of you, step between them, then repeat. On rocky trails, plant lightly. Do not jam the pole tip so hard that it gets stuck and yanks your shoulder.
Poles are not magic. If you take giant downhill strides, carry too much weight, and skip strength training, poles will not save the day. Use them as part of the system.
How should you practice downhill hiking if you live somewhere flat?
Use stairs, ramps, stadium steps, bridges, and gym equipment.
No mountains nearby? Fine. You can still train the braking pattern. The key is the lowering phase. Step down slowly. Control the knee. Repeat without rushing.
- Stairs: Walk down 4-8 flights with short steps, then ride the elevator up if available to focus on descending.
- Parking garages: Walk down ramps with a light pack and steady cadence.
- Stadium steps: Use the lower rows first. Big steps can overload your knees too soon.
- Treadmill decline: If your treadmill has a decline setting, start with 5-10 minutes.
- Step-down workouts: These are your best substitute for steep trail time.
Start small. A 20-minute stair descent workout can create more next-day soreness than a 5-mile [8 km] flat walk. Your quads may complain loudly after the first few sessions. That does not mean you failed. It means you found the missing piece.
How much pack weight should you use in training?
Start with no pack, then add weight only after your knees tolerate downhill work.
A pack changes everything. It increases braking demand, shifts your balance, and punishes sloppy footwork. Train unloaded first for 2 weeks, especially if you have had knee irritation before.
Then add weight gradually:
- Week 1-2: no pack or an empty daypack.
- Week 3-4: 5-10 lb [2.3-4.5 kg].
- Week 5-6: 10-20 lb [4.5-9.1 kg], if pain-free.
- Week 7-8: use the pack weight you expect for your hike, but only on one key practice day per week.
If knee pain climbs during a descent, reduce load before you blame your shoes, poles, or age. Weight is simple. Less of it usually helps.
What should you do after downhill training?
Recover with easy walking, light mobility, food, water, and sleep.
Downhill training can cause delayed muscle soreness, especially in the quads. That soreness often shows up 24-48 hours later. Plan for it. Do not stack hard downhill work on back-to-back days.
- Walk easily for 5-10 minutes after training.
- Stretch calves, hip flexors, hamstrings, and quads gently.
- Eat a meal with protein and carbohydrates within a few hours.
- Drink enough water that your urine is pale yellow.
- Sleep 7-9 hours when possible.
- Take an easier day if stairs hurt the next morning.
Training is not the workout. Training is the workout plus recovery. Skip the recovery and you are just collecting fatigue.
What are common downhill hiking training mistakes?
The common mistakes are doing too much too soon and ignoring technique.
Most hikers do not get into trouble because they are lazy. They get into trouble because they cram. One big mountain day cannot replace weeks of preparation.
- Only training uphill: Uphill fitness does not fully prepare your knees for downhill braking.
- Running downhill for conditioning: It adds impact quickly. Walk first. Earn speed later.
- Skipping hip work: Weak hips let the knee collapse inward under fatigue.
- Using long strides: Long steps magnify braking force.
- Adding pack weight too early: Load should follow control, not replace it.
- Training through sharp pain: Muscle burn is normal. Sharp joint pain is a stop sign.
When to see a doctor
See a doctor if knee pain is severe, sudden, swollen, unstable, or does not improve with rest.
Training advice is not a diagnosis. Knee pain can come from overuse, tendon irritation, arthritis, ligament injury, meniscus injury, bursitis, infection, or other causes. If your symptoms are more than normal post-hike soreness, get medical help.
The NIH MedlinePlus knee pain guide says to contact a health care provider if you cannot bear weight, have severe pain, have marked swelling, cannot move the knee, or still have pain after 3 days of home treatment. The Mayo Clinic knee pain guide also flags swelling, deformity, fever, and inability to fully extend the knee as reasons to seek care.
If you have had knee surgery, a total knee replacement, repeated dislocations, or a diagnosed joint condition, talk with a clinician or physical therapist before training for steep descents with a pack.
Related reading
- How to Train for a Long-Distance Hike
- How to Train for High-Altitude Hiking at Sea Level
- How to Train for Backpacking With a Loaded Pack
- How to Train for Kilimanjaro
FAQ
How long does it take to train for downhill hiking?
Most hikers need 6-8 weeks to feel a real difference. If you already hike weekly and strength train, 4 weeks may be enough; if you are starting from flat walks, give yourself 10-12 weeks.
Are squats enough for downhill hiking?
No, squats help but they are not enough by themselves. Add step-downs, split squats, calf raises, hip stability work, and actual downhill practice.
Should your knees go over your toes when hiking downhill?
Yes, your knees can move over your toes when descending. The goal is control: keep the knee tracking in line with your foot, avoid collapsing inward, and use short steps.
Is it better to go downhill fast or slow?
Slow is better for knee control on steep or rough trails. A steady pace with short steps reduces hard braking and helps you avoid slips when your legs get tired.
Can trekking poles prevent knee pain?
Trekking poles can reduce strain and improve balance, but they cannot guarantee pain-free knees. They work best when paired with strength training, lighter pack weight, and good downhill technique.
What should I do if my knees hurt during a downhill hike?
Stop, shorten your stride, use poles if you have them, and reduce pack load if possible. If pain is sharp, swelling appears, the knee feels unstable, or you cannot bear weight, end the hike safely and seek medical care.