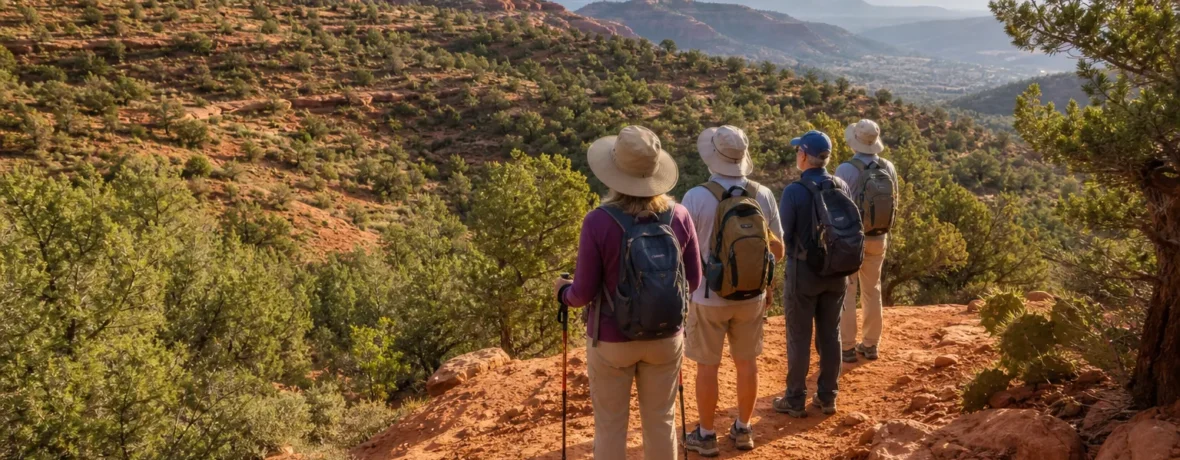
To plan a Sedona hiking trip for beginners, give yourself 3 days, hike early, keep each main trail between 1 and 5 miles [1.6 and 8 km], and use shuttles or fee-ready trailheads. Pick easy red rock routes first, save steeper classics for later, and build in recovery time.
Sedona can feel like a greatest-hits album on shuffle: sandstone towers, juniper flats, slickrock ledges, blue sky, traffic, tiny parking lots, and trail junctions that seem to appear every 90 seconds. That mix is exactly why a plan helps. You do not need to be an athlete. You do need to be honest about heat, crowds, water, footwear, and your own pace.
This guide gives you a clean 3-day beginner itinerary for Sedona hiking, with short routes, scenic payoffs, safer timing, and easy swaps if the weather or parking scene gets weird.
What is the best 3-day Sedona hiking itinerary for beginners?
The best beginner plan is an easy arrival hike on Day 1, a signature red rock hike on Day 2, and a flexible shorter hike on Day 3.
That structure works because Sedona hiking feels different from walking in a city park. The sun hits hard. Trail signs can be spaced out. Smooth-looking sandstone can still be steep. And even short trails feel bigger when you are staring at cliffs instead of streetlights.
| Day | Main hike | Why it works for beginners | Plan B |
|---|---|---|---|
| Day 1 | Bell Rock Pathway or Courthouse Butte area | Open views, gentle terrain, easy turnaround options | Sedona View Trail |
| Day 2 | Little Horse Trail to Chicken Point area | Big scenery without committing to a hard climb | Fay Canyon |
| Day 3 | Airport Mesa area or a mellow West Sedona loop | Shorter, flexible, good before driving home | Crescent Moon area |
Use this as a framework, not a dare. If you wake up sore, cut mileage. If the day gets hot, stop early. If a trailhead is packed, do not circle for 45 minutes while your good hiking window disappears. Move to the next option.
How do you plan a Sedona hiking trip for beginners without overdoing it?
Plan one real hike per day, then add only short walks, viewpoints, or town time.
The beginner mistake is stacking three famous hikes into one day because they look close on a map. In Sedona, “close” can still mean slow traffic, full lots, exposed trail, and a sun-baked climb back to the car. Your goal is not to collect trail names. Your goal is to finish each day feeling good enough to hike tomorrow.
- Choose your base area. Stay in Sedona, West Sedona, Village of Oak Creek, or nearby Cottonwood depending on budget and availability.
- Pick one main hike per day. Keep the main hike beginner-friendly, then add scenic stops if you still have energy.
- Start early. Morning gives you cooler temps, better light, and a better shot at parking.
- Check official alerts. Before you go, check the Coconino National Forest website for current notices, fire restrictions, and road or trail information.
- Know your shuttle options. The Sedona Shuttle trailhead routes serve several high-demand trailheads, including Cathedral Rock, Little Horse, Soldier Pass, Dry Creek Vista, and Mescal, as of November 2026.
- Bring more water than you think. Dry air hides sweat. You can get depleted before you feel soaked.
- Turn around early. A turnaround is not a failure. It is how smart hikers get tacos afterward.
For parking on many Red Rock Ranger District sites, the Forest Service says a Red Rock Pass or Federal Recreation Lands Pass is needed when leaving a vehicle at fee sites; check the official Red Rock Recreation Guide for current pass coverage and purchase options, as of November 2026.
What should you hike on Day 1 in Sedona?
Start with Bell Rock Pathway or the Courthouse Butte area because the views come fast and the route is easy to shorten.
Day 1 is not the day to prove anything. You may be coming off a flight, a long drive, or a late check-in. Pick a trail that gives you red rock drama without a complicated route. The Bell Rock and Courthouse Butte area is ideal for this: wide-open sightlines, iconic formations, and plenty of natural stopping points.
The Forest Service lists Bell Rock Pathway at 3.7 miles [6.0 km] with 50 feet [15 m] of elevation change, and Courthouse Butte at 3.6 miles [5.8 km] with 250 feet [76 m] of elevation change in its Red Rock trail table. For a beginner arrival day, you do not need to hike every foot. Walk out, enjoy the views, turn around while you still feel fresh.
Day 1 sample schedule
- Morning or late afternoon: Bell Rock Pathway out-and-back, 1 to 3 miles [1.6 to 4.8 km].
- Midday: Lunch, water refill, check into lodging.
- Evening: Sunset viewpoint or a short town walk.
If you arrive during hot weather, shift the hike toward early morning or the last cooler stretch before sunset. Do not start a sun-exposed hike late in the morning just because the mileage looks small.
What should you hike on Day 2 if you want classic red rock views?
Hike Little Horse Trail toward Chicken Point for big Sedona scenery with a manageable out-and-back format.
Day 2 is your main hiking day. You have slept, sorted your gear, and learned how the light and traffic feel. Little Horse Trail is a strong beginner-friendly choice because you can control the distance. The Forest Service trail table lists Little Horse at 1.5 miles [2.4 km] with 300 feet [91 m] of elevation change. Many hikers combine it with nearby connections, but beginners should keep it simple: out, views, snack, back.
Use the shuttle when it fits your schedule. As of November 2026, Sedona Shuttle lists Little Horse among the trailheads served by its fixed trailhead routes, with no reservations needed for those fixed routes. Always check the current schedule before you build your morning around it.
Day 2 sample schedule
- Start early. Eat breakfast before you leave and carry a real snack.
- Ride the shuttle or park legally. Do not create your own parking spot on road shoulders or vegetation.
- Hike Little Horse as an out-and-back. Turn around before fatigue sets in.
- Take a long midday break. This is prime time for lunch, shade, and cold drinks.
- Add only an easy evening walk. Keep it optional.
If Little Horse is too busy or the shuttle timing does not work, Fay Canyon is a good alternate style of hike: canyon walls, less exposed feeling, and a straightforward out-and-back rhythm. Still bring water. Shade is not guaranteed when you want it.
What should you hike on Day 3 before leaving Sedona?
Choose a shorter hike on Day 3 so you can enjoy the morning without rushing your drive or checkout.
Day 3 is where many beginners accidentally make the trip harder than it needs to be. You are packing, checking out, watching the clock, and maybe facing a long drive. This is not the moment for a big unknown route.
Try the Airport Mesa area if you want close-to-town views and a flexible outing. The Forest Service trail table lists Airport Loop at 3.3 miles [5.3 km] with 200 feet [61 m] of elevation change. Beginners can hike a portion instead of the full loop. Shorter is fine. The views still count.
Day 3 sample schedule
- Early morning: Airport Mesa area walk or another short West Sedona trail.
- Late morning: Breakfast, coffee, pack up.
- Before leaving: Refill bottles and check traffic.
If your legs are tired, make Day 3 a scenic recovery morning. Visit a viewpoint, walk a flat path, or sit somewhere with red rock views and let the trip breathe a little.
What are the easiest Sedona hikes for first-time visitors?
The easiest beginner hikes are short, well-used routes with modest elevation gain and clear turnaround options.
Look for trails that let you bail out gracefully. Out-and-back trails are often better than loops for beginners because you can decide exactly when half your energy is gone. Open terrain also helps with orientation, though you should still carry a map.
| Trail or area | Best for | Beginner tip |
|---|---|---|
| Bell Rock Pathway | First Sedona views | Do a partial out-and-back instead of chasing every spur. |
| Courthouse Butte area | Longer easy scenery | Skip the full loop if heat or fatigue builds. |
| Little Horse Trail | Classic red rock formations | Use shuttle access when available. |
| Airport Mesa area | Quick views near town | Expect rocks underfoot even on short walks. |
Beginner does not mean boring here. Sedona’s easy trails still punch way above their weight. The trick is avoiding routes that require scrambling, exposed ledges, steep slickrock, or complicated junctions until you know how the terrain feels.
Do you need permits, passes, or shuttle tickets for Sedona hiking?
You often need a parking pass at Red Rock Ranger District fee sites, but many hikes do not require a separate hiking permit.
As of November 2026, the Forest Service states that if you leave your vehicle while recreating at one of its fee sites, you must display a Red Rock Pass or a Federal Recreation Lands Pass. The same Forest Service guide says Red Rock Passes can be purchased at fee-site vending machines, at the Red Rock Ranger District Visitor Center, and online through Recreation.gov, with online passes tied to your license plate.
The shuttle is different from a trail permit. As of November 2026, the Sedona Shuttle says no reservations are needed for its fixed trailhead routes, and it serves several busy trailheads where parking can be restricted when the shuttle is running. Check the Sedona Shuttle how-to-ride page before your trip because schedules and service days can change.
State parks, concession-managed areas, and special sites can have their own rules. Do not assume one pass covers everything. Read the sign at the trailhead or check the official site before you go.
What should beginners pack for Sedona hiking?
Pack for sun, dry air, rocky footing, and route-finding.
Sedona trails are not remote wilderness on every route, but they can still punish casual preparation. Flip-flops are a bad idea. One tiny bottle of water is a bad idea. A phone with no downloaded map is asking for confusion.
- Water: Carry more than you expect to drink, especially in warm months.
- Electrolytes or salty snacks: Useful when you are sweating in dry heat.
- Sun protection: Wide-brim hat, sunglasses, sunscreen, and light long sleeves.
- Footwear: Hiking shoes or trail runners with good grip.
- Map: Download offline maps before leaving Wi-Fi or cell service.
- Small first-aid kit: Blister care, bandages, and personal medications.
- Layers: Desert mornings can feel cool, then heat can build quickly.
- Headlamp: Bring one even if you plan to finish before sunset.
- Trash bag: Pack out peels, wrappers, tissues, and dog waste bags.
Bring patience too. The popular trailheads are popular for a reason. If your first-choice lot is full, move on. The red rocks are not going anywhere.
When is the best time of year for beginner hiking in Sedona?
Spring and fall are the most comfortable seasons for many beginner hikers.
Summer can be brutally hot on exposed sandstone and open desert trails. Winter can be lovely, but cold mornings, icy patches at higher or shaded spots, and shorter daylight can change the feel of a hike. Spring and fall usually give beginners a better balance: more forgiving temperatures, good daylight, and plenty of trail options.
That said, these are also busy seasons. Book lodging early, start hikes early, and use shuttle routes where they make sense. If you visit during a holiday or school break, build more flexibility into your plan.
How do beginners stay safe on Sedona trails?
Start early, stay found, carry water, and turn back before you feel cooked.
The most common beginner problems are simple ones: heat, dehydration, wrong turns, slipping on rock, and pushing too far. Sedona makes people excited. Excited hikers walk past good turnaround points.
- Tell someone your trail plan and when you expect to be back.
- Stay on signed trails and durable rock surfaces.
- Do not climb higher on slickrock unless you know you can safely descend.
- Watch for mountain bikes on shared-use trails.
- Give wildlife space.
- Skip narrow or exposed routes if heights make you freeze.
- Check weather before hiking washes or canyon routes.
For heat, use plain language with yourself: if you feel dizzy, weak, nauseated, confused, chilled despite heat, or you stop sweating while still hot, stop hiking and get help. The CDC heat illness guidance describes heat stroke as a medical emergency and lists confusion, altered mental status, slurred speech, loss of consciousness, and seizures among danger signs.
When to see a doctor
Get medical help right away for severe heat symptoms, chest pain, trouble breathing, fainting, major injury, or symptoms that do not improve with rest and cooling.
Do not try to diagnose yourself on the trail. Stop, move to shade if you can do so safely, cool down, and contact emergency services if symptoms are serious. Heat stroke is an emergency; the CDC says to call 911 for emergency medical care when heat stroke is suspected.
You should also seek medical care after a hike if you have persistent vomiting, worsening headache, confusion, severe weakness, signs of infection in a cut, a suspected fracture, or a blister or wound that makes normal walking difficult. If you have heart disease, diabetes, kidney disease, are pregnant, or take medications that affect heat tolerance, ask a clinician before planning hot-weather hikes.
What mistakes should beginners avoid in Sedona?
The biggest mistake is treating Sedona’s short trails like they are automatically easy.
A 2-mile [3.2 km] hike can feel demanding when it is sunny, rocky, crowded, and unfamiliar. Respect the terrain and your trip gets better fast.
- Starting too late: Midday heat can turn a fun hike into a slog.
- Chasing social media routes: Some famous hikes are steep, exposed, or crowded.
- Ignoring shuttle rules: Parking restrictions can apply when shuttles are running.
- Underpacking water: Dry air fools people.
- Wearing smooth-soled shoes: Sandstone and loose gravel need traction.
- Skipping offline maps: Cell service is not a plan.
- Doing too much on Day 1: Save your legs for the full day.
Can you hike Sedona without a car?
Yes, you can hike some popular Sedona trailheads without a car if your lodging and shuttle timing line up.
The Sedona Shuttle helps reduce parking stress at several high-use trailheads. It is most useful when you plan around its service days, route times, and park-and-ride locations. If you stay far from those connections, a car or rideshare may still be needed for early starts and flexible meals.
If you do have a car, use it thoughtfully. Park only in legal spaces, display any required pass at fee sites, and never block gates, roads, driveways, or emergency access. A bad parking decision can get expensive and can also damage the access hikers depend on.
How should you adjust this 3-day plan for heat, crowds, or sore legs?
Cut distance first, then change trailheads, then switch to viewpoints if needed.
A beginner-friendly Sedona trip should have escape hatches. The plan is not fragile if you build it correctly.
- If it is hot: Hike at sunrise, choose shorter routes, avoid exposed midday trails, and stop early.
- If trailheads are full: Use the shuttle, pick a less famous route, or come back later.
- If your legs are sore: Swap a loop for an out-and-back and turn around sooner.
- If wind or storms roll in: Avoid exposed ridges, slickrock climbs, and washes.
- If someone in your group is nervous: Choose wide, low-angle trails with easy exits.
The best Sedona hiking plan is the one you can actually enjoy. Leave space for slow mornings, long lunches, and staring at the rocks without checking your watch every five minutes.
Related reading
- How to Plan a Camping Trip
- How to Plan a Hiking Trip Step by Step
- How to Prepare for a Hiking Trip: Gear, Body and Route
- How to Plan a Hiking Route With Elevation Changes: A Practical Guide
FAQ
How many days do beginners need for Sedona hiking?
Three days is enough for a strong beginner trip. You can do one easy arrival hike, one bigger scenic hike, and one shorter final-day hike without cramming your schedule.
Is Sedona hiking hard for beginners?
Sedona can be beginner-friendly if you choose short routes and start early. It gets hard when you pick steep social-media hikes, underestimate heat, or try to do too many trails in one day.
Do I need hiking boots for Sedona?
You do not need heavy boots for most beginner trails, but you do need good traction. Trail runners or light hiking shoes usually work well on rocky paths, loose gravel, and sandstone.
What is the easiest scenic hike in Sedona?
Bell Rock Pathway is one of the easiest scenic choices for first-time visitors. You get classic red rock views quickly, and you can turn around whenever you want.
Can beginners hike Cathedral Rock?
Many beginners should skip Cathedral Rock as a first Sedona hike. It is short but steep, with slickrock sections that can feel exposed; try easier trails first and save it for later if your group is confident.
What is the best month to hike in Sedona?
March, April, October, and November are often good months for beginner hiking because temperatures are usually more comfortable than summer. These months can also be busy, so book lodging early and plan morning hikes.