To plan a hiking trip, pick a trail that matches your fitness, check permits and closures, estimate time at 2 mph [3.2 km/h] plus 30 minutes per 1,000 feet [305 m] gained, pack the 10 essentials, share your plan, and set a firm turnaround time before you start.
How do you plan a hiking trip step by step?
Start with the trail, then build the day around distance, elevation, weather, gear, and safety. A good plan is not complicated. It is specific enough that you know where you are going, when you should be back, and what you will do if the original idea falls apart.
- Choose the trip style. Decide on a day hike, overnight, basecamp weekend, peak hike, desert walk, forest loop, or point-to-point route. This choice controls nearly everything else: pack weight, footwear, food, transportation, permits, and risk.
- Pick a trail that fits the slowest hiker. Use mileage, elevation gain, trail surface, exposure, heat, altitude, and water availability. A flat 8-mile [12.9 km] path is not the same as 8 miles with 3,000 feet [914 m] of gain.
- Check official trail information. Look for closures, fire restrictions, washed-out bridges, snow, road access, shuttle rules, parking limits, and permit requirements. The National Park Service hiking safety guide says to check park alerts and current conditions before you go.
- Estimate your hiking time. Use 2 mph [3.2 km/h] as a starting pace on moderate terrain, then add 30 minutes for every 1,000 feet [305 m] of elevation gain. Add more time for kids, snow, river crossings, scrambling, heavy packs, photos, and long snack breaks.
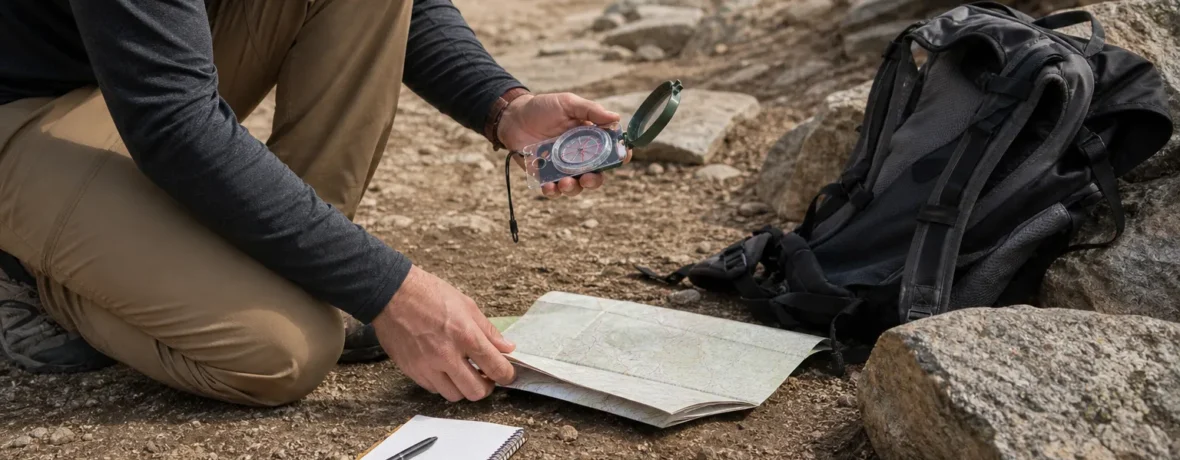
- Study the map before the trailhead. Find the start, junctions, bail-out points, water sources, steep climbs, exposed ridges, campsites, and the halfway point. Download an offline map and carry a paper map or printed route backup.
- Check the forecast at the trail elevation. A town forecast can be useless if the trailhead sits 3,000 feet [914 m] higher. Look at temperature, wind, lightning risk, snow level, heat alerts, and overnight lows if you are staying out.
- Build your gear list. Pack for the expected day and the ugly version of that day. Rain, darkness, blisters, cold wind, a wrong turn, and a dead phone are normal outdoor problems, not dramatic exceptions.
- Plan food and water. Bring enough calories to keep moving and enough water capacity for the driest stretch. If you plan to refill, carry a filter, purifier, or chemical treatment and know where water usually flows.
- Tell someone your plan. Share the trail name, trailhead, route, group names, vehicle description, start time, expected finish time, and the time they should call for help if you have not checked in.
- Set a turnaround time. Pick the time before you start. If you are not at the summit, lake, overlook, or halfway mark by then, turn around. The trail will still be there next time.
How do you choose the right hiking trail?
Choose a trail by matching distance and elevation to your current legs, not your optimism. The best route is the one your group can finish with daylight, energy, and a margin for mistakes.
For beginners, start with 3 to 6 miles [4.8 to 9.7 km] and less than 1,000 feet [305 m] of elevation gain. If you already walk, run, bike, or climb regularly, you can stretch that, but do not stack every challenge on the same day. Long mileage, high heat, altitude, snow, and a heavy pack should not all debut together.
| Trail factor | Easy day | Harder day | What to check |
|---|---|---|---|
| Distance | 3-6 miles [4.8-9.7 km] | 8+ miles [12.9+ km] | Total mileage, not just one-way distance |
| Elevation gain | Under 1,000 feet [305 m] | 2,000+ feet [610+ m] | Climb per mile and high point elevation |
| Route type | Loop or out-and-back | Point-to-point | Shuttle, parking, road walks, exit options |
| Terrain | Maintained trail | Talus, snow, sand, exposure | Footing, route finding, traction needs |
Read recent trip reports, but do not treat them as official. Conditions shift fast after storms, fires, freeze-thaw cycles, and heavy holiday use. Use reports for color; use the land manager for decisions.
Do you need permits, reservations, or passes before hiking?
Sometimes yes, and you must check before you drive. As of November 2026, permits, timed-entry reservations, campsite reservations, quotas, fees, and closures vary by trail, season, agency, and activity.
Day hikes may need a parking pass, entrance pass, timed-entry slot, trail permit, shuttle ticket, or nothing at all. Overnight trips often add wilderness permits, campsite reservations, bear-canister rules, group-size limits, fire restrictions, and food-storage requirements. The official place to start for many federal reservations is Recreation.gov’s backpacking trip planning guidance, but some state parks, tribal lands, local preserves, and private lands use separate systems.
Check these before you commit:
- Trailhead parking rules and overnight parking limits
- Entrance passes or timed-entry reservations
- Day-use permits for popular trails
- Wilderness permits for overnight routes
- Campfire bans and stove rules
- Bear canister or food-hanging requirements
- Dog rules, leash rules, and seasonal wildlife closures
- Road closures, shuttle schedules, and gate hours
If the official page says the trail is closed, it is closed. Do not rely on a social post, an old blog, or a map app that still shows the line.
What should you pack for a hiking trip?
Pack the 10 essentials first, then add trip-specific layers, food, water, and comfort items. The goal is not to carry your garage; the goal is to solve the most likely problems without turning your pack into punishment.
The National Park Service 10 essentials list covers navigation, sun protection, insulation, illumination, first aid, fire, repair items, food, water, and emergency shelter. For a normal day hike, that can fit in a small daypack. For a cold, remote, or exposed hike, it grows.
- Map, compass, GPS app, and offline route
- Headlamp with spare power
- Sun hat, sunglasses, and sunscreen
- Rain shell or wind shell
- Warm layer, gloves, and beanie in cool seasons
- First-aid kit with blister care
- Knife or small multi-tool and repair tape
- Lighter, waterproof matches, or fire starter where fires are allowed
- Extra food beyond lunch
- Water bottles or reservoir plus treatment if refilling
- Emergency blanket, bivy, or small shelter
- Personal medications and emergency contact information
Wear shoes that already work for your feet. Brand-new boots on a long hike are a blister invitation. For rocky trails, use supportive trail shoes or boots with real tread. For wet trails, bring dry socks. For desert trails, bring more sun coverage than you think you need.
How much food and water should you bring on a hike?
Bring enough water for the full dry stretch and food you will actually eat while moving. A simple plan beats a fancy menu that stays buried in your pack.
For day hikes, pack snacks that tolerate heat, cold, and crushing: bars, trail mix, jerky, tortillas, nut butter, cheese, dried fruit, crackers, and salty chips. On hard climbs, many hikers do better with small bites every 60 to 90 minutes instead of one huge lunch.
Water planning depends on heat, effort, body size, altitude, shade, and refill options. Do not assume every blue line on a map has water. Seasonal creeks dry up. Filters clog. Springs get buried under snow. In freezing weather, bottles can ice over; carry one upside down and keep a small bottle inside your jacket if needed.
For any refill plan, know your treatment method before the trip. A squeeze filter, pump filter, UV purifier, or chemical treatment can all work when used correctly. If your route crosses livestock areas, desert potholes, or silty glacial streams, plan for slower treatment and backup capacity.
How to plan a backpacking trip differently from a day hike?
Backpacking adds sleep, heavier gear, overnight weather, food storage, human waste rules, and a wider safety margin. The route may look simple on a map, but carrying 25 to 40 pounds [11.3 to 18.1 kg] changes your pace fast.
For your first overnight, keep it short. A 3 to 5 mile [4.8 to 8 km] hike to camp gives you time to fix mistakes before dark. You can learn how your tent pitches, how your stove behaves, how cold you get at night, and how your shoulders handle weight without being 15 miles [24.1 km] from the car.
Backpacking planning needs a second checklist:
- Tent, tarp, bivy, or hammock system allowed for the area
- Sleeping bag or quilt rated for expected low temperatures
- Sleeping pad with suitable insulation
- Stove, fuel, lighter, and cook pot if cooking
- Bear canister, bear bag, or approved food-storage method
- Water treatment and enough capacity for dry camps
- Toilet kit that follows local rules
- Camp shoes or dry socks if useful
- Extra layers for sitting still after sunset
- Permit, campsite reservation, or itinerary printout when required
Do not plan backpacking mileage like day-hiking mileage. A 10-mile [16.1 km] day with a light pack might feel lively. The same distance with a loaded pack, a late start, and 2,500 feet [762 m] of gain can feel like a forced march.
How do you plan for weather, daylight, and trail conditions?
Plan around the worst credible conditions, not the prettiest forecast. Weather decides pace, gear, risk, and sometimes the whole trip.
Check sunrise and sunset, then build a daylight budget. If sunset is 6:15 p.m., do not plan to finish at 6:10 p.m. Give yourself at least 1 hour of cushion on easy trails and more on remote or complex routes. Start earlier than feels necessary. Late starts create rushed decisions.
Look for these condition triggers:
- Thunderstorms: avoid exposed ridges, summits, and open plateaus when storms are possible.
- Heat: start before sunrise, shorten the route, carry extra water, and avoid long unshaded climbs.
- Snow and ice: check whether microspikes, snowshoes, or an ice axe are needed; skip terrain that exceeds your skills.
- High water: do not assume a creek crossing will be safe in spring runoff or after heavy rain.
- Smoke and fire: check current closures and air quality; have a different trail ready.
- Wind: exposed passes, fire lookouts, and alpine ridges can become miserable or unsafe.
Always build a Plan B that is easier, lower, shorter, or closer to the trailhead. That is not failure. That is clean planning.
How do you stay safe on a hiking trip?
Stay found, stay warm or cool enough, stay fueled, and speak up early when something feels wrong. Most trail problems get worse when people stay quiet and keep pushing.
Before you leave, put your phone in airplane mode to save battery, but keep GPS available. Carry a headlamp even for short hikes. Bring a small power bank on long days. If you hike where cell service is absent, consider a satellite messenger or personal locator beacon, especially for solo trips.
On the trail, manage the group. Keep the slowest person in the decision-making loop. Stop at signed junctions and confirm the route. If someone is getting chilled, overheated, dizzy, unusually tired, or quiet in a bad way, stop and reassess.
Use wildlife sense too. Store food properly. Give animals space. Never feed wildlife. In bear country, follow the local agency’s food-storage and encounter guidance, because black bear, grizzly, and campground rules differ by place.
When to see a doctor
Get medical help when symptoms are severe, worsening, unusual, or tied to altitude, heat, injury, or a tick bite. Trail planning is not medical care, and you should not try to tough out red-flag symptoms.
After a tick bite, the CDC tick guidance says to see a doctor if a rash or fever develops within several days to weeks. Also get care for spreading redness, flu-like symptoms, severe headache, joint pain, or if you feel seriously ill after hiking in tick habitat.
For altitude trips, the CDC high-altitude travel guidance advises people with heart or lung disease to talk with a doctor before high-elevation travel. At altitude, seek urgent help and descend safely if someone has confusion, trouble walking, severe breathing trouble, chest symptoms, or symptoms that worsen instead of improving.
For injuries, get care for suspected fractures, deep wounds, loss of sensation, head injury symptoms, severe allergic reactions, heat illness signs, or pain that prevents normal walking. When in doubt, end the hike early.
Related reading
- How to Plan a Camping Trip
- Sedona Hiking for Beginners: A 3-Day Plan
- How to Prepare for a Hiking Trip: Gear, Body and Route
- How to Plan a Hiking Route With Elevation Changes: A Practical Guide
FAQ
How far should a beginner hike on the first trip?
Start with 3 to 6 miles [4.8 to 9.7 km] on a marked trail with modest elevation gain. Pick a route where you can turn around easily and still finish before dark.
How early should you start planning a hike?
For a local day hike, start 2 to 7 days ahead so you can check weather, conditions, and gear. For popular parks, permit areas, or overnight routes, start months ahead because reservations can disappear quickly.
What is the most common planning mistake?
The biggest mistake is choosing a route by mileage alone. Elevation gain, heat, altitude, trail surface, pack weight, and daylight matter just as much as distance.
Should you hike alone?
Solo hiking can be reasonable on familiar, well-marked trails if you are prepared and leave a detailed plan. For remote routes, winter conditions, off-trail travel, or your first major hike, go with a partner or group.
What should you do if the trail is harder than expected?
Turn around before you are exhausted. Eat, drink, add or remove layers, check the map, and choose the safest known route back rather than pressing toward the original goal.
Do you need a paper map if you have a phone?
Yes, carry a backup for longer or remote hikes. Phones break, batteries die, rain gets in, and cold weather drains power faster than you expect.