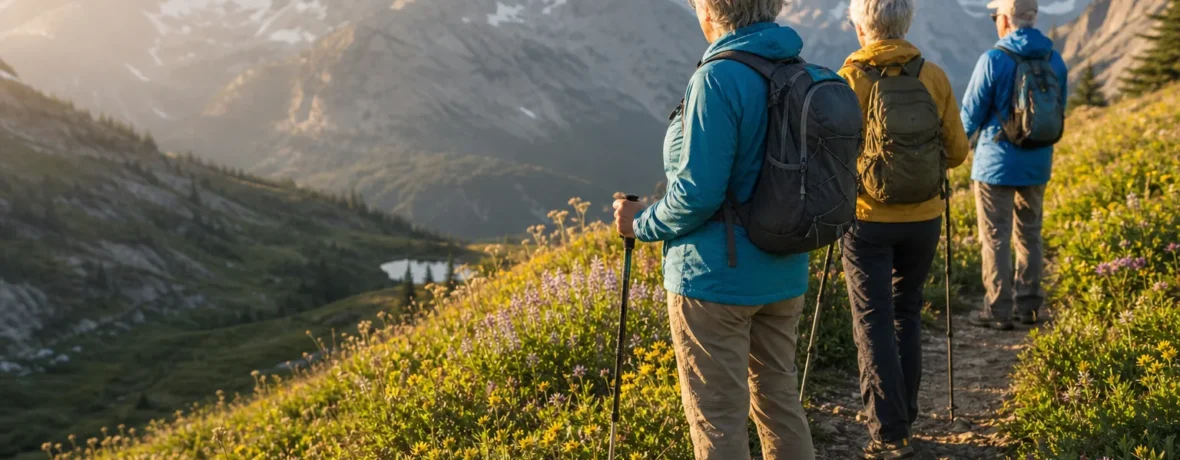
Hiking for seniors is safe and smart when you choose moderate trails, build up gradually, carry the right gear, and respect health limits. Start with 1 to 3 miles [1.6 to 4.8 km], keep elevation gain gentle, use trekking poles if balance is shaky, and stop for chest pain, dizziness, or unusual shortness of breath.
You do not need to chase big summits to be a hiker. You need steady legs, good judgment, and a plan that matches the body you have today. That body may have cranky knees, a replaced hip, a pacemaker, arthritis, hearing aids, or a deep dislike of steep downhill grades. Fine. Trails still have room for you.
The trick is to stop treating age like a red light and start treating it like trail data. It changes your route, pace, pack, and recovery. It does not automatically cancel the hike.
Is hiking for seniors safe?
Yes, hiking is safe for many older adults when the distance, terrain, weather, and pace fit your current health and fitness.
The safest hike is not the famous one. It is the one you can finish with energy left for the drive home, dinner, and the next morning’s stairs. Pick trails with clear footing, reliable cell service or a well-known route, easy bailout options, and no pressure to “push through.”
Federal activity guidance for adults 65 and older includes aerobic activity, muscle-strengthening work, and balance training each week. The CDC’s older adult physical activity guidance lists 150 minutes of moderate-intensity aerobic activity per week, 2 days of muscle-strengthening activity, and balance work. Hiking can help cover the aerobic piece, and uneven trail walking can challenge balance, but it should not be your only training.
Use the talk test. On a moderate hike, you should be able to speak in short sentences. If you can sing, you may be walking easy. If you can only gasp out single words, back off, stop, or turn around.
How should seniors start hiking again after a long break?
Start shorter than your ego wants.
If you have been away from trails for months or years, your first goal is not mileage. It is a clean finish: no fall, no flare-up, no dehydration, no limping through the parking lot. Choose a familiar path or a local park loop before you head into rougher country.
- Walk on flat ground 3 days per week. Begin with 15 to 30 minutes. Keep the pace easy enough that you can talk.
- Add gentle hills. Use sidewalks, park paths, or a treadmill incline before you test rocky trail grades.
- Try a 1-mile [1.6 km] nature trail. Pick packed dirt, boardwalk, or smooth gravel.
- Increase one thing at a time. Add distance, elevation, pack weight, or rougher footing. Not all four in the same week.
- Take a recovery day after trail days. Soreness is normal. Sharp pain, swelling, chest discomfort, or dizziness is not trail toughness.
- Repeat a route before upgrading. If a trail feels good twice, choose a slightly longer or hillier one next.
The National Institute on Aging recommends warming up before exercise and cooling down after. On trail, that can mean 5 to 10 minutes of slow walking at the start and finish. Simple. It works.
What is a good senior hiking pace?
A good pace is the speed you can hold without stumbling, gasping, or needing long emergency rests.
Forget the pace of younger hikers, old hiking partners, and people flying past with tiny packs. Your pace should protect your feet and keep your brain sharp. Most falls happen when attention drops, legs get tired, or the trail gets underestimated.
Use this rhythm on moderate terrain: walk 20 to 30 minutes, then pause for 2 to 5 minutes. Drink, check your feet, adjust layers, and scan the route ahead. On steep climbs, switch to a slower pattern: 10 to 15 minutes walking, 2 to 3 minutes standing or sitting. Short breaks prevent big crashes.
Downhill deserves respect. Descents often bother knees more than climbs because each step adds braking force. Shorten your stride, keep your toes pointed forward, and plant trekking poles before stepping down. If your thighs start shaking, rest. Shaking legs are not a badge. They are a warning.
What are the best trails for senior hiking?
The best trails are well-marked, moderate, and easy to shorten.
A great senior hiking route has steady footing, shade, places to sit, clear signs, and a turnaround point that does not feel like defeat. Loops are fun, but out-and-back trails give you more control. When you turn around, you know exactly what is waiting on the return.
| Trail feature | Best choice | Use caution with |
|---|---|---|
| Surface | Packed dirt, fine gravel, boardwalk | Loose scree, wet roots, angled rock slabs |
| Distance | 1 to 5 miles [1.6 to 8 km] | Routes with no bailout or shortcut |
| Elevation | Gentle rolling terrain | Long, steep descents |
| Navigation | Signed trails with maps at junctions | Faint paths, social trails, confusing intersections |
Before you go, read recent trail reports from the land manager when available. Conditions matter more than trail reputation. A “moderate” trail can turn nasty after rain, snowmelt, wildfire damage, downed trees, or washouts.
What gear do older hikers really need?
You need gear that prevents small problems from becoming trip-ending problems.
Do not overpack out of fear. Do not underpack out of pride. Carry the basics, then tailor the kit to your health, weather, and trail distance.
- Footwear: Shoes or boots with firm heel hold, roomy toe box, and outsoles that grip dirt and rock.
- Trekking poles: Helpful for balance, creek crossings, steep descents, and reducing load on knees.
- Daypack: 12 to 24 liters is enough for most day hikes.
- Water: Carry more in heat, at altitude, and on exposed trails.
- Food: Bring easy snacks you know your stomach handles.
- Layers: A light insulating layer and rain shell can save a cold, wet day.
- Sun protection: Hat, sunglasses, sunscreen, and sun shirt.
- Navigation: Paper map, downloaded offline map, or GPS device. Batteries fail. Screens crack.
- Emergency items: Whistle, headlamp, small first-aid kit, fire starter, and emergency blanket.
- Health items: Personal medications, medical ID, glucose source if directed by your clinician, and a written emergency contact.
Fit matters more than brand. A shoe that rubs in the store will bite harder on mile 3 [km 4.8]. A pack that hangs low will tug on your back all day. Poles set too long can strain shoulders; set them so your elbows bend near 90 degrees on level ground.
How can older hikers build strength for hills and uneven ground?
Train your legs, hips, core, and balance before the trail asks for them.
Hiking strength is practical strength. You need to step over logs, lower yourself down stone steps, recover from a stumble, and climb grades without leaning on your lungs alone. Two short strength sessions per week can make trail days smoother.
Try this simple routine 2 days per week, with rest between sessions:
- Sit-to-stand: Stand from a chair, then sit with control. Builds quads and glutes.
- Step-ups: Use a low step. Hold a railing if needed. Train each leg.
- Calf raises: Rise onto toes, lower slowly. Helps climbing and ankle control.
- Wall push-ups: Strengthen chest, shoulders, and arms for pole use.
- Side steps: Use a hallway or counter. Strengthens hips for lateral stability.
- Single-leg balance: Stand near a counter and lift one foot for 10 to 20 seconds per side.
Keep the movements smooth. Pain is not the goal. Control is the goal. If balance feels risky, use a counter, chair back, railing, or a physical therapist’s guidance.
How do seniors prevent falls while hiking?
Prevent falls by slowing down before tricky sections, using poles, and keeping your eyes on the next few steps.
Most trail falls are not dramatic cliff accidents. They are toe catches, slick roots, rolling gravel, hidden holes, and tired legs. The fix is not fear. The fix is better habits.
- Stop walking when you look at views, wildlife, maps, or your phone.
- Shorten your stride on descents.
- Step flat-footed on loose gravel instead of landing on your heel.
- Unbuckle your hip belt before tricky creek crossings so you can shed the pack if needed.
- Give other hikers room instead of stepping to the crumbly trail edge.
- Replace worn shoe tread before it turns slick.
- Use microspikes only when conditions call for them, and practice before relying on them.
Fatigue makes balance worse. If you start clipping rocks with your toes, wobbling during simple steps, or dragging one foot, stop. Eat, drink, rest, and consider turning around.
How much water and food should seniors carry on a hike?
Carry enough to drink before you feel thirsty and eat before your energy drops.
Thirst can lag behind need, especially in cool weather, dry air, wind, and higher elevations. Sip regularly. A clear bottle makes tracking easier; a hydration bladder makes sipping easier. Choose the system you will actually use.
For food, bring familiar trail snacks with carbohydrates, salt, and protein. Good choices include nut butter sandwiches, trail mix, cheese and crackers, dried fruit, tortillas, bars that do not melt, or whatever sits well in your stomach. If you manage diabetes, kidney disease, heart disease, or another condition with food or fluid limits, follow your clinician’s plan instead of generic hiking advice.
Heat deserves special caution. Older adults can be more vulnerable during hot weather, especially with certain medical conditions or medications. The National Institute on Aging’s outdoor exercise safety tips recommend checking weather, dressing for conditions, and taking steps to stay safe in both heat and cold. The Wilderness Medical Society’s heat illness practice guideline update also supports rest, cooling, and hydration strategies for heat-related problems.
When to see a doctor
See a doctor before harder hiking if you have new symptoms, recent surgery, unstable health conditions, or a history of falls.
This is not asking permission to enjoy dirt paths. It is getting clear limits, warning signs, and a safe plan. A clinician may help you adjust goals, review medications that affect heat or balance, suggest physical therapy, or advise which symptoms mean you should stop.
Talk with a health care professional before increasing trail intensity if you have:
- Chest pain, chest pressure, or pain spreading to jaw, neck, shoulder, or arm
- Unusual shortness of breath
- Dizziness, fainting, or unexplained falls
- A diagnosed heart, lung, kidney, or neurologic condition
- Diabetes with blood sugar swings during activity
- New or worsening joint pain
- Recent surgery, hospitalization, or major illness
- New swelling in legs, ankles, or feet
Stop hiking and seek urgent help for chest pain or tightness, fainting, severe shortness of breath, confusion, or a racing or irregular heartbeat that does not quickly settle. Mayo Clinic gives similar stop-and-seek-care warning signs in its exercise safety guidance for people monitoring blood pressure.
What should seniors do before every hike?
Use the same pre-hike checklist every time.
Good hikers are not lucky. They are boring in the best way. They check the weather, charge the phone, carry layers, tell someone the plan, and turn around before trouble gets loud.
- Check the land manager’s trail page for closures, storm damage, fire restrictions, and seasonal alerts.
- Check hourly weather, not just the daily high.
- Tell someone your trailhead, route, turnaround time, and expected return time.
- Download an offline map before leaving home.
- Pack water, food, layers, headlamp, first aid, and personal health items.
- Start earlier than you think you need to.
- Set a turnaround time before stepping onto the trail.
- Stretch or walk easily for 5 to 10 minutes before climbing hard.
- Check shoe laces and pole locks at the trailhead.
- Leave the summit, waterfall, or viewpoint optional.
That last line matters. Optional goals keep you safe. Mandatory goals get people into bad decisions.
How can seniors hike with more confidence?
Build confidence by making the trail predictable.
Repeat routes. Hike with steady partners. Use poles before you “need” them. Take classes through local outdoor clubs, senior centers, park districts, or land agencies. Choose weekday mornings if crowded weekends make you feel rushed.
Confidence also comes from knowing your personal limits. Maybe you handle distance well but hate steep descents. Maybe heat knocks you flat, but cool-weather hikes feel strong. Maybe rocky trails demand poles and slower mileage. That is not weakness. That is field data.
Keep a simple hiking log with the trail name, distance, elevation gain, weather, footwear, pack weight, and how you felt that night and the next day. Patterns show up fast. Use them.
Related reading
- Best Hiking Boots for Seniors
- A Walk in the Woods: Bill Bryson's AT Story vs Reality
- Kids' Hiking Boots: How to Size and When to Buy
- Mountain Porters: The People Who Carry Expeditions
FAQ
What is the best hiking distance for seniors?
The best distance is the one you can finish with steady footing and energy left. Many returning hikers do well starting with 1 to 3 miles [1.6 to 4.8 km], then increasing only after the same distance feels comfortable twice.
Are trekking poles good for older hikers?
Yes, trekking poles can help with balance, rhythm, and downhill control. They are most useful when adjusted correctly and planted before stepping down or crossing uneven ground.
How often should seniors hike?
One to three trail days per week works well for many older hikers. Mix hiking with strength and balance work so your joints, muscles, and recovery time stay ahead of your plans.
What should older hikers avoid?
Avoid rushing, hiking alone on unfamiliar remote trails, skipping water, ignoring weather, and pushing through chest pain, dizziness, confusion, or unusual breathlessness. Also avoid brand-new shoes on a real hike.
Can seniors hike with arthritis?
Many people with arthritis can hike if the route, footwear, poles, pace, and recovery plan fit their joints. Ask your clinician or physical therapist for personal guidance if pain is new, worsening, or changes how you walk.
What is the safest season for older adults to hike?
The safest season is usually the one with mild temperatures, stable footing, and daylight that matches your route. Spring mud, summer heat, fall hunting seasons, and winter ice can all be managed, but each adds risk that should shape your trail choice.