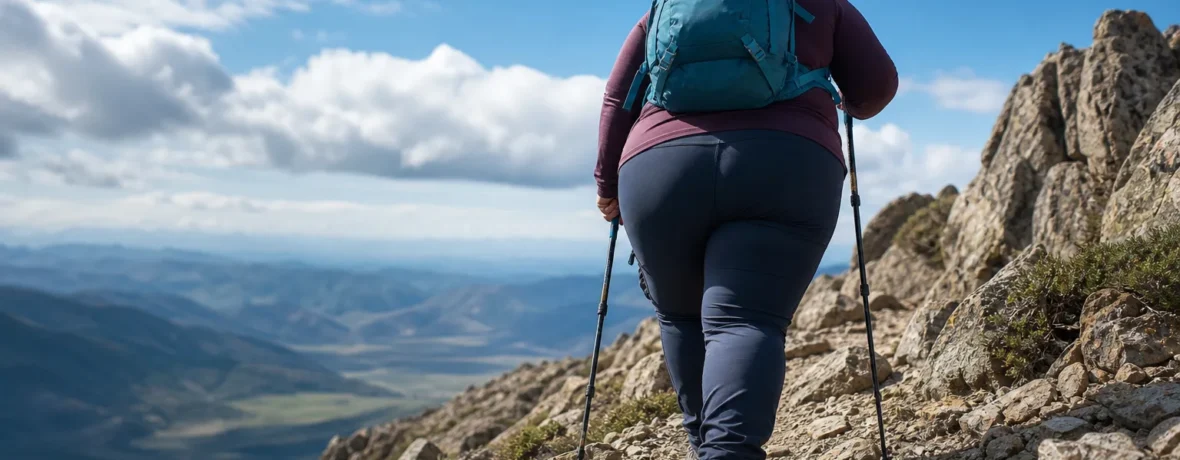
Plus size hiking works best when your gear fits your real body, your pace matches your conditioning, and your route gives you options. Start with 1-3 miles [1.6-4.8 km], use moisture-wicking layers, choose footwear with toe room, carry water, and stop hot spots before they become blisters.
What gear do you need for plus size hiking?
You need gear that fits without squeezing, rubbing, rolling, or forcing you to “make it work.” The right setup is not fancy. It is clothing that moves, shoes that protect your feet, a pack that sits securely, and small comfort items that keep friction from stealing the day.
Start with fit, not brand loyalty. Plus-size hikers often get pushed toward oversized general outdoor gear, but “bigger” is not the same as better. A shirt that flaps and bunches can chafe. Pants that fit your waist but pull across your thighs can restrict your stride. A hip belt that lands on your stomach instead of your iliac crest can turn a two-hour hike into a wrestling match.
| Gear area | Look for | Avoid |
|---|---|---|
| Tops | Moisture-wicking fabric, shoulder room, long enough hem | Cotton tees for sweaty or cold hikes |
| Bottoms | Stretch, gusseted crotch, stay-put waistband | Hard seams on inner thighs |
| Footwear | Wide sizes, toe room, secure heel fit | Boots that need pain to “break in” |
| Pack | Adjustable torso, long hip belt, sternum strap | Short straps, fixed belts, bouncing load |
A day-hiking kit should be simple and repeatable:
- Moisture-wicking base layer
- Stretch hiking pants, shorts, skirt, or leggings
- Supportive sports bra or compression top if you use one
- Wool or synthetic socks
- Trail shoes or hiking boots that match your feet
- Day pack with comfortable straps
- Water and salty snacks
- Sun protection
- Rain shell or insulation when conditions call for it
- Blister care, anti-chafe balm, and any personal medical items
The best gear disappears while you walk. If you keep tugging, adjusting, yanking, folding, or apologizing for your body, the gear has failed. Not you.
How should hiking clothes fit if you are plus size?
Hiking clothes should skim, stretch, and stay put without cutting into your waist, thighs, chest, arms, or belly. You need full steps, easy breathing, and zero fabric saws.
Do the stairs test at home. Put on the full outfit, lace your shoes, load your pack, and walk up and down stairs for five minutes. Then sit, squat, raise your arms, bend forward, and step over a chair or low bench. Any pinch you notice indoors will get louder outside.
For tops, check three zones: shoulders, bust or chest, and hem. Shoulder seams should not pull forward under pack straps. The fabric should not strain across the chest when you inhale deeply. The hem should stay where you want it when you raise your arms. If you use trekking poles, swing your arms for 60 seconds and see what rides up.
For bottoms, inner-thigh seams matter. A flat seam or seamless inner thigh is gold. If your thighs touch, friction is normal; pain is not. Bike-short liners, long boxer briefs, thigh bands, or anti-chafe balm can help. Test them before a long trail day.
Rain gear deserves special attention. Many shells fit smaller than the tag suggests, especially over hips, upper arms, and chest. Your rain jacket should zip over your warm layer and still let you reach forward. Your rain pants should pull on over footwear or at least over socks without a floor routine in a muddy parking lot.
What are the best hiking shoes for plus-size hikers?
The best hiking shoes for plus-size hikers are the ones that match your foot shape, terrain, and support needs without crushing your toes. Cushion helps, but fit comes first.
Look for a thumb’s width of space in front of your longest toe when standing. Your heel should feel secure, not locked in a vise. If your forefoot spreads when you bear weight, try wide or extra-wide sizes instead of sizing up in length. Too-long shoes can trip you on roots and rocks.
Trail runners feel lighter and more flexible. Hiking shoes add structure. Boots can give ankle coverage and more underfoot protection, but they are not automatically safer. A boot that rubs your ankle bone or presses the top of your foot is not doing you favors.
Try footwear late in the day, when feet are more likely to be swollen. Bring the socks you plan to hike in. If you use orthotics, bring those too. Walk down an incline if the store has one; toe bang shows up fast on descents.
Blisters usually come from friction, pressure, moisture, or some blend of the three. The Wilderness Medical Society’s wound-management guidance names proper footwear and a dry foot environment, including wicking socks, as blister-prevention tools in backcountry settings through its practice guideline on basic wound management. Stop at the first hot spot. Tape it, pad it, change socks, or adjust laces. Waiting is how a small rub becomes a limp.
How do you choose a hiking backpack that fits a bigger body?
Choose a backpack by torso length, strap comfort, and hip-belt fit, not by the body type shown in the product photo. A good pack carries weight close to you without digging into your neck, chest, ribs, or belly.
For short hikes, a 10-20 liter day pack is usually enough for water, layers, snacks, and safety items. The exact volume matters less than the harness. Check shoulder straps first. They should curve around your shoulders without cutting into the sides of your neck. The sternum strap should reach across your chest comfortably; many packs have sliding sternum straps, and that little adjustment can make the whole thing feel less annoying.
Hip belts are tricky. Some plus-size hikers love them because they move weight off the shoulders. Others hate the pressure across the stomach or hips. Try both styles: a real padded hip belt and a simple webbing waist strap. If a pack’s belt does not fit, look for belt extenders from the maker or choose a model with a longer belt.
Before you keep a pack, load it with the weight you expect to carry. Walk for 15 minutes. Climb stairs. Twist. Reach for a water bottle. If the pack bounces, slides, or presses on one sharp spot, adjust it. If adjustment does not fix it, send it back.
How do you start hiking when you are out of shape?
Start smaller than your pride wants and build with repeat wins. Your first goal is not a huge summit; it is finishing with enough energy to want another hike.
The CDC’s adult activity guidance recommends 150 minutes of moderate-intensity physical activity each week plus 2 days of muscle-strengthening activity, and hiking can count when the effort is moderate for you; see the CDC adult physical activity guidelines. You do not need to hit that target on day one. Build toward it with short walks, gentle trails, and consistency.
- Pick a short route. Start with 1-3 miles [1.6-4.8 km] on familiar, well-marked terrain.
- Check elevation gain. A flat 3 miles [4.8 km] feels different from 3 miles with 900 feet [274 m] of climbing.
- Use a turnaround time. If you plan to hike for 90 minutes, turn around at 45 minutes even if the viewpoint is “close.”
- Practice your pace. Walk at a speed where you can speak in short sentences.
- Rest before you are wrecked. Short planned breaks beat one desperate collapse on a log.
- Repeat the route. The same trail teaches you pacing, footwear, fueling, and confidence.
- Add one variable at a time. Increase distance, elevation, pack weight, or heat exposure. Not all four.
Strength work helps too. Step-ups, sit-to-stands, calf raises, glute bridges, and light carries all transfer well to hiking. The NIH’s National Institute of Diabetes and Digestive and Kidney Diseases describes aerobic and muscle-strengthening activity as useful parts of adult health routines in its health tips for adults. Keep it boring. Boring works.
How do you handle chafing, sweat, and heat on the trail?
Handle friction early, manage sweat with fabric choices, and treat heat as a real safety factor. Comfort is not vanity on trail. Comfort keeps you moving well.
Chafing often shows up under arms, under the chest, along waistbands, between thighs, under pack straps, and where wet fabric folds. Use anti-chafe balm before you start, not after your skin is angry. Carry a small tube or stick so you can reapply. If one garment rubs every time, retire it from hiking duty.
Sweat is not the enemy. Trapped sweat is the problem. Cotton holds moisture and can feel clammy in cool weather. Wool and synthetic fabrics dry faster and reduce that wet-shirt chill when you stop. In hot weather, loose-but-not-floppy sun hoodies, breathable button-downs, or lightweight tees can all work. Choose what lets you move without cooking.
Heat illness can escalate. The CDC lists heat exhaustion symptoms such as heavy sweating, weakness, dizziness, headache, nausea, and a fast weak pulse, and gives first-aid steps through its heat-related illness guidance. On trail, take heat seriously: stop, get shade, cool down, and do not push through warning signs.
- Start early in hot weather.
- Carry more water than you expect to drink.
- Bring salty snacks if you sweat heavily.
- Wear a brimmed hat or sun hoodie.
- Use shaded routes when possible.
- Take breaks before you feel shaky.
- Turn around if cooling down is not working.
Cold weather brings another sweat problem. If you climb hard in heavy layers, you can soak your base layer, then get chilled on the descent. Start slightly cool, vent early, and add insulation when you stop.
How can plus-size hikers feel more confident on the trail?
Confidence comes from preparation, repetition, and refusing to treat your body as an apology. You belong on the trail before you lose weight, buy perfect gear, or reach anyone else’s pace.
There may be stares. There may be comments. There may also be people who are too busy gasping up the same hill to care what size pants you wear. Build your hiking life around the second group.
Use practical confidence tools:
- Know your route. Save the map offline and read recent trail notes if available.
- Tell someone your plan. Share the trailhead, route, and return window.
- Dress for function. A comfortable outfit beats a “hiker-looking” outfit that hurts.
- Claim rest breaks. Stopping is a skill, not a failure.
- Use trekking poles if they help. They can add stability on descents and stream crossings.
- Hike with kind people. Anyone who mocks your pace does not deserve your Saturday.
Solo hiking can feel freeing, but it is not required. Group hiking can feel supportive, but only with the right group. Look for beginner-friendly, body-neutral, no-drop hikes. “No-drop” means the group does not leave slower hikers behind. Ask the organizer direct questions before you go: What is the distance? What is the elevation gain? What pace do you expect? Are breaks built in?
If the answers are vague or smug, skip it. Trails are full of rocks already. You do not need extra ones in human form.
What should you pack for your first plus-size day hike?
Pack enough to solve common problems without turning your day pack into a punishment. For a short day hike, your kit should cover water, weather, food, navigation, skin, and safety.
- Water in bottles or a hydration reservoir
- Snacks with carbs and salt
- Map, downloaded route, or GPS app
- Small first-aid kit
- Blister pads, tape, or moleskin
- Anti-chafe balm
- Extra socks
- Rain shell or wind layer
- Warm layer for cool starts, summits, or long breaks
- Headlamp or small flashlight
- Sun protection
- Personal medications or medical supplies
- Trash bag or zip bag for wrappers and used supplies
Pack placement matters. Put heavier items close to your back. Keep water, snacks, blister care, and sun protection easy to reach. If you have to unpack everything to get lip balm, you will not use it until your lips are cracked.
For bathroom needs, plan ahead. Some trailheads have restrooms; many do not. A wide-mouth pee funnel, packable bidet, toilet paper, hand sanitizer, and waste bags can make remote stops less stressful. Follow local rules for human waste and pack out hygiene products.
What trail features make hiking more comfortable for bigger bodies?
Comfortable trails have manageable grades, solid footing, clear maps, rest options, and enough room to move at your pace. The prettiest trail is not always the best first trail.
Read trail descriptions with a sharp eye. “Short but steep” means your lungs and knees will notice. “Rock scramble” means hands may be needed. “Narrow ledge” means passing other hikers could feel stressful. “Exposed” means sun, wind, or drop-offs with little shelter.
Good starter trails often have:
- Loop or out-and-back routes under 3 miles [4.8 km]
- Modest elevation gain
- Benches, rocks, logs, or viewpoints where breaks feel natural
- Shade in warm seasons
- Firm tread instead of loose scree
- Cell service or heavy use if you want backup nearby
- Restrooms at the trailhead
- Clear signage at junctions
Do not let mileage fool you. A 2-mile [3.2 km] trail with steep grades, mud, and heat can feel harder than a 5-mile [8 km] rail trail. Look at distance, elevation, surface, weather, and escape options together.
When to see a doctor
See a doctor before increasing hiking intensity if you have symptoms, medical concerns, or a condition that could affect exertion, balance, hydration, circulation, breathing, or heat tolerance. Do not use trail advice as a diagnosis.
Get medical guidance before harder hikes if you have chest pain, fainting, unexplained shortness of breath, dizziness with exertion, recent surgery, pregnancy-related concerns, poorly controlled asthma, diabetes-related foot issues, heart disease, or a history of heat illness. If something feels wrong on trail, stop and make a safer plan.
Seek urgent help for chest pressure, trouble breathing that does not settle with rest, confusion, fainting, signs of heat stroke, severe allergic reaction, severe injury, or symptoms that worsen instead of improving. The CDC heat guidance says heat stroke is a medical emergency and calls for immediate medical care. Take that seriously.
For foot care, talk with a clinician or podiatrist if you have diabetes, numbness, circulation problems, recurring wounds, or blisters that show signs of infection. A “minor” foot issue can become a major trip-ender when you keep walking on it.
Related reading
- A Walk in the Woods: Bill Bryson's AT Story vs Reality
- Kids' Hiking Boots: How to Size and When to Buy
- Mountain Porters: The People Who Carry Expeditions
- Teaching Leave No Trace to Kids
FAQ
Can plus-size people hike safely?
Yes, plus-size people can hike safely with well-fitting gear, realistic pacing, and route choices that match current conditioning. Start with shorter trails, manage heat and friction early, and build distance over time.
What should a plus-size woman wear hiking?
Wear moisture-wicking layers, supportive undergarments, and bottoms that prevent thigh rub without restricting your stride. Leggings, hiking pants, shorts with liners, skorts, and hiking dresses can all work if they stay put and dry reasonably fast.
Are hiking boots better than trail runners for bigger hikers?
Not always. Hiking boots can add structure and protection, while trail runners are lighter and more flexible; the better choice is the one that fits your foot, terrain, and comfort needs.
How do I stop thigh chafing while hiking?
Use anti-chafe balm before you start and wear long inseam shorts, liner shorts, thigh bands, or leggings with smooth inner seams. Reapply balm during the hike before your skin starts burning.
How far should a beginner plus-size hiker go?
Start with 1-3 miles [1.6-4.8 km] on easy terrain, then judge by how you feel the next day. If you finish tired but not wrecked, repeat the route or add a small increase next time.
What if I am the slowest hiker in the group?
Being the slowest hiker is not a character flaw. Choose no-drop groups, ask pace questions before joining, and hike with people who treat rest breaks as normal trail practice.