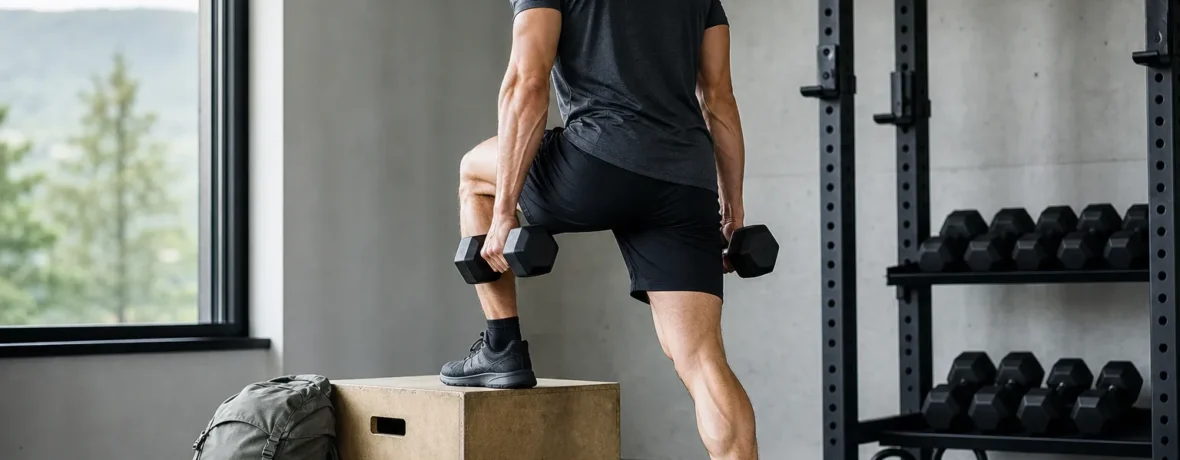
To train for hiking in the gym, lift 2–3 days per week, add 1–2 stair or incline cardio sessions, and practice loaded carries with your pack. Use moderate weights, 2–4 sets per exercise, and progress for 6–8 weeks before a hard hike.
How to train for hiking in the gym if you have 8 weeks?
Train legs, lungs, core, balance, and downhill control every week. Hiking is not just “strong quads.” You need calves that keep firing, glutes that push you uphill, hamstrings that brake you downhill, a trunk that resists twisting under a pack, and feet that keep their cool after thousands of steps.
The gym helps because you can load those systems in a clean, repeatable way. No mud. No weather excuses. No guessing if today’s hill was steep enough. You can build strength on Monday, stair endurance on Wednesday, and controlled downhill work on Friday.
Use this structure for 6–8 weeks before a demanding hike:
- Pick 2 strength days. Focus on squats, step-ups, deadlifts, lunges, calves, core, and carries.
- Add 1 incline cardio day. Use the treadmill, stair climber, or stepmill for uphill effort.
- Add 1 easy endurance day. Bike, walk, row, or hike outside at conversational pace.
- Train with your pack once per week. Start light, then add weight slowly.
- Keep one full rest day. Your legs get stronger between workouts, not during them.
As of November 2026, the CDC recommends adults get at least 150 minutes of moderate-intensity aerobic activity each week plus muscle-strengthening work on 2 days that trains all major muscle groups. That lines up nicely with hiking prep: build the engine, then build the chassis with strength training. See the CDC’s adult physical activity guidance for the baseline.
What muscles should you train for hiking?
Train your glutes, quads, hamstrings, calves, core, hips, back, and grip. The trail asks your whole body to work, especially when you carry water, food, layers, and emergency gear.
Here’s the simple breakdown:
| Trail demand | Main muscles | Gym focus |
|---|---|---|
| Climbing uphill | Glutes, quads, calves | Step-ups, squats, incline treadmill |
| Descending | Quads, hamstrings, hips | Reverse lunges, slow step-downs |
| Carrying a pack | Core, traps, back, grip | Loaded carries, rows, planks |
| Uneven ground | Glute medius, ankles, core | Single-leg work, balance drills |
If you only train on machines, you’ll still gain strength. But free weights, cables, and single-leg moves transfer better to trails because hiking is rarely symmetrical. One foot lands high. One foot lands low. Your pack shifts. Your body has to correct.
What are the best gym exercises for hiking?
The best gym exercises for hiking are step-ups, squats, deadlifts, lunges, calf raises, loaded carries, rows, planks, stair climbing, and hip stability work. Together, they build climbing power, downhill control, pack strength, and trail balance.
1. Weighted step-ups
Step-ups are the closest gym match for climbing steep trail. Use a box or bench that puts your working thigh near parallel to the floor. Hold dumbbells at your sides or wear a light pack.
- Do: 3 sets of 8–12 reps per leg
- Rest: 60–90 seconds
- Trail cue: Push through the whole foot, not just the toes
Keep the movement clean. Don’t spring off the back leg. The front leg should do the work.
2. Goblet squats
Goblet squats build the legs and hips you need for long climbs. Hold a dumbbell or kettlebell at chest height, brace your core, and sit between your knees.
- Do: 3–4 sets of 6–10 reps
- Use: A weight that leaves 2 reps in reserve
- Trail cue: Stand tall at the top without leaning back
If your heels pop up, place small plates under them or reduce depth until you can control the squat.
3. Romanian deadlifts
Romanian deadlifts train hamstrings, glutes, and your back-side chain. That matters when you’re climbing, stepping over logs, and stabilizing under a pack.
- Do: 3 sets of 8–10 reps
- Use: Dumbbells, kettlebells, or a barbell
- Trail cue: Hinge at the hips; don’t round your low back
Lower the weight until you feel a strong stretch in the hamstrings, then drive your hips forward to stand.
4. Reverse lunges
Reverse lunges train single-leg strength with less knee stress for many hikers than forward lunges. They also build the braking strength you’ll need on descents.
- Do: 3 sets of 8 reps per leg
- Start: Body weight, then add dumbbells
- Trail cue: Keep the front knee tracking over the middle toes
Move slowly. Fast lunges look athletic, but slow lunges build control.
5. Slow step-downs
Slow step-downs are the downhill insurance policy. Stand on a low box, lower one heel toward the floor for 3 seconds, tap lightly, then stand back up.
- Do: 2–3 sets of 6–10 reps per leg
- Box height: 6–12 inches [15–30 cm]
- Trail cue: Control the lowering phase
If your knee dives inward, use a lower box and slow down. The goal is control, not depth.
6. Standing calf raises
Calf raises help with climbing, balance, and foot fatigue. Trails punish weak calves, especially on long ascents and rocky terrain.
- Do: 3 sets of 12–20 reps
- Pause: 1 second at the top and 1 second at the bottom
- Trail cue: Use full range, not bouncy half reps
Progress to single-leg calf raises when both legs feel solid.
7. Farmer carries
Farmer carries train your grip, shoulders, core, and posture under load. That is pack training without overthinking it.
- Do: 4 carries of 40–80 feet [12–24 m]
- Use: Heavy dumbbells or kettlebells
- Trail cue: Walk tall, ribs down, shoulders level
Do not shrug your shoulders to your ears. Pack-carrying strength comes from stacked posture and steady breathing.
8. Cable or dumbbell rows
Rows strengthen your upper back so your pack does not fold you forward by mile 5 [8 km]. They also balance out all the pushing and sitting most people do.
- Do: 3 sets of 10–12 reps
- Use: Cable row, one-arm dumbbell row, or chest-supported row
- Trail cue: Pull elbows back, not shoulders up
Control the return. Letting the weight yank your shoulders forward misses half the benefit.
9. Plank with shoulder taps
Plank shoulder taps train your core to resist rotation. That matters every time one foot lands on a rock and your pack tries to twist you sideways.
- Do: 3 sets of 16–24 total taps
- Start: Feet wide for stability
- Trail cue: Keep hips quiet
If your hips sway, widen your stance or hold a regular plank for 30–45 seconds.
10. Stair climber or incline treadmill
The stair climber and incline treadmill build hiking-specific cardio. They train your lungs while your legs keep pushing uphill.
- Beginner: 20 minutes steady
- Intermediate: 30–40 minutes steady
- Hard session: 6 rounds of 3 minutes hard, 2 minutes easy
Keep your hands light on the rails. If you’re leaning heavily, reduce speed or incline.
How many days a week should you train for hiking?
Train 3–5 days per week, depending on your current fitness and your hike goal. Two gym strength days plus one cardio day is enough for many day hikes; bigger mountain days call for more volume.
| Goal | Weekly plan | Best for |
|---|---|---|
| Easy day hike | 2 strength + 1 cardio | Short trails, light pack |
| Hard day hike | 2 strength + 2 cardio | Steep climbs, 6–12 miles [10–19 km] |
| Backpacking trip | 3 strength + 2 cardio | Loaded pack, multi-day effort |
Do not make every session brutal. A smart week has hard days, easy days, and one full rest day. If your knees ache, sleep tanks, or your pace gets worse for several workouts in a row, pull back.
What should a hiking gym workout look like?
A hiking gym workout should start with a warm-up, move into strength work, finish with loaded carries or incline cardio, and end before your form falls apart. Quality beats trash reps.
Here is a clean 60-minute session:
- Warm up for 8 minutes. Walk on an incline, cycle easy, then do leg swings, hip circles, and body-weight squats.
- Weighted step-ups: 3 sets of 10 reps per leg.
- Goblet squats: 3 sets of 8 reps.
- Romanian deadlifts: 3 sets of 10 reps.
- Slow step-downs: 2 sets of 8 reps per leg.
- Rows: 3 sets of 12 reps.
- Farmer carries: 4 carries of 60 feet [18 m].
- Cool down for 5 minutes. Walk easy and breathe through your nose if you can.
The NIH has a simple strength-training checklist that backs the basics: work major muscle groups, use controlled movements, and give muscles recovery time. If you want the health-side primer, read the NIH’s maintain your muscle checklist.
How do you train for uphill hiking on a treadmill?
Use incline, not speed, to make a treadmill feel like hiking. Start at 6–10% incline and walk at a pace where you can speak in short sentences.
Try this treadmill hill workout:
- 5 minutes: Easy walk at 0–3% incline.
- 10 minutes: 6% incline at steady pace.
- 10 minutes: 8–10% incline at a slower pace.
- 5 minutes: Easy walk at 0–3% incline.
After 2 weeks, add 5 minutes. After that, add a light pack. Keep the pack snug and start with 5–10 lb [2–5 kg], not your full overnight load.
The biggest treadmill mistake is clinging to the rails. If the machine is pulling you uphill while your arms hold you in place, your legs are not getting honest work. Touch the rails only for balance.
How do you train for downhill hiking in the gym?
Train downhill hiking with slow lowering movements. Descending is eccentric work, which means your muscles lengthen while controlling force.
Use these moves once or twice per week:
- Slow step-downs: 3 seconds down, light tap, stand back up.
- Reverse lunges: Smooth lowering, firm push to stand.
- Split squats: Front foot planted, torso tall, slow descent.
- Backward sled drags: Great quad work if your gym has a sled.
Downhill training should not wreck your knees. Mild muscle soreness the next day can happen. Sharp pain, swelling, or pain that changes your walking pattern is a stop sign.
Should you train with a backpack in the gym?
Yes, train with a backpack if you will hike with one. Keep it light at first and use it for walking, step-ups, and stair sessions before you try heavy loads.
Pack training rules:
- Start with 5–10 lb [2–5 kg].
- Add 5 lb [2 kg] only when the current weight feels controlled.
- Keep most pack sessions under 45 minutes in the gym.
- Use your real hiking pack, not a loose school backpack.
- Stop if you feel numbness, tingling, sharp pain, or hot spots that change your gait.
Load teaches posture. Too much load too soon teaches compensation. Keep your ribs stacked over your hips, shorten your stride on inclines, and breathe steadily.
How do you progress without getting hurt?
Progress one thing at a time. Add weight, reps, sets, incline, speed, or duration — not all six in the same week.
Use this simple progression:
- Week 1: Learn the movements and leave 3 reps in reserve.
- Week 2: Add 1–2 reps per set where form is solid.
- Week 3: Add a small amount of weight to main lifts.
- Week 4: Keep weight steady and improve control.
- Week 5: Add 5 minutes to incline cardio.
- Week 6: Add light pack weight to one cardio session.
- Week 7: Practice your hardest planned workout.
- Week 8: Reduce volume by 30–40% before your hike.
If heat will be part of your hike, gym fitness is not enough. You also need heat acclimatization, pacing, shade breaks, and hydration planning. The Wilderness Medical Society states that acclimatization is one of the strongest prevention strategies for heat illness in its 2024 heat illness guideline update.
What gear should you bring to gym hiking workouts?
Bring the gear that affects your movement. You do not need the full trail kit, but you should practice with the pieces that change your stride, posture, and feet.
- Hiking shoes or trail runners you plan to wear
- Your hiking pack
- Thin and thick socks to test fit
- Water bottle or hydration bladder
- Towel for sweaty stair sessions
- Small notebook or phone note for tracking sets, loads, and incline
Training in your hiking shoes can reveal heel slip, toe pressure, or arch irritation before the trail does. That is much better than learning 4 miles [6 km] from the trailhead.
When to see a doctor
See a doctor before starting hard hiking training if you have heart disease, lung disease, diabetes, a long break from exercise, or symptoms during activity. Training should challenge you, not scare you.
Stop exercising and seek medical care if you have chest, jaw, neck, or arm discomfort; fainting; severe shortness of breath; irregular heartbeat; or dizziness that does not settle with rest. Mayo Clinic gives similar red flags in its guidance on when to check with a healthcare professional before exercise; read the Mayo Clinic exercise safety guidance if you have risk factors or symptoms.
Also get checked if joint pain changes your walking, swelling appears after workouts, or pain keeps returning in the same spot. Do not diagnose it in the squat rack. Get help, adjust the plan, and come back stronger.
Related reading
- How to Train for a Long-Distance Hike
- How to Train for High-Altitude Hiking at Sea Level
- How to Train for Backpacking With a Loaded Pack
- How to Train for Kilimanjaro
FAQ
Can you train for hiking only in the gym?
Yes, you can build most of your hiking fitness in the gym. Still, get outside when you can because trails train foot placement, weather judgment, pacing, and downhill confidence in ways machines cannot fully copy.
How long does it take to get in shape for hiking?
Most people need 6–8 weeks for a noticeable jump in hiking fitness. If you are preparing for a long backpacking trip or a steep mountain hike, give yourself 12 weeks and build pack weight slowly.
Is the stair climber good for hiking training?
Yes, the stair climber is excellent for uphill hiking fitness. Use it with light hands, steady breathing, and progressive time increases so your legs do the work instead of the rails.
Should I lift heavy or do high reps for hiking?
Use both, but start with moderate weights and clean reps. Sets of 6–10 build strength, while sets of 12–20 for calves, step-downs, and carries build the durability hikers need late in the day.
How heavy should my pack be during gym training?
Start with 5–10 lb [2–5 kg] and add weight only when your posture, breathing, and footwork stay solid. For backpacking, work gradually toward the load you expect to carry, but do not make every workout a heavy-pack workout.
What is the biggest mistake in gym training for hiking?
The biggest mistake is training legs hard while ignoring downhill control and pack posture. Strong uphill legs help, but slow step-downs, carries, rows, and core work are what keep you moving well when the trail gets long.