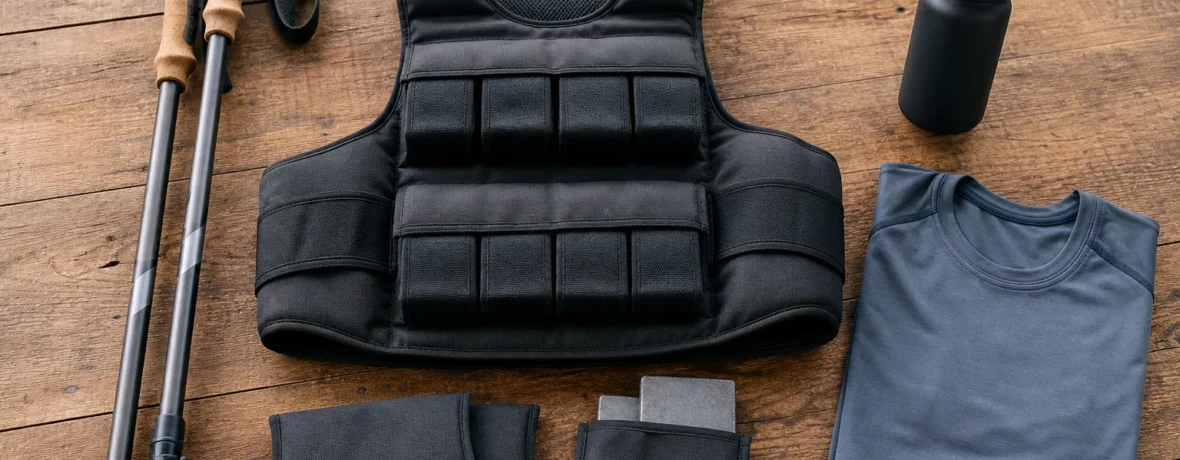
Hiking with a weighted vest can make easy trails harder, build leg and trunk endurance, and prepare you for pack weight. Yes, it can help—if you start with 5% to 10% of body weight, keep hikes short, and stop for sharp pain, dizziness, numbness, or unusual shortness of breath.
Is hiking with weighted vest good training?
Yes, when the load is light and your joints tolerate it.
A weighted vest turns a familiar walk into loaded movement. Your calves, quads, glutes, hips, core, and postural muscles have to work harder without changing the trail. That makes it useful for hikers who want more training effect from a short loop, a neighborhood hill, or a treadmill incline.
It is not magic. It is load. Load can build you up, or it can expose weak spots fast. If your knees bark on descents, your low back tightens under a daypack, or your feet already feel beat up after normal walks, adding weight may make those issues louder.
The best use is simple: wear the vest for controlled training hikes, not every hike. Keep your regular hikes fun and fluid. Use the vest when you want a measured challenge.
What are the benefits of weighted vest walking for hikers?
It adds intensity without forcing you to move faster.
That matters because hikers do not always need more speed. Often, you need steadier legs, better uphill stamina, and the ability to carry gear without folding at mile 6 [9.7 km]. Weighted vest walking can help with that because the load stays close to your body and leaves your hands free.
- Better uphill strength: More load means your legs work harder on climbs.
- Pack prep: A vest can mimic some of the stress of carrying water, layers, and food.
- Time efficiency: A 30-minute hill walk becomes tougher without adding miles.
- Posture practice: A snug vest encourages you to stand tall instead of slumping under load.
- Bone-loading exercise: Walking is weight-bearing activity, and the NIH’s NIDDK lists weight-bearing movement as part of building and maintaining bone and muscle strength in adults through physical activity: NIH NIDDK tips for starting physical activity.
For general health, the CDC recommends adults get 150 minutes of moderate-intensity physical activity each week plus 2 days of muscle-strengthening activity: CDC adult physical activity guidelines. A weighted vest is not required to meet that mark, but it can make moderate walks feel more like training.
What are the risks of hiking with a weighted vest?
The main risks are overuse, joint irritation, heat stress, and poor movement under fatigue.
Extra weight increases the force going through your feet, ankles, knees, hips, and spine. On flat ground, that may feel fine. On rocky descents, uneven steps, slick roots, and loose gravel, it becomes a different deal. Your braking muscles work harder. Your balance margin shrinks.
| Risk | What it feels like | Smart move |
|---|---|---|
| Knee or hip irritation | Sharp pain, ache on descents, soreness that changes your stride | Remove the vest and return to unloaded walking until symptoms settle |
| Low back strain | Tightness, pinching, or leaning backward to carry the load | Lower the weight and tighten the vest so it does not bounce |
| Foot and ankle overload | Hot spots, arch fatigue, ankle wobble | Use stable shoes and avoid technical trails at first |
| Heat stress | Dizziness, chills, headache, confusion, heavy fatigue | Stop, cool down, hydrate, and get help if symptoms are serious |
A vest also traps heat. The Wilderness Medical Society’s heat illness guidance emphasizes prevention, early recognition, and rapid cooling for serious exertional heat illness: Wilderness Medical Society heat illness guidelines. On hot, humid days, leave the vest at home.
How heavy should a weighted vest be for hiking?
Start with 5% of your body weight and cap early training at 10%.
If you weigh 180 lb [82 kg], that means starting near 9 lb [4 kg] and staying under 18 lb [8 kg] while you learn how your body responds. Strong hikers sometimes use more, but “can” does not mean “should.” Hiking already includes slopes, impact, weather, and uneven ground. Add weight slowly.
Use this progression:
- Week 1: Wear 5% body weight for 20 to 30 minutes on flat ground.
- Week 2: Keep the same weight and add gentle hills.
- Week 3: Add 5 to 10 minutes, not more weight.
- Week 4: If everything feels good, add 2 to 5 lb [0.9 to 2.3 kg].
- After that: Increase only one thing at a time: weight, distance, elevation, or trail difficulty.
Keep the ego out of it. A vest that makes you shorten your stride, stomp downhill, lean back, or breathe in ragged bursts is too heavy for that hike.
Is a weighted vest better than a loaded backpack?
Neither is better; they train different things.
A weighted vest keeps weight close to your torso. That can feel more balanced than a backpack and may reduce bounce if the fit is solid. A backpack trains the exact skill you need for backpacking: carrying weight on your shoulders and hips, managing straps, and moving with real gear.
| Option | Best for | Watch out for |
|---|---|---|
| Weighted vest | Short training hikes, hill repeats, hands-free walking | Heat buildup, chest restriction, pressure points |
| Loaded backpack | Backpacking prep, gear shakedowns, long trail days | Shoulder rub, poor hip-belt fit, pack sway |
| No added weight | Recovery days, speed work, technical trails | Less load-specific training |
If your goal is backpacking, use both. Wear the vest for short midweek strength walks. Use your pack on longer weekend hikes so your feet, hips, shoulders, and gear system get real practice.
How do you use a weighted vest safely on trail?
Fit it snug, start easy, and choose boring terrain first.
Boring is good here. Pavement, gravel paths, smooth dirt, and mellow hills let you feel the load without also fighting rocks and roots. Save steep descents and scrambles for unloaded days until you know how your body handles the vest.
- Choose a vest with adjustable weight in small increments.
- Keep the weight high and close to your torso, not hanging low on your belly.
- Tighten it enough to stop bounce, but not so tight that breathing feels restricted.
- Warm up for 5 to 10 minutes without pushing pace.
- Use trekking poles on hilly routes if they help your balance.
- Skip running in the vest unless a qualified coach has built that into your plan.
- Do not wear it on icy, exposed, or highly technical trails.
Mayo Clinic’s strength training guidance gives two rules that fit weighted vest work well: warm up first and increase weight slowly: Mayo Clinic weight training tips. Treat the vest like strength training, not like a fashion accessory.
Who should avoid hiking with a weighted vest?
Skip it if added load makes an existing health or pain issue worse.
You should be extra cautious if you have current back, neck, hip, knee, ankle, foot, balance, heart, or breathing problems. Pregnancy, recent surgery, recent injury, and osteoporosis also call for medical guidance before adding load.
A vest is not the only way to train. You can build trail strength with step-ups, bodyweight squats, calf raises, loaded carries, stair walking, and regular hill hiking. If the vest keeps causing pain, it is the wrong tool right now. No drama. Pick another tool.
When to see a doctor
See a doctor when symptoms are sharp, unusual, persistent, or tied to breathing, balance, or chest discomfort.
Do not try to “walk off” chest pain, fainting, new numbness, severe shortness of breath, confusion, or a sudden loss of coordination. Get medical help. Those are not training signals.
Also talk with a clinician or physical therapist if joint pain lasts beyond your next rest day, if one side hurts more than the other, or if pain changes the way you walk. You do not need a diagnosis from the trail. You need a safer plan.
What is a good beginner weighted vest hiking workout?
Use short hill intervals with light weight.
Try this once per week at first:
- Walk 10 minutes easy with the vest on flat ground.
- Climb a gentle hill for 2 minutes at a steady pace.
- Walk back down slowly and under control.
- Repeat 4 to 6 times.
- Finish with 5 to 10 minutes easy on flat ground.
Keep the total session under 45 minutes for the first few tries. If your legs feel cooked for 2 days, reduce the repeats. If your knees hurt on the downhill, remove the vest and use flatter terrain.
Related reading
- Weighted Vest Benefits for Hikers
- Weighted Vest vs Rucksack: Which Is Better?
- How Many Steps in a Mile (Walking vs Hiking)?
- What Is the Best Cardio for Hikers?
FAQ
Can you lose weight hiking with a weighted vest?
Yes, it can increase effort, but fat loss still depends on your overall calorie balance. Use the vest to make training harder, not as a shortcut around sleep, food quality, and consistent movement.
Is hiking with a weighted vest bad for your knees?
It can be bad for your knees if the vest is too heavy, the descent is steep, or you already have knee pain. Start light, avoid technical downhills, and stop if your stride changes.
How often should you hike with a weighted vest?
Start with 1 day per week. If you recover well for several weeks, add a second short session, but keep unloaded hikes in your routine.
Should a weighted vest replace strength training?
No, it should not replace strength training. Squats, step-ups, lunges, deadlifts, calf raises, and core work train movement patterns a vest hike will not fully cover.
Can beginners use a weighted vest for hiking?
Yes, but beginners should first be comfortable walking 30 to 45 minutes without pain. Then add a light vest on flat ground before taking it onto hills.