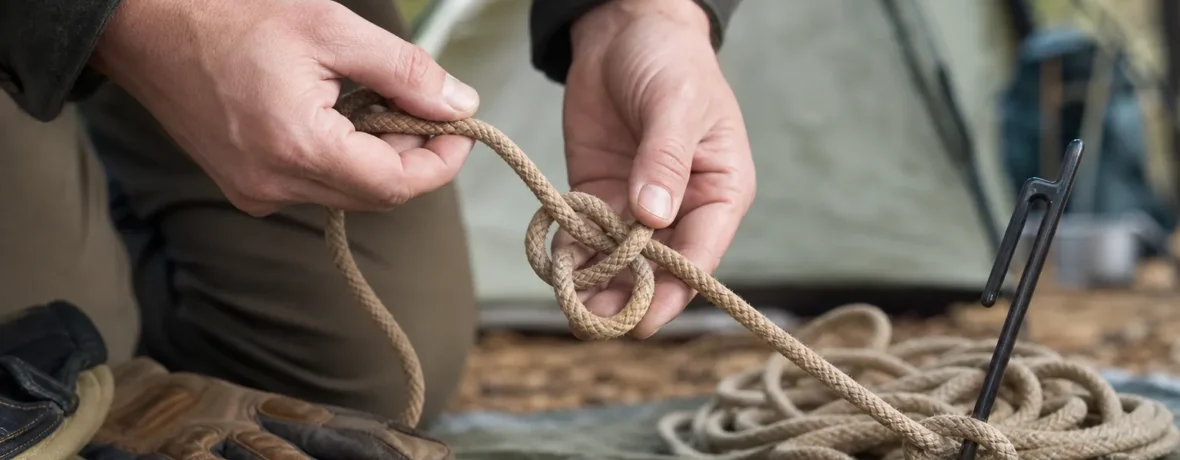
To tie knots for camping, start with 7 knots: bowline, taut-line hitch, trucker’s hitch, two half hitches, clove hitch, sheet bend, and figure eight. Practice each one 10 times at home with 6 ft [1.8 m] of cord until you can tie it in the dark.
A good knot is boring in the best way. It holds your tarp through wind. It lets you tighten a guyline without wrestling wet cord. It keeps your food bag line from turning into a bird’s nest. Bad knots? They jam, slip, waste time, and make camp feel harder than it needs to be.
These are the knots you actually use on trail. Not decorative knots. Not boating trivia. Just the small set that solves most camp problems.
One safety line before we get hands-on: these knots are for camping tasks, not climbing, rescue, rappelling, or hanging a person. For life-safety rope work, get trained and use the right certified gear. For knot diagrams and deeper technical references, Animated Knots is a clear visual resource, and the UIAA covers figure-eight knot details in climbing contexts.
What camping knots should every hiker know?
You should know 7 camping knots because they cover loops, tension, anchors, joining cord, and stopper knots.
| Knot | Best camp use | Why it earns a spot |
|---|---|---|
| Bowline | Fixed loop around a tree, stake, or pack handle | Strong, stable loop that is easy to untie after loading |
| Taut-line hitch | Tent guylines and adjustable tarp corners | Slides when you move it, grips when loaded |
| Trucker’s hitch | Tight ridgelines and gear tie-downs | Creates mechanical advantage for high tension |
| Two half hitches | Tying cord to a stake, post, or tree | Fast, simple, dependable |
| Clove hitch | Temporary attachment to poles, branches, or carabiners | Quick to tie and adjust |
| Sheet bend | Joining two cords | Works better than a square knot for different cord sizes |
| Figure eight | Stopper knot at the end of a line | Easy to inspect and easier to untie than an overhand knot |
How do you tie knots for camping?
You tie knots for camping by learning the job first, then picking the simplest knot that does that job.
Here is the plain-language system:
- Need a fixed loop? Tie a bowline.
- Need adjustable tension? Tie a taut-line hitch.
- Need a very tight line? Tie a trucker’s hitch.
- Need to attach cord to something? Tie two half hitches or a clove hitch.
- Need to join two cords? Tie a sheet bend.
- Need to stop the cord from pulling through? Tie a figure eight.
Learn these terms once and every knot gets easier:
- Working end: the end you move to tie the knot.
- Standing part: the long loaded section of rope or cord.
- Bight: a U-shaped bend in the rope.
- Loop: a full circle in the rope.
- Tail: the short free end left after the knot is dressed.
Dress every knot before you trust it. That means pull the strands neatly into place, remove twists, and leave a tail of 4 in [10 cm] or more. Sloppy knots slip sooner and jam harder.
How do you tie a bowline for a fixed loop?
A bowline makes a fixed loop that will not cinch tighter around the anchor.
Use it when you need a loop around a tree, a stake, a pack handle, or one end of a tarp ridgeline. The bowline is popular because it holds well under steady load and usually unties cleanly after use.
- Make a small loop in the standing part of the cord.
- Pass the working end up through the loop.
- Wrap the working end behind the standing part.
- Bring the working end back down through the original loop.
- Pull the standing part and the loop to tighten.
- Dress the knot so the strands sit cleanly, with at least 4 in [10 cm] of tail.
The old memory trick is “rabbit out of the hole, around the tree, back into the hole.” Corny. Useful. If your bowline capsizes into a strange pretzel, untie it and slow down. The finished knot should have a clean loop, a collar, and a tail inside the loop.
How do you tie a taut-line hitch for tent guylines?
A taut-line hitch is an adjustable knot that slides when loose and grips when loaded.
This is the knot for tent guylines. Stake the line, tie the hitch, then slide the knot to tighten or loosen the line without retying everything. It is excellent for nylon cord that relaxes after rain or overnight dew.
- Wrap the working end around the stake, tree, or anchor point.
- Bring the working end back alongside the standing part.
- Wrap the working end twice inside the loop, around the standing part.
- Make one more wrap outside the loop, again around the standing part.
- Pull the working end snug.
- Slide the hitch to adjust tension, then load the line to make it grip.
If the hitch slips, add another inside wrap or use a grippier cord. Slick Dyneema-style cord can be fussy with friction hitches. A small cord lock may beat a knot there, and that is fine. Use what works.
How do you tie a trucker’s hitch for a tight ridgeline?
A trucker’s hitch gives you extra pulling power for a tight tarp ridgeline or gear tie-down.
This knot is really a system: an anchor, a loop in the standing line, a pulley-style pass through that loop, then a tie-off. It is one of the most useful camp skills you can learn because it lets you tension a line hard without yanking like a maniac. Animated Knots’ trucker’s hitch guide shows several loop options if you want a visual sequence.
- Tie one end of your cord to the first anchor with a bowline or two half hitches.
- Walk the cord to the second anchor.
- Make a small loop in the standing part of the line several feet before the second anchor.
- Pass the working end around the second anchor.
- Bring the working end back through the small loop.
- Pull the working end to tighten the line.
- Hold the tension and secure it with two half hitches.
Do not reef on lightweight tarp fabric until seams scream. Tight is good. Over-tight is how you bend stakes, stress tie-outs, and shred cheap grommets.
How do you tie two half hitches around a tree or stake?
Two half hitches make a simple hitch for fastening cord to an object.
This knot is fast, easy to remember, and handy for tying a clothesline, securing a tarp corner, or attaching a line to a stake. It is not fancy. That is the point.
- Pass the working end around the anchor.
- Bring it over the standing part.
- Pass it through the loop you just made and snug it down. That is the first half hitch.
- Repeat the same move to make a second half hitch.
- Pull both hitches snug against the anchor.
When tying around live trees, protect the bark. Better yet, use stakes when you can. Leave No Trace recommends 1-inch-wide straps for hammocks and clotheslines to reduce tree damage. Thin cord under tension can bite into bark, especially when wind saws the line back and forth.
How do you tie a clove hitch for quick camp setup?
A clove hitch is a fast hitch for temporary attachment to a pole, branch, stake, or carabiner.
Use it when you need speed and adjustability, not permanent security. It can slip on smooth objects or under changing loads, so back it up with a half hitch when failure would be annoying.
- Wrap the cord around the object once.
- Cross the working end over the standing part.
- Wrap around the object a second time.
- Tuck the working end under the crossing strand.
- Pull both ends in opposite directions to snug the hitch.
You can also tie it by making two loops, crossing the second loop behind the first, and dropping both loops over a post. That method is slick for tent poles, trekking poles, and camp kitchen setups.
How do you tie a sheet bend to join two cords?
A sheet bend joins two cords, especially when they are different diameters.
Use it for extending a guyline, repairing a broken bear-bag line, or connecting accessory cord to thicker rope. A square knot is easy to tie wrong and can spill under uneven load. The sheet bend is the better trail choice.
- Make a bight in the thicker or stiffer cord.
- Pass the working end of the thinner cord up through the bight.
- Wrap it around the back of both parts of the bight.
- Tuck it under itself, not under the bight.
- Pull all four strands to dress and tighten the bend.
For slick cord or higher strain, tie a double sheet bend: make two wraps around the bight before tucking the working end under itself.
How do you tie a figure eight stopper knot?
A figure eight stopper knot keeps the end of a cord from pulling through a loop, grommet, cord lock, or pulley point.
It is bulkier than a plain overhand knot and usually easier to untie after loading. That makes it useful at the end of guylines, bear-bag lines, stuff-sack cords, and tarp tensioners. The U.S. Antarctic Program field manual includes figure-eight and bowline references among common field knots.
- Make a loop near the end of the cord.
- Pass the working end around behind the standing part.
- Bring the working end back through the original loop.
- Pull both ends to form the figure eight shape.
- Leave a clean tail so the knot cannot roll out.
Use this as a stopper, not as your only anchor for heavy or critical loads. It is the knot version of a doorstop: simple, useful, and not meant to do every job.
What rope should you use for camping knots?
Use accessory cord or utility cord that matches the job, not climbing rope unless you are doing trained rope work.
For most hiking camp chores, carry 25 to 50 ft [7.6 to 15.2 m] of cord. A 2 mm to 3 mm cord works for small guylines and repairs. A 4 mm to 6 mm cord is easier to handle for tarp ridgelines, bear-bag practice, and general camp tasks. Paracord is common, cheap, and easy to find, but it stretches when wet and is not ideal for every shelter pitch.
Pack cord in short, useful lengths:
- Four pieces at 6 ft [1.8 m] for tarp corners or extra guylines
- Two pieces at 10 ft [3 m] for extensions and repairs
- One piece at 25 to 50 ft [7.6 to 15.2 m] for ridgelines or food hangs where allowed
Bright cord is easier to see at dusk. Reflective cord is even better around tents because it saves shins. Thin dark cord across a campsite is a tripwire with a hobby.
How do you practice knots before a backpacking trip?
Practice knots with the same cord you plan to carry.
Do not learn on fat rope and expect tiny slick cord to behave the same way. Tie each knot slowly, dress it, load it, untie it, then repeat. Ten clean repetitions beat one hundred rushed tangles.
- Tie each knot while looking at a guide.
- Tie it again without looking.
- Tie it with gloves on.
- Tie it in low light.
- Tie it after wetting the cord.
- Teach it to another person if you want it to stick.
Build a tiny practice kit: 6 ft [1.8 m] of cord, a carabiner, and a pencil or tent stake. Keep it near your desk or in your vehicle. Five minutes here and there works better than one cram session the night before a trip.
What are the most common knot mistakes at camp?
The biggest mistake is tying a knot that is hard to inspect.
If you cannot tell whether the knot is right, do not trust it. Untie it and start over. Clean knots look clean. The strands run where they should, the load pulls in the right direction, and the tail is long enough that movement will not shake it loose.
- Leaving short tails: keep at least 4 in [10 cm] of tail on camp knots.
- Using the wrong knot: a fixed loop will not adjust; a friction hitch may slip on slick cord.
- Overtightening: knots can jam, stakes can bend, and tarp fabric can tear.
- Tying around fragile trees: use stakes, wider straps, or padding when needed.
- Trusting memory too soon: practice before you need the knot in rain and wind.
Also, untie knots before you pack up. Leaving knots in cord creates kinks and weak-looking messes. Clean cord is easier to use on the next cold, hungry evening when patience is thin.
Related reading
- How to Plan a Camping Trip
- How to Start Camping: A Beginner's Guide
- Dispersed Camping in Colorado: Best Areas and Rules
- Camping Checklist: What to Bring
FAQ
What is the best knot for camping?
The best all-around camping knot is the bowline because it makes a reliable fixed loop. Pair it with a taut-line hitch and a trucker’s hitch, and you can handle most tarp and tent line jobs.
What is the easiest camping knot to learn first?
The figure eight is the easiest knot to learn first. It is simple, easy to inspect, and useful as a stopper at the end of guylines and cords.
What knot should I use for tent guylines?
Use a taut-line hitch for tent guylines. It lets you tighten or loosen the line without pulling the stake and retying the cord.
Is a square knot good for camping?
A square knot is useful for bundling light items, but it is not the best knot for critical camp setup. Use a sheet bend to join two cords and use hitches for attaching cord to anchors.
How much cord should I bring backpacking?
Bring 25 to 50 ft [7.6 to 15.2 m] of cord for general camp use. Add shorter pre-cut guylines if you pitch tarps often or camp in windy conditions.
Can I use these knots for climbing?
No, treat these instructions as camping-only guidance. Climbing and rescue systems require formal training, certified equipment, partner checks, and standards that go beyond camp knots.