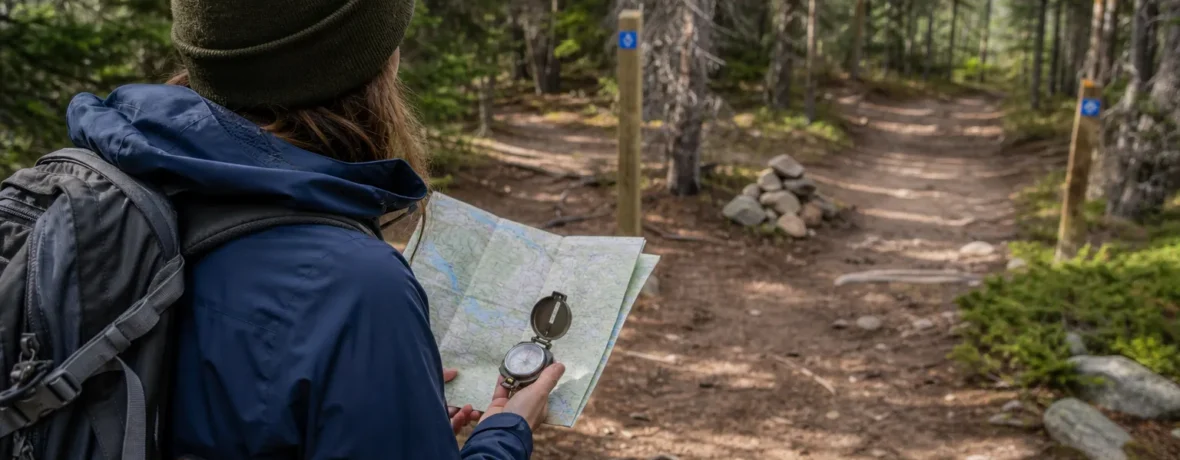
How to avoid getting lost while hiking: plan your route before you leave, carry a map and compass plus a charged GPS, check your position every 15-30 minutes, stay on marked trails, and turn around the moment the route stops matching your map. If you are unsure, stop moving.
How do you avoid getting lost while hiking?
You avoid getting lost by knowing where you are before you need to know.
That sounds blunt because it is. Most hikers do not get lost in one dramatic moment. They drift off-route by skipping small checks: one unmarked junction, one social trail, one ridge that “looks right,” one phone battery sitting at 9%.
Your goal is not to become a wilderness surveyor. Your goal is to build a simple system that keeps you oriented from the trailhead to the car.
- Study the route before you hike. Know the trail name, total distance, elevation gain, major junctions, water crossings, bail-out points, and the direction you should generally travel.
- Carry two forms of navigation. Bring a paper map and compass, plus a GPS device or offline phone map. The National Park Service hiking safety guidance lists navigation gear as part of the Ten Essentials.
- Download maps for offline use. Cell service can disappear 0.5 miles [0.8 km] from a parking lot. Do not rely on streaming map tiles.
- Check your position often. Every 15-30 minutes, match your map to the ground: trail bends, creeks, ridgelines, contour lines, junctions, cliffs, lakes, roads.
- Stop at every junction. Read the sign, check the map, look behind you, then move. Do not guess.
- Turn around early. If the terrain, direction, or timing does not match your plan, stop and backtrack while you still have daylight and energy.
Good route-finding is not magic. It is a habit. Look up. Look back. Check the map. Repeat.
You are hiking into unfamiliar terrain. What is the best way to keep your bearings?
The best way is to connect your map to real landmarks before you start walking fast.
Unfamiliar terrain is where hikers get sloppy. Everything looks new, so your brain wants to simplify: “The trail must be obvious.” Maybe. Until snow covers it. Until wildfire deadfall blocks it. Until an old road bed crosses your path and looks more traveled than the official trail.
Before you leave the trailhead, take 2 minutes and do this:
- Face the direction your route starts.
- Identify one large landmark ahead: a ridge, drainage, lake, road, peak, canyon wall, or powerline.
- Identify one landmark behind you so the return route looks familiar.
- Check which way is north on your map.
- Note your first “must-not-miss” point, such as a bridge, junction, saddle, or creek crossing.
Then move in short mental segments. Do not think, “I’m hiking 9 miles [14.5 km] today.” Think, “I’m following this drainage for 1.2 miles [1.9 km], then turning left at the signed junction, then climbing to the saddle.”
This keeps the day manageable. More importantly, it gives you fast feedback. If you expected to cross a creek in 20 minutes and you have climbed dry switchbacks for 45 minutes, something is wrong.
What should you carry so you do not get lost on a hike?
Carry navigation tools that still work when your phone does not.
Your phone is useful. It is also fragile, cold-sensitive, battery-hungry, and easy to drop in a creek. Treat it as one tool, not the whole plan.
| Tool | Best use | Weak spot |
|---|---|---|
| Paper topo map | Big-picture terrain, bail-out routes, ridges, drainages | Needs map-reading skill and weather protection |
| Compass | Direction checks, bearings, whiteout or forest travel | Useless if you never practice |
| Offline phone map | Quick position checks and route tracking | Battery failure, cracked screen, lost signal for downloads |
| Handheld GPS or satellite communicator | Coordinates, track recording, emergency messaging on some devices | Needs batteries, clear sky, and basic setup |
For US hikes, download or print a topographic map before you go. The USGS topographic map download page explains where to get current and historical topo maps. A 1:24,000-scale map shows trails, contour lines, water, roads, and landforms with enough detail for most day hikes.
Your anti-get-lost kit should include:
- Paper map in a waterproof bag or case
- Baseplate compass
- Offline map on your phone
- Fully charged phone in airplane mode
- Small power bank and short cable
- Headlamp with spare batteries or a second light
- Whistle
- Bright layer, bandana, or signal panel
- Emergency shelter, such as a bivy sack or space blanket
- Extra food and water
A headlamp belongs in a navigation article because darkness turns easy trails into puzzles. If sunset is at 6:15 p.m., your “quick” 2-mile [3.2 km] walk out can become a slow stumble if you are using your phone flashlight and trying to preserve battery at the same time.
How do you read a trail map before hiking?
Read the map like a preview of the decisions you will make on the ground.
Start with the trailhead. Find your parking area, the first trail segment, and your intended direction of travel. Then trace the route with your finger from start to finish. Say the main features out loud if that helps: “North along the creek, west at the junction, switchbacks to the ridge, south to the overlook, return the same way.”
Now look for places where mistakes are likely:
- Trail junctions: Circle or mark every intersection.
- Old roads: These can look wider and easier than the actual trail.
- Creek crossings: They may shift after storms or snowmelt.
- Open rock: Cairns can be missed, knocked over, or confused with random rock piles.
- Burn areas: Downed trees can hide tread and signs.
- Snow patches: A 200-foot [61 m] snowfield can erase the trail at exactly the wrong spot.
Contour lines tell you how the land feels. Tight lines mean steep ground. Wide lines mean gentler slopes. Lines forming a “V” usually point upstream in drainages. Ridges, saddles, and valleys matter because they stay put even when signs disappear.
Estimate your timing without pretending you are racing. A common planning pace on maintained trails is 2 miles per hour [3.2 km/h], then slower for steep climbs, rough footing, heat, snow, kids, dogs, or photo stops. Your real pace is the only pace that matters.
Should you use GPS or a compass for hiking?
Use both if the terrain is unfamiliar, remote, snowy, foggy, or poorly signed.
GPS gives you a fast dot on a map. That is powerful. A compass gives you direction without batteries. That is power of a different kind. Together, they cover each other’s failures.
Use GPS for quick checks:
- Confirm you are on the intended trail.
- Mark the trailhead before you leave.
- Record a track so you can retrace it.
- Read coordinates if you need to call for help.
Use a compass for direction:
- Check that the trail is trending the right way.
- Orient your paper map to the landscape.
- Follow a bearing across open terrain.
- Stay honest when your phone map rotates and confuses you.
Before the hike, open your map app at home and download the full area, not just the trail line. Include nearby roads, drainages, alternate trails, and the approach drive. Then put your phone in airplane mode at the trailhead. GPS still works on most phones in airplane mode, but your battery lasts longer because the phone stops hunting for cell towers.
One warning: the blue dot can make you lazy. If you stare at the dot all day, you may stop reading the land. Look around. The land is the actual map.
What trail habits keep you oriented?
Small habits keep small mistakes from becoming long ones.
Use these on every hike, even easy ones:
- Look back often. The return trail looks different. Turn around at junctions, creek crossings, and open slabs so your brain stores the reverse view.
- Pause after turns. After a junction, walk 100-200 feet [30-61 m], then check that the trail direction matches your map.
- Notice handrails. A handrail is a long feature that guides you: creek on the left, ridge on the right, road below, canyon wall ahead.
- Set a turnaround time. Pick it before you start. If you hit that time before the destination, turn around.
- Do not follow strangers blindly. Confident hikers can be confidently wrong.
- Stay found in groups. Everyone should know the route, not just the person in front.
Trail signs help, but they are not a contract. Signs burn, fall, get buried, get vandalized, or point toward several trails at once. Your map and your attention fill the gaps.
What should you do if you think you are lost?
Stop immediately and make the problem smaller.
The worst move is to keep walking fast while hoping the trail will “sort itself out.” That burns daylight, water, battery, and calm. The National Park Service gives clear guidance for lost hikers: stop, assess, try to find your location, retrace your steps if safe, and seek help if you cannot relocate yourself through the NPS outdoor emergency plan.
Use this field sequence:
- Stop. Sit down if panic is rising. Drink water. Add a layer before you get cold.
- Think. Ask: When was the last place you were certain of your location? A signed junction? Bridge? Viewpoint? Creek?
- Observe. Match visible landmarks to your map. Look for ridges, drainages, roads, powerlines, lakes, cliffs, or trail signs.
- Check tools. Use GPS, compass, and map together. Do not trust one clue if the other clues disagree.
- Retrace if safe. If you can clearly follow your footprints, track, or trail back to the last known point, do it calmly.
- Stay put if you cannot relocate. If it is getting dark, you are injured, weather is worsening, or you are exhausted, stop moving.
- Call for help. Call 911 if you need rescue. Give coordinates if available, trailhead name, last known location, clothing colors, gear, medical concerns, and number of people.
If your phone has limited service, text may go through when a call fails. Send a short message with coordinates, your situation, and your plan to stay put. Then preserve battery: dim the screen, close apps, keep the phone warm, and check it at set intervals.
Use your whistle in blasts of three. Use bright clothing or reflective items where searchers can see them. If aircraft are nearby, move into an opening only if it is safe and you can return to shelter.
How do you avoid getting lost while hiking in snow, fog, or darkness?
You avoid it by turning around earlier and relying on instruments sooner.
Snow hides tread. Fog removes landmarks. Darkness shrinks your world to the beam of your headlamp. In those conditions, a trail you know can feel unfamiliar, and an unfamiliar trail can become a trap.
Use stricter rules:
- Check your position every 10-15 minutes.
- Mark the trailhead, key junctions, and turnaround point on GPS.
- Keep your paper map accessible, not buried under snacks and gloves.
- Turn around if the trail disappears and you cannot confirm the route.
- Avoid shortcuts across slopes, meadows, frozen water, or drainages.
- Carry a headlamp on every hike, even if you plan to finish by lunch.
In snow, your summer pace means little. A 3-mile [4.8 km] return can take far longer if you are postholing, breaking trail, or searching for markers. In fog, compass direction matters more than “that way feels right.” In darkness, every junction deserves a full stop.
If you lose the trail in bad visibility, do not fan out as a group. Keep everyone together unless there is an immediate safety reason to separate. A separated group creates more problems for rescuers and for you.
How should you tell someone your hiking plan?
Leave a trip plan with a person who will act if you do not return.
A plan is not useful if it sits in your notes app and no one sees it. Send it to a reliable person before you leave. Tell them when to expect your check-in and when to call for help if you are overdue.
Your trip plan should include:
- Your full name and phone number
- Names of everyone in the group
- Trailhead and parking area
- Route, destination, and planned return route
- Start time and expected finish time
- Vehicle make, model, color, and license plate
- Clothing colors and pack colors
- Navigation tools and emergency gear carried
- Medical concerns that rescuers should know
- Local agency or ranger station if known
Do not change routes without updating that person. A “small detour” can send searchers to the wrong drainage. If plans change at the trailhead because of weather, closures, crowds, or road access, send the update before you lose service.
When to see a doctor
Get medical help fast if being lost leads to exposure, injury, heat illness, or cold illness.
Do not diagnose yourself on the trail. If someone is confused, fainting, unable to walk normally, severely injured, or not improving after rest, cooling, warming, food, or water, call 911 or seek emergency care.
For cold exposure, the CDC guidance on recognizing hypothermia says to seek immediate medical attention for signs of hypothermia. For heat exposure, the CDC guidance on heat-related illness identifies heat stroke as a medical emergency that requires calling 911.
After a rescue or a long unplanned night out, get checked if you had prolonged shivering, confusion, vomiting, chest pain, severe headache, a head injury, possible fracture, frostbite signs, or symptoms that worsen after you are back at the trailhead.
Related reading
- How to Make Coffee While Camping: 6 Methods
- What to Do If You Get Lost in the Woods: STOP Method
- How to Prevent Tick Bites While Hiking
- Hiking While Pregnant: Safety by Trimester
FAQ
What is the first thing to do if you get lost hiking?
Stop walking. Take a breath, check your map, GPS, and compass, then identify your last known location before deciding whether to retrace your steps or stay put.
Is it better to follow a creek if you are lost?
Not automatically. Creeks can lead into waterfalls, cliffs, brush, private land, or canyons, so only follow one if your map shows it is a safe route to a known trail, road, or landmark.
Can you rely on your phone for hiking navigation?
Yes, but only as one tool. Download offline maps, carry a power bank, and bring a paper map and compass because batteries, screens, and phones fail.
How often should you check your map while hiking?
Check your map every 15-30 minutes on clear trails and every 10-15 minutes in snow, fog, darkness, or confusing terrain. Also check at every junction, creek crossing, and major change in direction.
Should you leave the trail to take a shortcut?
No, not unless you have the skills, map, compass, and terrain awareness to travel off-trail safely. Shortcuts cause many route-finding problems and can damage fragile terrain.
What information should you give 911 if you are lost?
Give your GPS coordinates if available, trailhead name, last known location, number of people, injuries or medical issues, clothing colors, gear, and your plan to stay put. Keep the phone warm and save battery after the call.