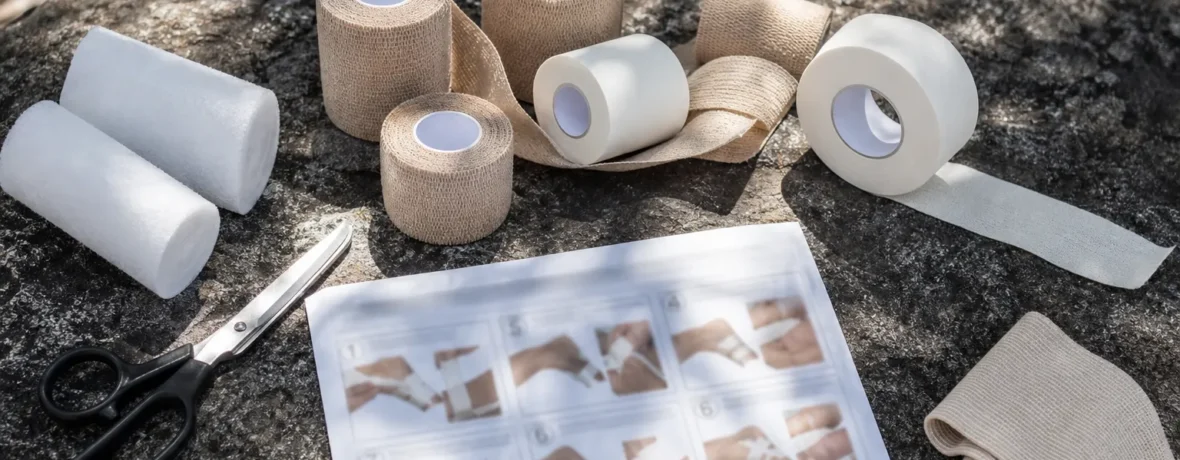
To tape a sprained ankle, use rigid athletic tape over a thin underwrap, hold the foot at 90 degrees, anchor above the ankle, add 2 to 3 stirrups, then lock the heel with figure-8 wraps. Tape only if pain is mild, circulation is normal, and you can walk without sharp pain.
A rolled ankle can turn a clean trail day into a slow, lopsided grind. Tape can help you get back to the trailhead, add support during recovery, or protect an ankle that has a history of twisting. It is not a magic fix. If the ankle is unstable, numb, badly swollen, misshapen, or too painful to bear weight on, do not tape it and keep hiking. Stop. Stabilize it. Get medical help.
This guide shows you a practical hiking tape job: firm enough to limit side-to-side wobble, simple enough to do at a trailhead, and realistic enough for a first-aid kit.
Can you tape a sprained ankle and keep hiking?
Yes, but only when the injury is mild and walking does not make the pain worse.
Tape is support, not treatment. A sprain means the ligaments around a joint have been stretched or torn, and ankle sprains often cause pain, swelling, bruising, and limited movement, according to MedlinePlus sprain first-aid guidance. On trail, you usually cannot know the exact grade of a sprain. You are making a safety call, not a diagnosis.
Use this quick trail check before you tape:
- Can you take 4 careful steps? If no, do not hike out unless rescue is not available and staying put is more dangerous.
- Is there obvious deformity? If yes, do not force the boot on and do not tape tightly.
- Is the foot numb, cold, blue, or tingling? If yes, loosen anything wrapped around it and seek urgent care.
- Is swelling growing fast? If yes, a rigid tape job may become too tight.
- Does pain climb with each step? If yes, stop hiking.
If the ankle passes those checks, tape can help limit inversion, the common inward roll that strains the outside ankle ligaments. Keep your goal simple: get safely to the car, camp, or a place where you can rest and reassess.
What tape should you use for hiking ankle support?
Use rigid athletic tape for real support, and pack elastic wrap for swelling control.
Those stretchy rolls of kinesiology tape look tidy, but they are not the best choice when you need firm trail support. NIH’s NCBI Bookshelf notes that compression bandages can help during healing, while “Kinesio tape” has not yet been proven to help ankle sprains in the same way. Read the full NIH overview here: ankle sprain treatment options from NCBI Bookshelf.
| Option | Best use on trail | Watch-outs |
|---|---|---|
| Rigid athletic tape | Limiting side-to-side ankle motion | Can restrict circulation if wrapped too tight |
| Elastic bandage | Compression when the ankle is swelling | Less structural support than rigid tape |
| Kinesiology tape | Light cueing and comfort for some hikers | Not enough support for a fresh trail sprain |
| Ankle brace | Repeat sprains, long trips, recovery hikes | Bulkier than tape and must fit inside footwear |
For a hiking first-aid kit, carry one roll of 1.5-inch [3.8 cm] rigid athletic tape, a small roll of underwrap or gauze, and a compact elastic bandage. If you have a known bad ankle, a lace-up or semi-rigid brace is often easier to use correctly than tape when your hands are cold or the wind is throwing grit into everything.
How to tape a sprained ankle step by step
Start below the calf, build support under the heel, then lock the ankle with figure-8 wraps.
Before you begin, take the boot and sock off if you can do so without causing more pain. If the ankle is swelling quickly, consider using an elastic wrap instead of a rigid tape job because swelling can turn a good tape job into a tourniquet.
What you need
- 1 roll of 1.5-inch [3.8 cm] rigid athletic tape
- Underwrap, gauze, or a thin sock layer to protect skin
- Small scissors or a knife for clean tape cuts
- Optional: elastic bandage for swelling after you stop walking
The hiking ankle tape method
- Sit down and put the ankle in a neutral position. Keep the foot at a 90-degree angle, like it is standing flat on the ground. Do not point the toes down.
- Check circulation first. The toes should be warm and normal in color. Ask the injured hiker if they feel numbness or tingling before you start.
- Add a thin protective layer. Use underwrap, gauze, or a thin sock. Bare athletic tape can chew up skin, especially once sweat and dust join the party.
- Place 1 anchor above the ankle. Wrap tape once around the lower leg, 2 to 3 inches [5 to 8 cm] above the ankle bones. Keep it snug, not tight. Do not stretch the tape hard.
- Place 1 anchor around the midfoot. Wrap once around the arch, leaving the heel and toes free. Avoid squeezing the forefoot.
- Add the first stirrup. Start on the inside of the upper anchor, run the tape down under the heel, and pull it up to the outside of the upper anchor. This U-shape supports the outer ankle.
- Add 2 more stirrups. Slightly overlap each one, moving forward and backward by half the tape width. You now have 3 firm strips running under the heel.
- Add a horseshoe strip. Start on one side of the foot anchor, wrap behind the heel, and finish on the other side. This ties the stirrups together.
- Make a figure-8. Start above the inside ankle, cross down over the top of the foot, pass under the arch, then come back up around the ankle. Repeat once if the tape still feels flexible.
- Add heel locks. From the front of the ankle, angle the tape around one side of the heel, under the foot, and back across the front. Repeat on the other side. Heel locks are the strips that make the tape job feel like real support instead of decoration.
- Close the gaps. Add short strips so no loose edges catch on your sock. Do not wrap tight circles again and again around the lower leg.
- Recheck circulation. Toes should stay warm and normal in color. Numbness, tingling, throbbing, or blue toes mean the tape is too tight. Remove it.
- Put the sock and boot back on carefully. Relace the boot with even pressure. Skip aggressive ankle-tight lacing if swelling is building.
- Walk 20 to 30 steps and reassess. If pain gets sharper, the ankle buckles, or the tape causes throbbing, stop and change the plan.
A good tape job feels supportive, not crushing. It should reduce wobble without making your toes pulse. If the tape job feels wrong, it is wrong. Cut it off and start again with less tension, or switch to a softer elastic wrap.
How tight should ankle tape be?
Ankle tape should be snug enough to limit rolling, but loose enough that your toes stay warm, pink, and fully sensitive.
Here is the simple field test: press a toenail until it turns pale, then release. Normal color should return quickly. If color is slow to return, or the foot feels cold, numb, prickly, or swollen below the tape, loosen or remove the tape. Do not try to “walk it off” with a tape job that is cutting off circulation.
Swelling changes the rules. A tape job that felt fine at the trailhead can become too tight 30 minutes later. Check it after the first few minutes of walking, then again at every break. If you are descending, check more often. Downhill steps drive the foot forward and can make a taped ankle feel tighter inside the boot.
Should you use RICE before taping an ankle?
Use rest, ice or cooling when available, compression, and elevation when you can, but do not let the acronym override common sense.
MedlinePlus describes first aid for sprains as rest, ice, compression, and elevation, with care to avoid direct ice on bare skin. On a hike, you may not have a freezer pack, but you can still use the idea:
- Rest: Sit down. Stop loading the ankle while you assess it.
- Cooling: Use a cold stream bottle or wrapped cold pack if available. Do not numb the skin or cause a cold injury.
- Compression: Use an elastic wrap if the ankle is swelling. Rigid tape is for support, not swelling control.
- Elevation: Prop the foot on a pack during breaks.
The Mayo Clinic lists pain, swelling, bruising, limited range of motion, instability, and sometimes a popping feeling as sprained ankle symptoms. Their guidance also says to contact a healthcare professional if you have pain and swelling and think you may have a sprain. See Mayo Clinic’s sprained ankle overview for patient-focused medical detail.
Can you tape an ankle over a sock?
Yes, you can tape over a thin sock in a pinch, but it is less secure than taping over underwrap or directly over protected skin.
On trail, taping over a sock may be the cleanest option. It protects skin, saves time, and avoids sticking tape to hair, dirt, sunscreen, and sweat. The tradeoff is slippage. A sock can shift under the tape, especially on a long descent.
If you tape over a sock, use a thin, smooth hiking sock. Avoid thick, cushioned socks that bunch under the arch. After taping, slide the foot back into the boot and check for folds. A wrinkle under the arch can become a blister fast.
Can you tape an ankle with hiking boots on?
No, not properly.
You need access to the foot, heel, and lower leg to create stirrups, heel locks, and figure-8 support. Taping around the outside of a boot will not stabilize the ankle joint in a useful way. It may also interfere with traction, lacing, and normal boot flex.
If removing the boot causes severe pain, leave the boot in place and treat the situation as potentially serious. Loosen the laces if swelling is increasing. Use trekking poles, splinting materials, an elastic wrap above the boot if appropriate, or outside help rather than forcing a tape job.
How long can you leave ankle tape on?
Leave ankle tape on only as long as you need support, and remove it if pain, swelling, numbness, tingling, or skin irritation starts.
For a hiking injury, think in hours, not days. Tape that gets wet with sweat, rain, or creek water can loosen, rub, and trap grit against the skin. At camp or back at the car, remove it and reassess. If swelling is still rising, switch to a comfortable compression wrap and elevate the ankle.
Do not sleep in a tight athletic tape job. Overnight swelling can make it too tight while you are not paying attention. If you need overnight support, use a medical brace or wrap recommended by a clinician.
When to see a doctor
See a doctor promptly if you cannot bear weight, have severe swelling, feel numbness, see deformity, or the ankle is not improving.
Trail pride is a lousy medical plan. The Wilderness Medical Society has emphasized that in the backcountry it can be hard to tell a sprain from a fracture without imaging, and the practical priority is immobilizing the injury and deciding how to get the person to medical care. See this Wilderness Medical Society backcountry splinting article for wilderness context.
Get medical care if any of these are present:
- You cannot take 4 steps without major pain.
- The ankle or foot looks crooked or misshapen.
- There is numbness, tingling, blue color, or cold skin in the foot.
- Pain is directly over the ankle bones or midfoot bones.
- Swelling is severe or keeps increasing.
- You heard or felt a snap and the ankle feels unstable.
- Symptoms do not improve after a short period of rest and home care.
- You have diabetes, circulation problems, nerve problems, or a previous serious ankle injury.
If you are deep in the backcountry and the hiker cannot safely walk, do not turn a sprain into a rescue epic by pushing forward. Keep them warm, protect the ankle, use a splint if trained to do so, and contact rescue when needed.
What should you pack to tape an ankle on a hike?
Pack a small ankle-care kit if you hike rough trails, travel solo, or have a history of ankle rolls.
You do not need a training-room drawer in your pack. You need enough to stabilize, protect skin, and make a smart exit.
- 1 roll rigid athletic tape, 1.5 inches [3.8 cm] wide
- 1 elastic bandage
- Small underwrap or gauze roll
- Blister pads or moleskin
- Mini scissors or a small knife
- Trekking poles, which double as balance tools during a slow exit
- Emergency communication device for remote trips
- Personal medications and medical info, if relevant
Practice at home once. Seriously. The first time you tape an ankle should not be on slanted gravel while blackflies chew your calves. Run through the steps on a healthy ankle, then cut the tape off and see where it pulled, wrinkled, or felt too tight.
How do you hike after taping a sprained ankle?
Hike out slowly, shorten your stride, use poles, and turn back instead of continuing the planned route.
The tape is there to help you exit, not to save the summit. Keep the injured hiker’s pack as light as possible by sharing weight among the group. Avoid loose rock, wet roots, sidehill trail, and shortcuts. Step flat. No hopping from rock to rock. No jogging the downhill because dinner is waiting.
Use this trail plan:
- Recheck the tape after 5 minutes. Look for swelling below the tape, color change, or new tingling.
- Shorten the route. Pick the safest exit, not the most scenic one.
- Use both trekking poles. They reduce wobble and help control downhill steps.
- Take frequent breaks. Elevate the foot on a pack when stopped.
- Stop if pain climbs. More pain means the plan is failing.
After the hike, get the ankle checked if symptoms are more than mild or if walking remains painful. Repeated ankle sprains can lead to chronic instability, and rehab exercises may be part of recovery. NIH’s ankle sprain guidance notes that strengthening and coordination exercises can help stabilize the foot and reduce repeat sprains.
Related reading
- How to Heal a Sprained Ankle Fast: What Really Works
- How Long Does a Sprained Ankle Take to Heal?
- When to Worry About a Sprained Ankle
- How to Wrap a Sprained Ankle on the Trail
FAQ
What is the best way to tape an ankle for hiking?
The best trail method is an anchor, 2 to 3 stirrups, a horseshoe, a figure-8, and heel locks using rigid athletic tape. This supports the ankle against side-to-side rolling while still fitting inside a hiking boot.
Is tape or an ankle brace better for hiking?
An ankle brace is usually easier and more consistent for hikers with repeat sprains. Tape works well for short-term support, but it takes practice and can loosen with sweat, rain, and long descents.
Can I hike with a mild ankle sprain?
You may be able to hike out on a mild sprain if you can walk without sharp pain and symptoms do not worsen. Do not continue the planned hike; use tape or a brace only to reach a safe exit.
Should I tape a swollen ankle?
Be careful taping a swollen ankle because rigid tape can become too tight as swelling increases. A soft elastic wrap may be safer for compression, and severe or fast-growing swelling needs medical assessment.
What should I do if my toes tingle after taping?
Remove or loosen the tape right away. Tingling, numbness, cold toes, blue color, or throbbing can mean the tape is restricting circulation or pressing on nerves.
Can taping prevent ankle sprains on rocky trails?
Taping may add support for hikers with a history of ankle rolls, but it cannot prevent every sprain. Strong ankles, balance training, well-fitting footwear, trekking poles, and careful foot placement matter too.