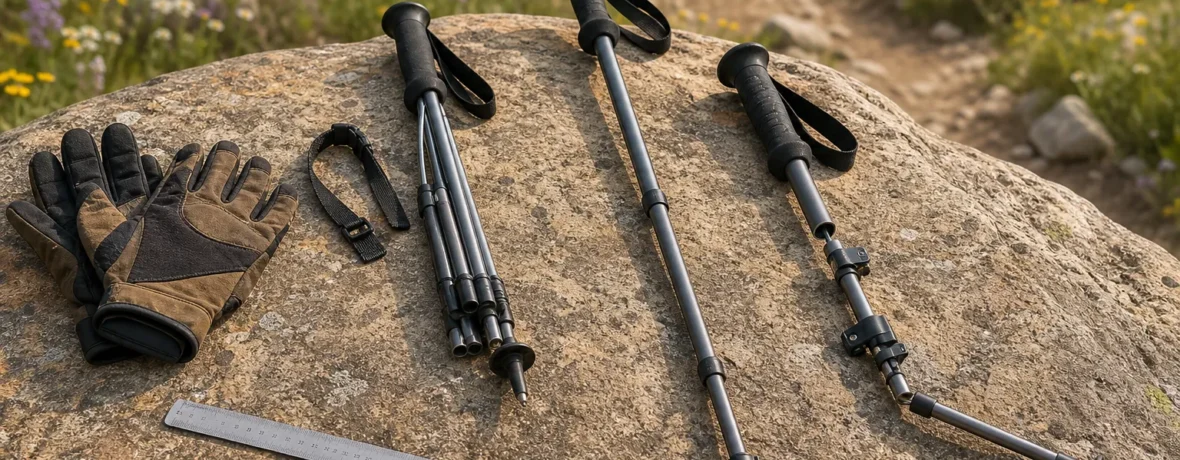
To choose hiking poles, start with length: your elbow should bend near 90 degrees on flat ground. Choose adjustable poles for mixed terrain, lever locks for easy changes, aluminum for durability, carbon for low weight, and grips that feel secure without squeezing.
How to choose hiking poles in 7 steps?
Pick hiking poles by fit first, then match the features to your terrain and pack.
Good poles disappear into your stride. Bad ones clack, slip, rattle, blister your hands, and make every downhill feel like an argument. Here is the clean way to sort the rack without getting buried in product labels.
- Set your flat-ground length. Stand tall in your hiking shoes, hold the grip, and plant the tip near your foot. Your elbow should form a near-right angle.
- Decide fixed or adjustable. Fixed-length poles are light and simple. Adjustable poles are better for steep trails, snow travel, trekking-pole shelters, and shared use.
- Choose a lock style. External lever locks are fast to use with gloves and easy to inspect. Twist locks look clean, but they can be fussier when wet, cold, or dusty.
- Pick the shaft material. Aluminum bends before it fails in many trail mishaps. Carbon fiber saves weight but can crack from side impacts.
- Test the grip. Cork handles feel firm and manage sweat well. Foam is soft and light. Rubber insulates in cold weather but can feel clammy in heat.
- Check packed length. If the poles will ride inside or outside a daypack, folded or collapsed length matters more than you think.
- Match tips and baskets to the trail. Carbide tips bite rock and dirt. Rubber tip covers help on pavement. Bigger baskets help in snow, mud, and sand.
If you want a broad gear primer, REI’s trekking pole guide gives a useful overview of adjustability, locking mechanisms, grip materials, and shaft materials.
What length hiking poles do you need?
Your hiking poles should put your elbow near 90 degrees on flat ground.
That 90-degree bend is the baseline. From there, terrain changes the setting. Shorten the poles by 2 to 4 in. [5 to 10 cm] on long climbs so your shoulders do not hike up toward your ears. Lengthen them by 2 to 4 in. [5 to 10 cm] on descents so you can plant the tips ahead of you without folding at the waist.
| Hiker height | Starting pole length | Best use |
|---|---|---|
| Under 5 ft 1 in. [155 cm] | 39 in. [100 cm] | Shorter fixed poles or compact adjustable poles |
| 5 ft 1 in. to 5 ft 7 in. [155 to 170 cm] | 43 in. [110 cm] | Most day hiking and fast hiking |
| 5 ft 8 in. to 5 ft 11 in. [173 to 180 cm] | 47 in. [120 cm] | General hiking, backpacking, and rolling trails |
| 6 ft and taller [183 cm+] | 51 in. [130 cm] | Tall hikers, long descents, and trekking-pole shelters |
Those numbers line up with Black Diamond’s fixed-pole size chart, which lists 100 cm, 110 cm, 120 cm, and 130 cm sizes by height range in its trekking pole sizing guide. Adjustable poles usually cover a range, so you are not locked into one number.
How do you adjust hiking poles for uphill and downhill?
Shorten them for climbs and lengthen them for descents.
On climbs, a shorter pole keeps the plant closer to your body. That helps you push down through the strap and grip without reaching too far forward. If your shoulders feel bunched or your wrists are cocked upward, the poles are too long.
On descents, a longer pole gives you a third and fourth contact point before your boot lands. Do not stab the trail like you are spearing fish. Place the tip, load it lightly, and step. Smooth beats force.
For sidehilling, set the uphill pole shorter and the downhill pole longer. This is where adjustable poles earn their keep. Fixed poles can work, but you have to choke down on one grip or palm the top of the handle, which gets old on long traverses.
How to choose trekking poles for your trail style?
Match the pole to the hiking you actually do most, not the trip you might take someday.
If your normal trail is a smooth 4-mile [6.4 km] loop, you do not need expedition hardware. If you backpack in the Rockies, cross snowfields, or pitch a shelter with poles, you want stronger locks, a wider adjustment range, and dependable tips.
- Day hiking: Choose adjustable aluminum or carbon-aluminum poles with external locks and comfortable grips.
- Backpacking: Choose sturdy adjustable poles that can handle heavier pack weight, rough descents, and shelter duty.
- Fast hiking and trail running: Choose folding poles with low weight and fast deployment.
- Snow, mud, and sand: Choose poles that accept wider baskets.
- Travel: Choose folding poles or short-collapsing telescoping poles that fit your luggage and pack system.
Are adjustable hiking poles better than fixed-length poles?
Adjustable hiking poles are better for most hikers because they adapt to changing terrain.
Fixed-length poles win on simplicity. There is less to break, less to slip, and less to think about. They are common with runners and fast hikers who know their preferred length and want quick, light gear.
Adjustable poles win everywhere else. You can shorten them on climbs, lengthen them on descents, tune each side on traverses, and set them to a shelter’s required pitch height. They also work better if more than one person may use the same pair.
The tradeoff is weight and complexity. More sections and locks mean more places where grit can build up or a clamp can loosen. That is not a dealbreaker. It just means you should learn how the locks work before you are standing in sleet with cold fingers.
Which trekking pole locks are best?
External lever locks are the best choice for most hikers.
A lever lock clamps the pole section from the outside. You flip it open, slide the shaft, flip it shut. The mechanism is visible, which makes it easy to clean, tighten, and trust. If the pole starts to slip, you usually adjust a small screw or dial and keep moving.
Twist locks expand inside the shaft. They can be light and tidy, but they are less obvious when something goes wrong. Dirt, moisture, or over-twisting can make them annoying. Some hikers like them. Many hikers who hike in cold rain, dust, or gloves prefer levers.
Folding poles use an internal cord system and often add a small length adjustment near the grip. They pack shorter and deploy quickly, but they usually offer less length range than telescoping poles.
| Lock type | Strength | Best for | Watch out for |
|---|---|---|---|
| External lever lock | Fast, visible, glove-friendly | Most hiking and backpacking | Clamp tension may need adjustment |
| Twist lock | Clean profile, often light | Dry trails and casual use | Can be harder to troubleshoot |
| Folding cord lock | Short packed size, quick setup | Travel, fast hiking, running | Limited adjustment range |
Should you choose aluminum or carbon hiking poles?
Choose aluminum for durability and value; choose carbon for lower weight.
Aluminum poles are the sensible pick for rough hiking, rocky trails, backpacking, and anyone who tends to wedge tips between stones. Aluminum can dent or bend, but it often gives warning before total failure.
Carbon fiber poles are lighter and feel crisp in the hand. That lower swing weight matters over long days because you lift and plant each pole thousands of times. The downside is impact behavior. Carbon does not like sharp side blows, crushing, or getting trapped between rocks while your body keeps moving.
There is a middle path: poles with carbon upper sections and aluminum lower sections. The lower section takes the most abuse from rocks, roots, and careless plants. A hybrid build can trim weight while keeping toughness where it counts.
Which grip material should you choose?
Choose cork for all-around comfort, foam for low weight, and rubber for cold conditions.
Grip shape matters as much as material. A grip should let your hand relax. If you have to squeeze to control the pole, the handle is wrong for your hand or the strap is adjusted poorly.
- Cork: Firm, warm enough, good with sweaty hands, and often preferred for long hikes.
- Foam: Soft, light, and comfortable in warm weather, especially with extended lower grip sections.
- Rubber: Durable and insulating in cold weather, but less pleasant for sweaty summer palms.
Extended grips are useful on rolling terrain. Instead of changing pole length every two minutes, you can slide your hand lower on the foam or cork sleeve for short climbs. Simple. Fast. No fiddling.
Do hiking pole straps matter?
Yes, straps matter because they transfer load from your hand to your wrist when used correctly.
Put your hand up through the bottom of the strap, then settle your palm down over the strap and onto the grip. The strap should support your wrist without cutting into it. You should be able to keep a loose hand on the grip while pushing down.
On terrain where a pole could get trapped and pull you off balance, loosen the strap or take your hand out. This is especially smart around boulder fields, creek crossings, brush, and steep off-trail sections. A pole is not worth a twisted wrist.
What tips and baskets do hiking poles need?
Most hikers should use carbide tips for trails and add baskets when the surface gets soft.
Carbide tips bite into dirt, rock, roots, and packed trail. They are noisy on pavement and can scar soft rock, so rubber covers make sense on sidewalks, roads, and sensitive surfaces. Rubber tips also help when traveling because they cover the sharp point.
Baskets stop poles from sinking too far. Small trekking baskets work for three-season dirt and mud. Larger snow baskets spread the load in soft snow. If your baskets screw on, check them before each hike; they can loosen while you walk.
Are shock-absorbing hiking poles worth it?
Shock absorption is optional, not required.
Spring-loaded poles can feel softer on long descents and hard surfaces. Some hikers like that muted feel. Others find it vague, bouncy, or heavier than they want.
If you hike with sore wrists or spend time on packed gravel roads, try shock-absorbing poles in person. If you want precise plants on rocky trails, standard poles usually feel cleaner. Many models with shock absorption let you turn the feature off, which is useful when climbing.
Can hiking poles help with knee pain?
Hiking poles may help some hikers feel steadier on descents, but they are not a medical fix for knee pain.
The research is mixed. A PubMed-indexed study on level walking found that increased pole force did not reduce knee joint compressive force in healthy subjects, while a separate NIH-hosted paper on gait modification reported that short hiking poles with wide placement reduced knee contact force in a specific test condition. The takeaway for hikers is practical: poles can improve balance and confidence, especially downhill, but they do not diagnose or cure joint problems. Read the abstracts at PubMed and the full NIH-hosted paper at PMC if you want the biomechanics.
If your knees hurt, focus on fit, pace, footwear, pack weight, and descent technique. Take shorter downhill steps. Keep your torso stacked over your hips. Plant the poles lightly ahead of you rather than slamming them into the trail.
When to see a doctor
See a doctor if pain changes how you walk, follows an injury, or comes with swelling, redness, fever, instability, or inability to bear weight.
Do not use poles to push through sharp or worsening pain. Mayo Clinic advises seeking urgent care for severe pain after injury, visible deformity, sudden swelling or redness, fever with knee symptoms, inability to bend the knee, or inability to put weight on it; check Mayo Clinic’s knee pain guidance for more detail.
Poles can support balance on the trail, but they cannot tell you whether pain is from overuse, injury, arthritis, infection, or something else. Get medical help when symptoms are severe, persistent, or unusual for you.
What should you check before buying hiking poles?
Check fit, lock security, grip comfort, packed length, basket compatibility, and replacement parts.
Try poles with the shoes and pack you normally use. If you shop online, measure your preferred flat-ground length at home with a broom handle or yardstick before choosing a size range. For adjustable poles, make sure your normal length sits in the middle of the adjustment range, not at the absolute maximum.
- The grips fit your hands without pressure points.
- The straps adjust quickly and lie flat against your wrists.
- The locks do not slip when you load the poles.
- The collapsed or folded length fits your pack.
- The poles accept replacement tips.
- The baskets match your hiking season.
- The pair weight feels reasonable after several minutes of swinging.
- The maximum length works for descents and any trekking-pole shelter you use.
How do you use hiking poles without wasting energy?
Use a natural arm swing and keep your grip relaxed.
Most of the time, your poles should move opposite your feet: right pole with left foot, left pole with right foot. On steep climbs, you can plant both poles together and step up between them. On descents, plant slightly ahead and to the side, then step down under control.
Do not overreach. A pole planted too far forward turns into a brake. A pole planted too far behind you does almost nothing. Keep the tips close enough that your arms swing naturally from the shoulders.
Also, quiet poles are usually efficient poles. If every plant sounds like a drum solo, soften your hands and shorten your stride.
Common mistakes when choosing hiking poles
The biggest mistake is buying poles for one feature while ignoring fit.
- Buying too long: Long poles lift your shoulders and strain your wrists.
- Buying too short: Short poles make you hunch and lose downhill support.
- Ignoring packed length: A pole that will not fit your pack becomes awkward during scrambles or travel.
- Choosing carbon for abuse-heavy trails: Carbon is light, but rocky terrain punishes careless plants.
- Using straps wrong: Gripping hard all day defeats the point of the strap.
- Skipping maintenance: Dirt in locks and sections can cause slipping, sticking, and corrosion.
How should you maintain hiking poles?
Clean and dry the sections after wet, sandy, snowy, or muddy hikes.
Pull telescoping sections apart at home, wipe them down, and let them dry before storage. Do not store adjustable poles clamped tight for months. Relax the locks so the clamps and shafts are not under constant pressure.
Inspect carbide tips before long trips. If a tip is rounded smooth or loose, replace it. Check baskets too. A missing basket is not a disaster on dry trail, but it can be maddening in snow or mud.
If lever locks slip, adjust the tension in small increments. The lever should close firmly, but not so hard that you need both hands and a grimace.
The quick buying verdict
Most hikers should buy adjustable aluminum poles with external lever locks, cork or foam grips, carbide tips, and removable baskets.
That setup is durable, easy to use, and flexible across day hikes, weekend backpacking trips, steep descents, muddy trails, and travel. Go carbon if saving weight matters more than impact toughness. Go folding if packed size matters more than broad adjustability. Go fixed-length only if you already know your ideal size and want the simplest pole possible.
Choose the pole that fits your body first. Then choose the features. The trail will sort out the rest fast.
Related reading
- How to Choose a Sleeping Bag: Temperature Ratings, Fill and Shape
- How to Choose a Hiking Backpack: Volume, Torso Length and Fit
- How to Choose a Tent: Capacity, Seasons and Weight
- How to Use Trekking Poles Properly Uphill and Downhill
FAQ
What is the correct height for hiking poles?
The correct height puts your elbow near 90 degrees on flat ground. Shorten the poles by 2 to 4 in. [5 to 10 cm] for climbs and lengthen them by 2 to 4 in. [5 to 10 cm] for descents.
Are hiking poles and trekking poles the same thing?
Yes, most hikers use the terms interchangeably. A hiking staff usually means one single pole, while hiking poles or trekking poles usually mean a pair.
Are carbon hiking poles better than aluminum?
Carbon is better for low weight, while aluminum is better for durability and value. If you hike rocky trails, backpack with a heavy load, or often wedge poles between rocks, aluminum is the safer pick.
Do beginners need one hiking pole or two?
Two poles are better for balance, rhythm, and spreading effort across both sides of the body. One pole can work for mellow trails, but a pair gives more support on descents, crossings, and uneven ground.
Should hiking poles be longer for downhill?
Yes, lengthen them for downhill travel. A 2 to 4 in. [5 to 10 cm] increase helps you plant the tips ahead of you without bending too far forward.
Can hiking poles go in carry-on luggage?
Usually, do not count on it. Sharp trekking poles are often treated as items that need checked baggage, so check your airline and airport security rules before flying.