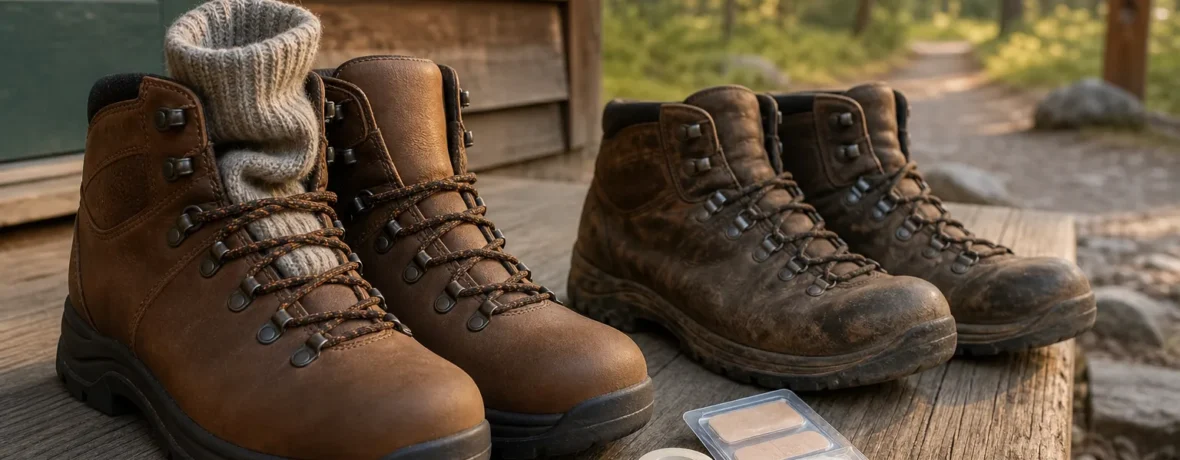
To break in hiking boots, wear them in short, controlled sessions for 1 to 3 weeks before a big hike. Start indoors, add weighted walks, climb stairs, then test them on trail. Leather boots usually need 15 to 30 miles [24 to 48 km]; lightweight synthetic boots need less.
How do you break in hiking boots step by step?
Break them in by increasing time, distance, terrain, and pack weight in that order.
New boots fail on trail for one boring reason: friction. Your feet swell, your socks shift, the boot flexes in new places, and one tiny rub turns into a hot spot. The fix is not suffering through a 12-mile [19 km] hike on day one. The fix is a simple ramp-up.
-
Check the fit before you wear them outside.
Put on the exact socks you hike in. Lace the boots snugly, then stand on a downhill angle if you can. Your toes should not slam the front. Your heel can lift slightly, but it should not slide up and down with every step.
-
Wear them inside for 30 to 60 minutes.
Walk around the house, go up stairs, crouch, and stand still. Indoor wear keeps the outsole clean, so you can still return the boots if the fit is clearly wrong. Pain, numb toes, sharp pressure on the ankle bone, or a crushed pinky toe means the boot does not fit. Breaking in will not fix a bad last.
-
Do two short neighborhood walks.
Start with 1 mile [1.6 km], then 2 miles [3.2 km]. Use your hiking socks, not gym socks. Stop the second you feel a hot spot. Add tape or a blister bandage before skin breaks.
-
Add hills and stairs.
Flat sidewalks do not tell the whole truth. Walk uphill to check heel lift. Walk downhill to check toe bang. Climb stairs to see where the boot creases across the top of your foot.
-
Wear your daypack.
Add 10 to 15 pounds [4.5 to 6.8 kg]. Weight changes your stride and pushes your feet harder into the boot. If you backpack, build toward your real pack weight instead of saving that surprise for the trailhead.
-
Take one short dirt-trail test.
Choose a 3- to 5-mile [5 to 8 km] loop with bailout options. Dirt, rocks, roots, and sidehills reveal rubbing that pavement misses.
-
Adjust the lacing before blaming the boot.
Heel slipping? Use a heel-lock lace. Top-of-foot pressure? Skip the eyelet over the sore spot. Toe bang? Snug the ankle and instep so your foot stays back in the heel cup.
-
Do one final shakedown hike.
Before a long day hike or backpacking trip, wear the boots for a 6- to 8-mile [10 to 13 km] hike with your real socks, insoles, and pack. If your feet finish clean, you are ready.
How long does it take to break in hiking boots?
Most hiking boots take 1 to 3 weeks of regular wear to break in.
The exact timeline depends on the boot’s materials, stiffness, your foot shape, and the trip you are preparing for. A soft day-hiking boot may feel ready after two walks. A full-grain leather backpacking boot can need several short hikes before the upper flexes naturally and the heel pocket settles.
| Boot type | Typical break-in time | Best first trail test |
|---|---|---|
| Trail runners or hiking shoes | 0 to 10 miles [0 to 16 km] | 2 to 4 miles [3 to 6 km] |
| Lightweight synthetic hiking boots | 5 to 15 miles [8 to 24 km] | 3 to 5 miles [5 to 8 km] |
| Leather day-hiking boots | 10 to 25 miles [16 to 40 km] | 4 to 6 miles [6 to 10 km] |
| Stiff backpacking or mountaineering boots | 20 to 40 miles [32 to 64 km] | 5 to 8 miles [8 to 13 km] |
Do not treat those numbers as a dare. Your feet get the vote. If you are getting numbness, bruised toenails, or sharp pressure, more miles may make the problem worse. If the boot feels secure, flexes smoothly, and leaves no hot spots after several loaded walks, it is broken in enough for a moderate hike.
Can you break in hiking boots without getting blisters?
Yes, you can usually prevent blisters if you stop hot spots early and control moisture, friction, and fit.
A blister often starts as warmth, rubbing, or a “grain of sand” feeling. That is your warning. Stop right there. Do not wait for the next viewpoint. Take the boot off, dry the area, smooth the sock, and cover the hot spot with tape, moleskin, or a blister pad.
The American Academy of Dermatology says most blisters heal on their own, and it recommends watching for infection signs such as redness, pus, increased pain, or swelling. The U.S. National Library of Medicine’s MedlinePlus blister guide also warns that draining a blister can raise infection risk.
- Wear hiking socks. Merino wool or synthetic socks manage moisture better than cotton.
- Match sock thickness to boot volume. A thick sock in a tight boot can crush toes; a thin sock in a roomy boot can slide.
- Trim toenails straight across before the trip. Long nails hit the front of the boot on descents.
- Carry a small foot kit. Pack tape, blister bandages, alcohol wipes, a safety pin for gear repairs, and spare socks.
- Change socks when they are soaked. Wet skin is easier to damage.
- Use your real insoles from day one. Swapping insoles later changes boot volume and heel position.
How to break in hiking boots fast without wrecking your feet?
You can speed up the process, but you should not force it with heat, soaking, or marathon walks.
The fastest safe method is frequency. Wear the boots daily in short sessions instead of crushing your feet once. Two 45-minute walks on separate days teach you more than one painful 6-mile [10 km] slog.
- Day 1: Wear boots indoors for 1 hour.
- Day 2: Walk 1 to 2 miles [1.6 to 3.2 km] on pavement.
- Day 3: Rest your feet, then inspect hot spots and adjust lacing.
- Day 4: Walk 2 to 3 miles [3.2 to 5 km] with stairs or hills.
- Day 5: Add a 10-pound [4.5 kg] pack for 2 miles [3.2 km].
- Day 6: Hike 3 to 5 miles [5 to 8 km] on dirt.
- Day 7: Make the call: ready, needs more short walks, or wrong boot.
Skip the old tricks. Do not bake boots in the sun, soak leather until it is floppy, wear them in the shower, or attack pressure points with a hammer. Those moves can damage leather, adhesives, waterproof membranes, midsoles, and your feet. If a boot needs that much drama, the fit is the problem.
Should hiking boots hurt at first?
No, hiking boots should feel firm and new, not painful.
A good boot may feel stiff underfoot. It may crease sharply for the first few walks. The collar may feel rigid around the ankle. That is normal.
Pain is different. Sharp rubbing on the heel, numb toes, burning under the ball of the foot, pinching across the forefoot, or ankle-bone pressure are red flags. A boot can soften, but it will not grow a wider toe box or move a seam away from your bunion.
How should hiking boots fit before you break them in?
They should fit securely from the start, with room for toe swelling and no hard pressure points.
Try boots late in the day, when your feet are closer to their hiking size. Wear the socks you plan to use. If you use orthotics or aftermarket insoles, bring them. Lace both boots, stand up, and walk for several minutes before judging.
- Toe room: You should be able to wiggle your toes, and they should not hit the front on a downhill step.
- Heel hold: A tiny lift is fine; repeated sliding means blisters are coming.
- Midfoot lock: The boot should hold your foot without crushing the arch.
- Forefoot width: Your foot should not spill over the edge of the midsole.
- Ankle collar: The collar should support, not jab.
- Flex point: The boot should bend where your foot bends.
If you are between sizes, test the larger size with lacing changes and a volume reducer before you settle. For backpacking, feet often swell during long days, so a boot that feels “perfectly snug” in the store can feel tight at mile 9 [14 km].
What lacing tricks help break in hiking boots?
Lacing can solve heel slip, toe bang, and top-of-foot pressure without changing boots.
Use lacing as a tuning system. You do not need to lace every eyelet with the same tension. Keep the forefoot comfortable, lock the heel, and adjust the ankle depending on terrain.
| Problem | Lacing fix | What it does |
|---|---|---|
| Heel lift | Heel-lock or surgeon’s knot at the ankle | Holds the heel back in the cup |
| Toe bang downhill | Snug instep, locked ankle | Stops the foot from sliding forward |
| Top-of-foot pressure | Window lacing over the sore area | Removes lace pressure from one spot |
| Forefoot squeeze | Looser lower laces, tighter upper laces | Gives toes room while keeping support |
Re-lace during the hike. Feet swell as the day goes on. Uphill travel may need a looser ankle for range of motion; downhill travel usually needs a tighter ankle to prevent toe slam.
Can leather hiking boots be broken in differently?
Yes, leather boots usually need more gradual wear and better conditioning than synthetic boots.
Leather molds well, but it does not love shortcuts. Wear leather boots in short sessions, flex them naturally, and keep them clean after muddy walks. If the manufacturer recommends a conditioner or waterproofing product, use that type rather than grabbing random oil from the garage.
Heavy oils can over-soften leather and may affect adhesives or breathability. Waterproof-breathable leather boots also need care that does not clog the membrane. Follow the boot maker’s care instructions, especially if you want warranty coverage.
What gear helps break in hiking boots?
The right socks, insoles, and blister supplies make break-in cleaner and safer.
Boots get all the attention, but the system matters. A perfect boot with a wrinkled cotton sock can still chew your heel. A slightly roomy boot with a better insole and dialed lacing may feel excellent.
- Merino or synthetic hiking socks: Choose a thickness that fills the boot without squeezing your toes.
- Liner socks: Useful for some hikers because friction can happen between sock layers instead of on skin.
- Aftermarket insoles: Helpful when you need more arch support or a more secure heel cup.
- Leukotape, kinesiology tape, or paper tape: Use on known hot spots before they blister.
- Blister bandages: Good for cushioning an irritated spot during the walk out.
- Spare socks: Dry socks can save a hike.
The Wilderness Medical Society’s wound management guidance discusses foot blisters as a common wilderness problem and points to proper footwear and keeping feet dry as key prevention steps.
When should you give up on new hiking boots?
Give up when the boot causes repeat pain in the same place after reasonable lacing, sock, and insole changes.
Break-in is not a rescue mission. If the toe box is too narrow, the arch hits wrong, or the heel pocket does not match your foot, the trail will expose it. Return or exchange the boots while you still can.
- Toe numbness that starts quickly and returns every wear
- Bruised toenails after short downhill walks
- Heel blisters in the same spot on every test
- Pressure on ankle bones that does not improve with lacing
- Forefoot squeezing that forces toes together
- Arch pain caused by the boot shape or stock insole
A different size may fix the problem. A wide version may fix it. A different brand may fix it faster. Boot lasts vary, and your foot does not owe loyalty to any logo.
When to see a doctor
See a doctor if a blister or foot injury shows signs of infection, severe pain, spreading redness, pus, warmth, swelling, fever, or red streaks.
Most small friction blisters heal with basic care, but you should not ignore worsening symptoms. The Mayo Clinic’s blister first-aid guidance says to seek medical care for signs of infection such as spreading skin color changes, increasing pain, pus, or warm skin.
Get medical advice sooner if you have diabetes, poor circulation, immune suppression, or a blister that came from a burn, allergic reaction, frostbite, or unknown cause. Do not self-diagnose a serious foot problem from a hiking article. If your foot pain changes your gait, lasts after rest, or keeps returning in different footwear, get checked.
Related reading
- How to Clean Hiking Boots Without Ruining Leather or Membranes
- Hiking Shoes vs Hiking Boots: Which Should You Buy?
- How Should Hiking Boots Fit? The Thumb Rule and Other Checks
- How to Lace Hiking Boots: 5 Lacing Methods That Stop Heel Slip
FAQ
Can I wear new hiking boots on a long hike?
No, not unless you have already tested them on shorter walks and a real trail. For a long hike, give yourself at least one 6- to 8-mile [10 to 13 km] shakedown with your actual socks, insoles, and pack.
Do hiking boots stretch as they break in?
Leather boots can soften and mold slightly, but they will not stretch a full size. Synthetic boots usually change less, so the fit you feel on day one is close to the fit you will have later.
Should I get hiking boots a half size bigger?
Sometimes, yes, especially if your toes hit the front on descents or your feet swell on longer hikes. The better rule is to fit the boot with hiking socks, enough toe room, and secure heel hold rather than chasing a specific half-size increase.
Can I break in hiking boots by wearing them around the house?
Yes, but house wear is only the first step. It helps you catch obvious fit problems while the boots are still clean, but you still need hills, stairs, dirt, and pack weight before a real hike.
What is the fastest safe way to break in boots?
The fastest safe way is daily short wear with gradual increases in distance, hills, and pack weight. Do not soak, heat, or force the boots; those shortcuts can damage the boots and your feet.
Why do my heels blister in new hiking boots?
Heel blisters usually come from heel lift, wet socks, poor sock fit, or a heel cup that does not match your foot. Try a heel-lock lace, dry hiking socks, and early taping; if the same blister returns every walk, the boot may be the wrong shape.