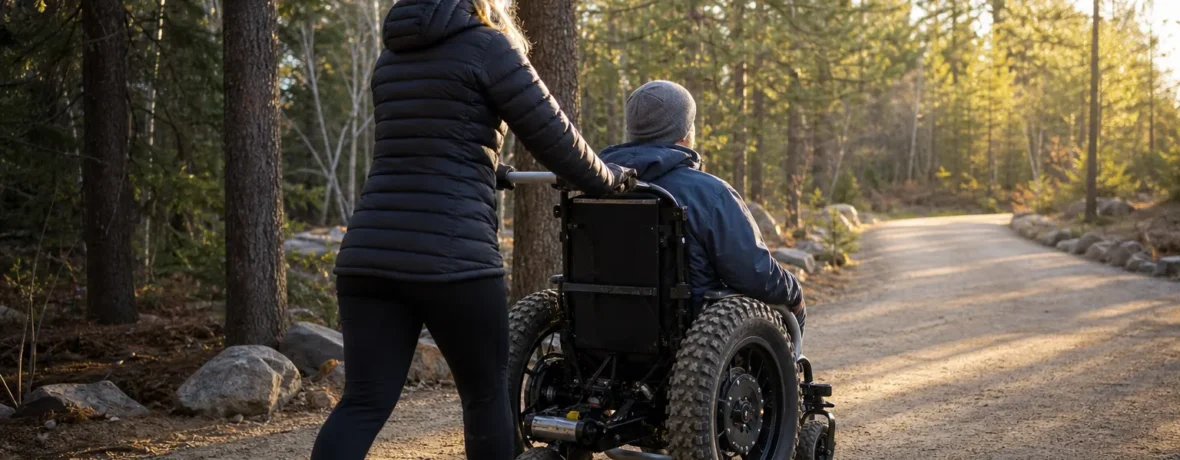
Adaptive hiking is possible on day one if you match 5 things before you go: trail surface, grade, distance, gear, and support. Start with a route under 1 mile [1.6 km], firm footing, known rest stops or bailout points, and a clear turn-around plan.
What is adaptive hiking?
Adaptive hiking is hiking shaped around the hiker, not the other way around.
That can mean a manual wheelchair on a paved nature path, an all-terrain chair on packed gravel, trekking poles for balance, a white cane on a boardwalk, a service dog on a forest trail, a sensory-friendly route at a quiet hour, or a short walk with planned sitting breaks. The point is access, choice, and good information.
Disabled hikers are not one group with one set of needs. A hiker with low vision may care most about trail edges, contrast, and verbal wayfinding. A hiker with chronic pain may need benches and a shorter loop. A hiker using a mobility device needs surface, width, grade, and turn-around options before leaving the house.
The best trips begin with plain facts: distance, surface, slope, shade, parking, restrooms, cell service, and what happens if the route stops working halfway through. That is not overplanning. That is smart hiking.
How do you find accessible trails before you leave home?
Look for trail pages that publish surface, grade, width, length, and current conditions.
Start with official land manager pages: national parks, state parks, county parks, city open-space districts, wildlife refuges, and national forests. Search the park name plus “accessibility,” then read the page for the exact trail or trailhead. Photos help, but numbers help more.
The U.S. Access Board says new trailhead information signs for covered trails should include length, surface type, tread width, grade, and cross slope, which are the details that let you decide if a route fits your body and gear. Use that same standard when you read web pages, maps, or park handouts: if the page skips those details, call the visitor center or ranger station before you drive. See the U.S. Access Board outdoor developed areas guidance for the official language.
- Pick the trail type first. Paved path, boardwalk, packed crushed stone, dirt, sand, roots, or rock all feel different under wheels, braces, canes, feet, and paws.
- Check grade. A short steep pitch can stop a trip faster than a long gentle path. Look for average grade, maximum grade, and cross slope.
- Confirm distance both ways. A 0.5-mile [0.8 km] out-and-back is 1 mile [1.6 km] total.
- Study parking and restrooms. The trail may work, but the approach from the parking lot may not.
- Check recent conditions. Snow, washouts, downed trees, soft shoulders, closed boardwalks, and construction can change access overnight.
- Call with specific questions. Ask: “What is the narrowest point?” “Are there steps?” “Is the surface firm after rain?” “Is there a bench or turn-around spot?”
What trail features matter most for disabled hikers?
Surface, slope, width, and recovery options matter most.
Pretty views are great. A firm surface is better. If you are choosing between two routes, choose the one with clearer access information, easier bailouts, and fewer surprises. A trail that looks mellow in photos may hide a tilted boardwalk, loose gravel, or a lip at a bridge entrance.
| Feature | What to check | Why it matters |
|---|---|---|
| Surface | Asphalt, concrete, boardwalk, packed gravel, dirt, sand, roots, rock | Firm, stable surfaces reduce slipping, sinking, vibration, and fatigue. |
| Grade | Average grade and steepest section | Short steep sections can be harder than longer gentle mileage. |
| Cross slope | Side tilt across the tread | Side tilt can pull wheelchairs, scooters, walkers, ankles, and knees off line. |
| Width | Narrowest point, passing places, bridge width | Enough room lets hikers pass, turn, rest, or retreat without stress. |
| Rest options | Benches, shade, overlooks, flat pullouts | Planned pauses make the trip longer, calmer, and safer. |
If the trail description uses vague words like “easy” or “family friendly,” keep digging. Easy for whom? A smooth 2-mile [3.2 km] paved loop may be perfect for one hiker and too exposed for another. A dirt path with roots may work for a strong all-terrain chair user and fail for a cane user with balance issues. Match details to the person, not to a difficulty label.
What gear helps disabled hikers hike farther or safer?
The right gear reduces friction, fatigue, pain, and uncertainty.
Adaptive gear does not need to be flashy. Sometimes the best piece of kit is a folding foam pad for sitting, a brighter hat for visibility, or a phone mount that keeps navigation within reach. Start with the barrier you need to solve, then pick the tool.
| Need | Gear to consider | Trail notes |
|---|---|---|
| Mobility support | Trekking poles, forearm crutches, rollator with outdoor wheels, manual chair, power chair, all-terrain chair | Test braking, turning radius, battery range, and tire performance before the hike. |
| Balance and traction | Rubber pole tips, grippy shoes, ankle braces, ice traction when conditions allow | Wet boardwalks and dusty rock can be slick even on short trails. |
| Vision access | White cane, high-contrast tape on poles, audio navigation, sighted guide plan | Trail edges, drop-offs, low branches, and mixed surfaces need clear communication. |
| Energy management | Cooling towel, sun umbrella, sit pad, hydration bladder, easy-open snacks | Keep food, water, and cooling tools reachable without unpacking everything. |
| Communication | Whistle, phone, battery bank, written emergency card, satellite messenger where cell service is weak | Do not bury emergency tools at the bottom of a pack. |
If you use a wheelchair, scooter, or powered mobility device, check the manufacturer’s limits for slope, water, sand, battery range, and temperature. Trail terrain can eat battery faster than pavement. Cold weather can do the same. Bring more range than the map suggests.
If you use trekking poles, adjust them on flat ground before you start. For many hikers, a slightly shorter pole helps on climbs and a slightly longer pole helps on descents, but comfort comes first. Wrist straps should help you control the pole, not trap you during a fall.
How do you plan your first adaptive hike?
Choose a short, known route and build from there.
A first trip should feel almost too easy on paper. That is a feature, not a flaw. You are testing the trail, the gear, the pace, the parking, the restroom situation, the weather, and the support plan all at once.
- Set one goal. Reach a viewpoint, practice a new chair, try 20 minutes of walking, or enjoy lunch outside. One goal keeps the day clean.
- Choose a short route. Start under 1 mile [1.6 km] total unless you already know your gear and endurance on similar terrain.
- Pick a mild weather window. Heat, cold, wind, and rain add work. Shade and calm air can matter more than scenery.
- Make the bailout plan first. Know where you can turn around, who can help, and how you will get back to the vehicle.
- Share the plan. Send the trail name, parking area, start time, expected return time, and group contact numbers to someone off trail.
- Use a pace that feels slow at the start. The first 10 minutes should not drain the next 50.
- Stop before the problem gets big. Hot spots, dizziness, pain spikes, sensory overload, battery drop, or rising anxiety all deserve an early pause.
Turn-around discipline is freedom. If the plan says turn around at 30 minutes, turn around at 30 minutes. The mountain, marsh, canyon, or neighborhood greenway will still be there.
How should hiking partners help without taking over?
Ask first, then follow the hiker’s answer.
Helpful does not mean grabbing a chair, pulling an arm, steering a dog, or narrating every rock without being asked. Disabled hikers know their bodies and equipment. Partners should offer support without taking control.
- Ask, “Do you want help here?” before touching a person or mobility device.
- Use the words the hiker uses for their disability, gear, pace, and limits.
- Walk at the agreed pace, not the speed you wish the group could hold.
- Give specific trail information: “Root across the left half of the trail in 6 ft [1.8 m],” not “Be careful.”
- Keep breaks normal. No drama. No pity.
- Respect a turn-around call the first time it is made.
For groups, name roles before the hike: lead, sweep, navigator, medical contact, driver, and person carrying shared gear. Clear roles reduce chatter when a decision needs to be made fast.
What should you pack for an adaptive day hike?
Pack for comfort first, then repair, weather, and communication.
The exact kit changes with disability, season, route, and group size. Keep the items you may need quickly in reachable pockets, not sealed inside a pack someone else is carrying.
- Water in a bottle, bladder, or cup system you can use without strain
- Salty and sweet snacks that are easy to open
- Sun hat, sunglasses, sunscreen, and lip balm
- Warm layer and rain shell, even for short trips
- Personal medications and medical supplies you already use, packed as directed by your clinician
- Small first-aid kit with blister care, bandages, gloves, and any personal care items
- Repair kit for your gear: tire pump, patch kit, Allen key, duct tape, zip ties, spare tips, or charging cable
- Phone, battery bank, and offline map
- Whistle and emergency contact card
- Seat pad, cooling towel, hand warmers, or sensory tools if those help you regulate
- Waste bags for service animal cleanup if applicable
If your pack rides on a wheelchair, scooter, or walker, secure it so it cannot swing into wheels, brakes, or controls. If another person carries your supplies, keep critical items on your body or mounted where you can reach them.
What should you know about passes, service animals, and park rules?
Check official rules for the exact park or forest before you go.
For federal recreation lands, the National Park Service says the Access Pass is a free lifetime pass for U.S. citizens or permanent residents medically determined to have a permanent disability; it covers entrance fees at participating federal lands, as of November 2026. Read the current details on the National Park Service accessibility page before relying on it for a trip.
Service animal rules are also site-specific in practice. The NPS states that only dogs are classified as service animals under its national park policy, and the dog must perform a specific task related to a person’s disability; emotional support or comfort animals are not service animals, as of November 2026. Check the NPS service animals page and the individual park page before visiting.
Permits, shuttle rules, beach access routes, cave rules, seasonal closures, fire restrictions, and construction closures change. If a rule affects whether you can safely hike, verify it on the official site the week you go and again the morning of the trip.
When to see a doctor
Talk with a clinician when symptoms, conditions, or terrain raise your risk.
Outdoor movement can be part of a healthy routine for many disabled adults. The CDC says adults with disabilities should aim for 150 minutes of moderate-intensity aerobic activity per week when possible, or be as active as their abilities allow and avoid inactivity. Use the CDC disability and physical activity guidance as a starting point, then ask your clinician how it applies to your body.
Get medical advice before increasing hike distance, heat exposure, altitude, pack weight, or exertion if you have a heart condition, breathing condition, diabetes, seizure history, fainting history, recent surgery, new mobility changes, or any symptoms that are not normal for you.
On trail, stop and seek help if symptoms feel severe, sudden, or unfamiliar. For heat illness, Mayo Clinic advises contacting a healthcare professional if symptoms get worse or do not improve after first-aid steps; read the Mayo Clinic heat exhaustion first-aid guidance before hot-weather hiking. Call emergency services for confusion, loss of consciousness, chest pain, severe shortness of breath, stroke symptoms, or any situation that feels life-threatening.
Related reading
- A Walk in the Woods: Bill Bryson's AT Story vs Reality
- Kids' Hiking Boots: How to Size and When to Buy
- Mountain Porters: The People Who Carry Expeditions
- Teaching Leave No Trace to Kids
FAQ
Can wheelchair users go hiking?
Yes, wheelchair users can hike when the trail, surface, grade, chair, and support plan match the user. Paved paths, firm gravel routes, boardwalks, and some all-terrain trails can work well, but every route needs a current access check.
What makes a trail accessible?
A trail is more usable when it has a firm surface, manageable grade, limited cross slope, enough width, and clear trailhead information. The best descriptions include length, surface, tread width, grade, cross slope, restrooms, parking, and current hazards.
How long should a first adaptive hike be?
Start under 1 mile [1.6 km] total unless the hiker already knows they can handle more on similar terrain. The first trip is a systems test for gear, pacing, weather, fatigue, communication, and turn-around decisions.
Do I need special gear to start?
No, not always. Many hikers start with what they already use daily, then add targeted gear such as trekking poles, a sit pad, a cooling towel, outdoor wheels, a battery bank, or a repair kit.
How can I help a disabled hiking partner?
Ask what help they want before the hike, then ask again before touching them or their equipment on trail. Give specific information, respect pacing, and treat a turn-around decision as final.
Are service animals allowed on hiking trails?
Often yes, but rules depend on the land manager and the site. Check the official park, forest, refuge, or local agency page before you go, especially for caves, shuttles, sensitive wildlife areas, beaches, and seasonal restrictions.