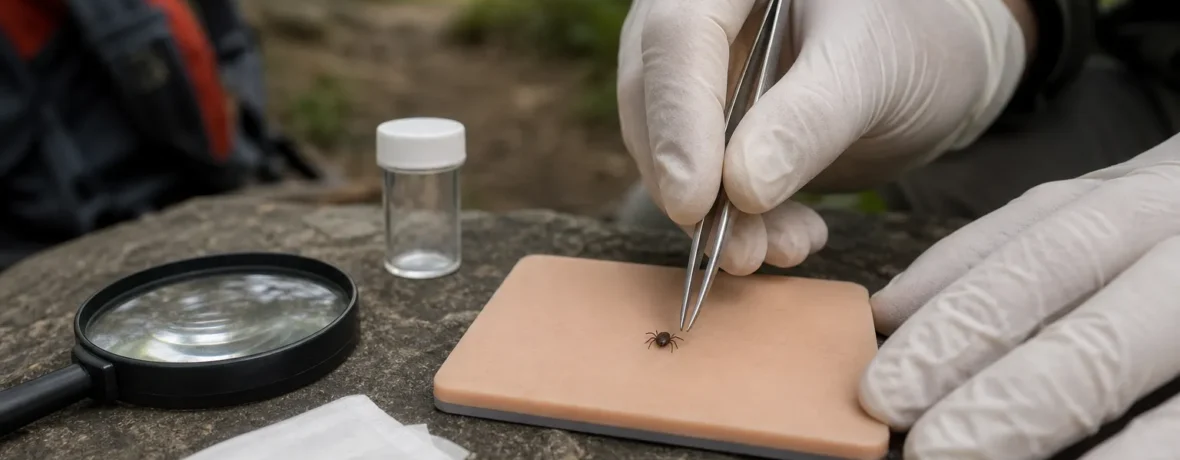
Here’s how to remove a tick: use clean, fine-tipped tweezers, grab the tick as close to your skin as possible, and pull straight up with steady pressure. Do not twist, squeeze, burn, or coat it. Clean the bite and your hands right away, then watch for rash, fever, or flu-like symptoms.
How to remove a tick step by step
Remove it as soon as you find it.
A tick is not a splinter, and this is not the moment for campfire tricks. The goal is simple: get the whole tick off your skin without squeezing its body or making it regurgitate into the bite. The CDC tick removal guidance says plain tweezers work well, especially fine-tipped tweezers.
- Stay calm and get light on the bite. Use a headlamp, phone light, or daylight. If the tick is behind your knee, in your hairline, or on your back, ask someone steady-handed to help.
- Use clean, fine-tipped tweezers. If you have alcohol wipes, clean the tweezer tips first. A dedicated tick key can work for some ticks, but fine-tipped tweezers give you the best control on tiny nymphs.
- Grab the tick close to the skin. Aim for the mouth area, not the swollen body. Get right down to where the tick enters the skin.
- Pull upward with steady, even pressure. No twisting. No yanking sideways. Think slow, firm, straight pull.
- Do not crush the tick with your fingers. Drop it into a sealed bag or container, wrap it in tape, put it in alcohol, or flush it.
- Clean the bite and your hands. Use soap and water, rubbing alcohol, or hand sanitizer.
- Check the rest of your body. One tick on your leg can mean another in your sock line, waistband, scalp, armpit, or behind your knee.
- Write down the details. Note the date, where you were hiking, where the bite was on your body, and how long the tick may have been attached.
If you are miles from the trailhead and do not have tweezers, use what you have. The CDC says regular tweezers or fingers can be used if fine-tipped tweezers are not available, but avoid squeezing the tick’s body. Use a tissue, bandana, plastic bag, or glove as a barrier if fingers are your only option.
What should you use to remove a tick?
Use fine-tipped tweezers if you have them.
Pack a tiny pair in your first-aid kit. They weigh next to nothing and beat improvising with a knife tip, fingernail, or credit card edge. For hiking, the best tick-removal setup is small, cheap, and boring:
- Fine-tipped tweezers
- Alcohol wipes
- Small zip-top bag or empty pill bottle
- Hand sanitizer
- Phone for taking a photo and logging the date
Do not wait until you get home if you can remove the tick safely on trail. Delaying removal can raise your risk from tickborne disease. That does not mean every tick bite makes you sick. It means time matters, and a two-minute stop beside the trail is smarter than pretending you did not see it.
What should you not do when removing a tick?
Do not burn, smother, twist, paint, or squeeze it.
Old tick advice refuses to die. You may hear that a hot match makes the tick back out, or that petroleum jelly, nail polish, peppermint oil, gasoline, or alcohol will make it let go. Skip all of it. The CDC warns against petroleum jelly, heat, nail polish, and similar substances because they may irritate the tick and increase the chance of infected fluid entering the skin.
| Method | Use it? | Why |
|---|---|---|
| Fine-tipped tweezers | Yes | Best control near the skin, especially for tiny ticks. |
| Tick key or tick spoon | Sometimes | Useful for larger ticks, but harder on very small nymphs. |
| Hot match, lighter, or flame | No | Can burn you and may irritate the tick. |
| Petroleum jelly, nail polish, oil, alcohol on attached tick | No | Slower than pulling it out and not recommended. |
What if the tick head stays in?
Try to remove visible mouthparts, but do not dig.
People usually say “the head stayed in,” but what often remains is the tick’s mouthparts. If you can grab the piece easily with clean tweezers, remove it. If not, leave it alone and let the skin heal. Digging with a needle or knife can irritate the bite and raise the chance of a skin infection.
The NIH MedlinePlus tick removal page advises getting medical help if you cannot remove all parts of the tick. That is especially sensible if the spot becomes increasingly painful, swollen, warm, or drains fluid.
After any tick removal, expect the bite spot to look annoyed for a bit. A small red bump right where the tick was attached can happen from local irritation. That is different from a spreading rash, a bull’s-eye pattern, or a rash paired with fever, chills, headache, joint pain, or fatigue.
How do you clean a tick bite after removal?
Wash the bite and your hands right away.
Use soap and water first if you have it. On trail, use hand sanitizer or an alcohol wipe until you can wash properly. Clean the tweezers too before they go back in your kit.
Then keep the area easy to inspect. Do not bury it under heavy ointment and tape unless the skin is bleeding or rubbing against clothing. A small adhesive bandage is fine if the bite sits under a pack hipbelt, sock cuff, or boot collar. Change it when dirty or wet.
Take a clear photo of the bite on day one. Add another photo if it changes. A photo gives your healthcare provider useful context if symptoms show up later. It also keeps your brain from doing what brains do after a long hike: guessing.
Should you save the tick after removing it?
Save it briefly if you can, but do not rely on tick testing.
A saved tick may help a clinician identify the species, which can matter because different ticks carry different risks in different regions. Drop the tick into a sealed bag or small container. Add the date and location. If you do not want to keep it, dispose of it safely.
Do not crush it between your fingers. That is messy and unnecessary. Also, do not make treatment decisions based on a commercial tick test. The CDC says tick testing is generally not recommended for deciding care, because a positive tick result does not prove you were infected and a negative result does not rule out another bite.
How long does a tick need to be attached to make you sick?
Remove ticks fast because risk can rise with attachment time.
There is no trail-friendly stopwatch that tells you “safe” or “not safe.” Some disease risks are linked to longer attachment, and the Wilderness Medical Society notes that Lyme disease risk is tied to how long an infected blacklegged tick has been attached, with prompt removal recommended once a tick is discovered. You can read the clinical guidance in the Wilderness Medical Society tick-borne illness guideline.
Here is the practical version: do tick checks during the day, not just at bedtime. Brushy trail? Stop at lunch and check sock lines. Sitting in leaf litter? Check before you get back in the car. Hiking with kids or a dog? Check them too. Ticks can ride indoors on clothing, packs, and pets, then attach later.
Where should you check for ticks after hiking?
Check warm, tucked-away places first.
Ticks crawl. They often head for protected spots where clothing presses against skin or hair gives them cover. After a hike through grass, brush, leaf litter, or wooded terrain, do a full-body check.
- Scalp and hairline
- Behind and inside the ears
- Neck and collar line
- Armpits
- Inside the belly button
- Waistband and underwear line
- Groin
- Back of knees
- Sock line and between toes
The CDC tick prevention guidance recommends showering within 2 hours of coming indoors, checking gear and pets, and drying dry clothes on high heat for 10 minutes to kill ticks. If clothes are damp, they may need more time. If you need to wash them first, hot water is the better choice.
When to see a doctor
See a doctor if symptoms appear or removal does not go cleanly.
Most tick bites do not require an emergency room visit. Still, do not shrug off symptoms after a bite. Contact a healthcare provider if you develop a rash, fever, chills, headache, muscle aches, joint pain, swollen lymph nodes, unusual fatigue, or flu-like symptoms in the days or weeks after removing a tick. Tell them when the bite happened and where you were hiking.
Seek urgent help right away for trouble breathing, chest pain, heart palpitations, paralysis, or a severe headache. Those are not “wait and see” symptoms. The Mayo Clinic tick bite first aid guidance also flags emergency symptoms and recommends prompt, careful removal.
Ask a clinician whether preventive antibiotics are appropriate if the tick may have been attached for a long time, if you were in a Lyme disease area, or if you are unsure what kind of tick bit you. Do not self-treat with leftover medication. No guessing, no sharing pills, no trail-medic heroics.
How can you prevent tick bites on your next hike?
Stack several small habits instead of trusting one trick.
Tick prevention starts before your boots hit dirt. You do not need to hike scared. You do need to hike aware, especially in grassy, brushy, and wooded areas.
- Treat clothing and gear with 0.5% permethrin. Use it on boots, pants, socks, gaiters, and packs. Follow the label and let treated gear dry fully before wearing it.
- Use an EPA-registered repellent on exposed skin. Options include DEET, picaridin, IR3535, oil of lemon eucalyptus, PMD, and 2-undecanone. Follow the product label.
- Walk in the center of the trail. Avoid brushing against tall grass, leaf litter, and trailside vegetation when you can.
- Wear light-colored clothing. Dark ticks are easier to spot against pale pants or socks.
- Tuck pants into socks in heavy tick country. It looks goofy. It works as a barrier.
- Check during breaks. A 30-second sock-line scan beats finding an attached tick the next morning.
- Handle clothes fast after hiking. Dry clothes on high heat, then wash if needed.
Dogs need checks too. Look around ears, collar, armpits, groin, tail, and between toes. Talk with a veterinarian about tick prevention for pets; do not use human repellents on animals unless your vet says to.
Related reading
- What Does a Tick Bite Look Like? Photos and Warning Signs
- When to Worry About a Tick Bite
- Deer Tick vs Dog Tick: How to Tell
- How to Prevent Tick Bites While Hiking
FAQ
Can you remove a tick with your fingers?
Yes, if you have no tweezers, but protect your fingers and avoid squeezing the tick. Use tissue, gauze, a plastic bag, or a glove, then grasp close to the skin and pull steadily upward.
Should I twist a tick to get it out?
No. Pull straight up with steady, even pressure. Twisting or jerking can break off the mouthparts and leave pieces in the skin.
Do I need antibiotics after every tick bite?
No. Antibiotics are not needed after every tick bite. Ask a healthcare provider if the bite may be high risk, especially if the tick was attached for a long time or the bite happened in a Lyme disease area.
What does a tick bite look like after removal?
A small red bump at the bite site can happen from irritation. Call a healthcare provider if the redness spreads, a bull’s-eye-type rash appears, or you develop fever, chills, headache, joint pain, or flu-like symptoms.
Can ticks bite through clothing?
Ticks usually crawl under clothing to reach skin rather than bite through fabric. Tucking pants into socks, wearing gaiters, and treating clothing with permethrin help block that crawl path.
How soon should I check for ticks after hiking?
Check as soon as you can, and shower within 2 hours of coming indoors when possible. Do another careful check before bed, especially around the scalp, waistband, groin, armpits, and backs of knees.