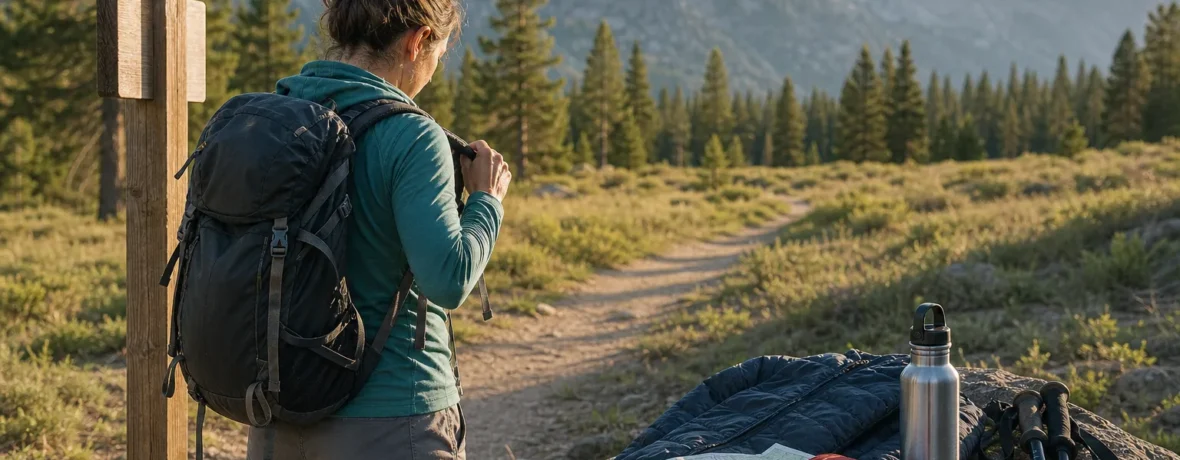
To prepare for a hiking trip, match the route to your fitness, check weather and trail conditions 24 hours before you go, pack the 10 essentials, carry 0.5-1 liter of water per hour, break in footwear first, and leave your plan with someone who will notice if you are late.
How do you prepare for a hiking trip step by step?
Prepare in this order: route, weather, body, gear, food, water, safety plan.
Do not start with the backpack. A shiny new pack will not save a bad plan. Start with the walk itself: distance, elevation gain, terrain, exposure, trailhead access, daylight, and your real pace when the trail gets steep.
- Pick a route you can finish with margin. For a first or early-season hike, choose a trail shorter than your best guess. Add elevation gain to your decision, not just mileage. A 5-mile [8 km] hike with 2,000 feet [610 m] of climbing can feel harder than a flat 10-mile [16 km] path.
- Check the official trail source. Look at the park, forest, state land, or local agency page for alerts, closures, fire restrictions, road access, and permit language. If you need a permit, reserve it before building the rest of the plan.
- Read the weather like a hiker. Check temperature, wind, precipitation, thunderstorm timing, smoke, heat index, and overnight lows if there is any chance you will be out late.
- Plan your timing backward. Choose your turnaround time before you leave home. If sunset is 7:30 p.m., you do not want to be “almost there” at 6:45 p.m. with a dead phone and tired legs.
- Pack the essentials, then trim comfort items. The National Park Service 10 Essentials list includes navigation, sun protection, insulation, lighting, first aid, fire, repair kit, nutrition, hydration, and emergency shelter, as of November 2026.
- Tell a real person your plan. Send the trail name, trailhead, route, vehicle description, start time, expected finish time, and when to call for help.
- Do a final check at the trailhead. If the weather is worse than expected, the road is sketchy, or your body feels off, shorten the day. Turning around early is a skill.
How to prepare for a hike when you are new?
Start smaller than your ego wants.
For your first few hikes, pick well-marked trails with reliable cell service nearby, modest elevation gain, and an easy bail-out point. Stay away from exposed ridges, desert heat, snow travel, river crossings, and routes that require route-finding. Those can come later.
A simple starter target is 3-5 miles [5-8 km] with less than 1,000 feet [305 m] of gain. If you already walk, run, cycle, or lift regularly, you may handle more. Still, hiking is sneaky. Downhill miles load your knees. Loose rock changes your stride. Heat drains you faster than a treadmill ever will.
Use the “could I repeat this tomorrow?” test. A good beginner hike should leave you tired, dirty, and happy, not limping into work two days later.
- Choose a popular trail, not a lonely cross-country line.
- Go with a partner for the first few trips if you can.
- Start early so you are not racing sunset.
- Wear broken-in shoes, not brand-new boots.
- Carry one extra warm layer, even if the parking lot feels mild.
- Download an offline map before you lose service.
What gear do you need for a day hike?
You need enough gear to stay found, warm, hydrated, fed, visible, and sheltered if the day goes sideways.
That does not mean carrying a 40-pound [18 kg] load for a mellow loop near town. It means packing the right small items before you need them. A headlamp weighs little. So does a whistle. So does a rain shell. They feel unnecessary until they are the only things that matter.
| Category | Pack this | Why it matters |
|---|---|---|
| Navigation | Offline map, paper map or backup, compass skills | Phones die, break, overheat, and lose signal. |
| Weather protection | Rain shell, warm layer, hat, gloves for cold starts | Wind and sweat can chill you fast during stops. |
| Water and food | Water, electrolytes if needed, salty snacks, lunch | Energy dips lead to sloppy footing and poor choices. |
| Emergency basics | Headlamp, first aid kit, lighter, repair tape, whistle, emergency blanket | Small failures get bigger after dark. |
Keep your first aid kit simple but useful: blister care, bandages, gauze, medical tape, tweezers, personal medications, and any items your doctor has told you to carry. Do not bury it at the bottom of your pack. If you need it, you want it now.
For clothing, skip cotton next to skin when sweat or cold weather is likely. Wear synthetic or wool layers that dry faster. Bring sunglasses and sunscreen for high-elevation, snow, desert, and exposed ridge hiking. Sunburn can happen on cool days.
How much water and food should you bring hiking?
Plan on 0.5-1 liter of water per hour, then adjust for heat, effort, altitude, shade, and your body.
That range is practical for many day hikes, but it is not a medical rule. Hot desert trails, humid climbs, high altitude, and long exposed ridges can push your needs higher. A cool forest walk may require less. If there is no reliable water source, carry what you need from the start.
Do not count on a blue line on a map. Seasonal creeks dry up. Springs get buried. Filters clog. If you plan to treat water, bring the filter, tablets, or purifier you actually know how to use.
For food, bring more than your “normal lunch.” Hiking burns energy steadily, and appetite can lag behind effort. Pack foods you will eat while moving or during short breaks.
- Salty snacks: pretzels, crackers, trail mix, jerky, salted nuts.
- Quick energy: bars, dried fruit, chews, tortillas with nut butter.
- Real lunch: sandwich, wrap, hard cheese, hummus pack, tuna pouch.
- Backup calories: one extra bar or snack you do not touch unless the day runs long.
Drink before you feel wrung out. Eat before you feel hollow. Small, steady intake beats a giant stop after you are already dragging.
How should you train your body before a hiking trip?
Train by walking uphill, carrying weight gradually, and strengthening your legs and core.
If the trip is one month away, build consistency first. Three or four brisk walks per week help more than one heroic weekend sufferfest. Add stairs, hills, or treadmill incline. Then add a loaded pack. Start light, then build toward the weight you will carry on trail.
Your body needs specific practice. Flat neighborhood walks help your engine, but hiking asks for climbing strength, downhill control, balance, ankle stability, and foot toughness. The downhill part surprises people. Quads, knees, and calves take a beating when the trail drops for miles.
- 2-4 weeks out: walk 30-60 minutes, 3-4 times per week.
- 1-3 weeks out: add hills or stairs twice per week.
- 1-2 weeks out: do one practice hike with your loaded pack.
- 3-5 days out: reduce hard efforts; let your legs freshen up.
- Day before: sleep, hydrate normally, and avoid new shoes or new workouts.
Foot prep matters. Wear the socks and shoes you will use on the trip during training walks. Hot spots are warnings. Stop and adjust laces, socks, or insoles before a hot spot becomes a blister.
How do you plan a hiking route safely?
Build your route around distance, elevation, terrain, daylight, water, weather, and exit options.
A safe route is not always the shortest route. A trail with clear signs, shade, water options, and steady footing may be safer than a shorter scramble with loose rock and no easy turnaround point. Look at the whole day, not just the summit or viewpoint.
Check these route details before you leave:
- Total distance: include side trips, road walks, and the walk from overflow parking.
- Elevation gain: 1,000 feet [305 m] of gain changes the day.
- High point: higher elevation can mean colder wind, snow patches, and altitude symptoms.
- Terrain: sand, talus, roots, mud, and snow slow you down.
- Water: mark sources, but verify seasonal reliability when possible.
- Exposure: note ridges, desert stretches, avalanche paths in winter, and lightning-prone high ground.
- Turnaround points: pick them before pride gets loud.
Download your map for offline use and carry a backup. A battery bank helps, but it is not navigation knowledge. Know the trail junction names, landmarks, and direction of travel before you step off.
Leave your itinerary with someone who is not on the hike. Tell them when you expect to be back and when they should act. “I’ll text you by 6 p.m.; if you have not heard from me by 9 p.m., call the ranger station or sheriff with this plan” is better than “back later.”
What should you check the night before a hike?
Check weather, closures, pack contents, footwear, water, food, and your start time.
The night before is when you catch dumb mistakes. Dead headlamp batteries. Missing socks. A trailhead road closed for construction. A storm forecast that moved from afternoon to 10 a.m. This is not fussing. This is how you avoid turning a nice hike into a mess.
- Check the official land manager page for alerts and closures.
- Check the hourly forecast for the trailhead and the high point.
- Charge your phone, battery bank, headlamp, watch, and satellite messenger if you carry one.
- Download offline maps.
- Fill water bottles or reservoirs.
- Pack food where you can reach it.
- Lay out shoes, socks, layers, hat, sunglasses, and rain gear.
- Put keys, wallet, permit, and pass in one place.
- Send your plan to your safety contact.
Do one more thing: set a no-go line. If the forecast shows lightning during your ridge window, if the road is unsafe, if you wake up sick, or if the group is not ready, change the plan. You do not owe a trail your day.
When to see a doctor
Get medical help fast for confusion, fainting, severe symptoms, suspected heat illness, serious injury, or altitude symptoms that worsen.
Hiking health advice should stay practical: prevent problems early, stop when symptoms appear, and get professional care when red flags show up. The CDC heat illness guidance lists confusion, altered mental status, slurred speech, loss of consciousness, and seizures as heat-stroke warning signs that require emergency action, as of November 2026.
For heat stress, move to shade, stop exertion, cool the body, and seek help if symptoms are severe or do not improve. For tick country, the CDC tick bite prevention guidance recommends EPA-registered repellents, treating clothing and gear with permethrin, walking in the center of trails, checking your body after being outdoors, and showering soon after coming indoors, as of November 2026.
At altitude, pay attention early. The Wilderness Medical Society altitude summary says travel above 8,200 feet [2,500 m] is associated with risk of acute altitude illness, though symptoms can happen lower for some people, as of November 2026. Headache, nausea, unusual fatigue, dizziness, trouble sleeping, shortness of breath at rest, confusion, or loss of coordination should not be brushed off.
For sprains and falls, use common sense and do not force a bad joint down the trail. The Mayo Clinic sprain first aid guidance recommends prompt care when you cannot put weight on the injured leg, the joint feels unstable or numb, you have pain directly over bone, or symptoms do not improve after a few days, as of November 2026.
What are the biggest mistakes hikers make before a trip?
The biggest mistakes are starting too late, underestimating elevation, overpacking the wrong stuff, and ignoring weather.
A late start is the classic trap. It feels harmless at breakfast. Then the parking lot is full, the climb is slower than expected, clouds build, and suddenly you are choosing between rushing and turning around. Start early. Finish with light to spare.
Another mistake is treating mileage like the only number. Elevation gain, footing, heat, altitude, and pack weight all change the day. A 7-mile [11 km] trail can be gentle or brutal. Read the profile, not just the headline.
Gear mistakes usually come in pairs: too much comfort gear and not enough safety gear. A camp chair has no place in most day packs. A headlamp does. So does rain protection. So does a map.
The final mistake is refusing to turn around. The mountain will not care. The desert will not care. Weather will not care. Your job is to come home with enough energy to tell the story.
Related reading
- How to Plan a Camping Trip
- How to Plan a Hiking Trip Step by Step
- Sedona Hiking for Beginners: A 3-Day Plan
- How to Prepare Your Body for a Long Hike
FAQ
How many days before a hike should I start preparing?
Start 1-4 weeks ahead for fitness and the final gear check 24 hours before the hike. For a short local trail, one careful evening may be enough; for altitude, heat, remote terrain, or a long route, give yourself more time.
What is the best backpack size for a day hike?
A 15-25 liter daypack works for most fair-weather day hikes. Choose the larger end if you carry extra layers, a water filter, a first aid kit, a camera, or gear for kids.
Should you hike in boots or trail running shoes?
Wear the footwear that fits your feet, terrain, and pack weight. Trail runners are light and comfortable for many maintained trails; boots can add ankle coverage, durability, and support for rough terrain or heavier loads.
What should you not do before hiking?
Do not wear brand-new shoes, skip breakfast if you usually need it, start with an uncharged phone, or ignore a bad forecast. Also avoid a hard leg workout the day before a demanding hike.
How do you know if a hike is too hard?
A hike is too hard if the distance, elevation gain, weather, terrain, or exposure leaves no safety margin. If you cannot finish before dark at a steady pace, carry enough water, or turn around easily, choose a shorter route.
What is the one thing most hikers forget?
A headlamp is one of the most commonly forgotten useful items. Phone flashlights drain batteries and are awkward in cold, rain, or rough footing, so pack a real light even for a morning hike.