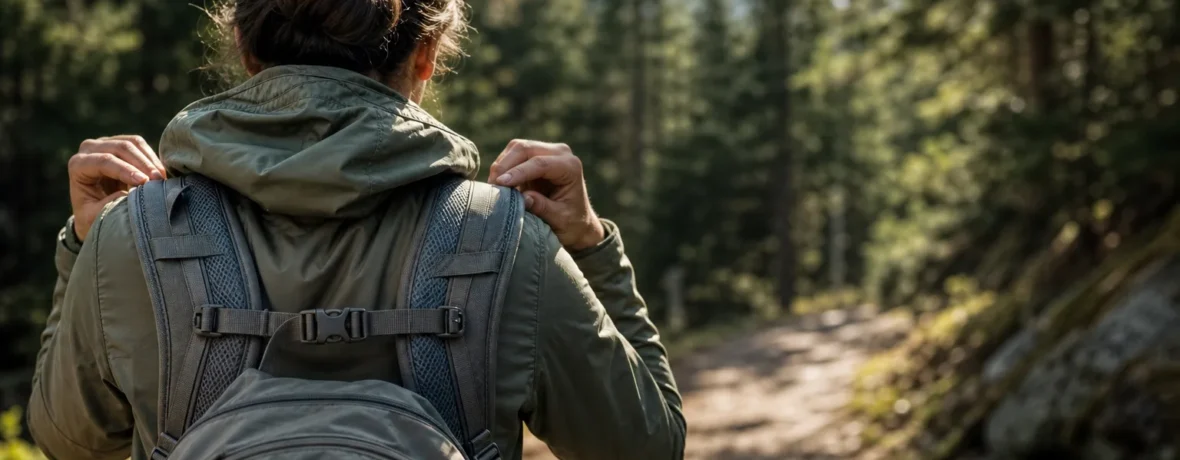
To adjust backpack straps, load the pack first, loosen every strap, then fit in this order: hip belt on top of your hip bones, shoulder straps snug, load lifters near a 45-degree angle, and sternum strap 1-2 in [2.5-5 cm] below your collarbones.
How do you know if your backpack fits before adjusting the straps?
The pack has to match your torso before the straps can do their job.
A bad fit cannot be fixed by yanking harder on webbing. If the torso length is wrong, the hip belt may ride on your stomach, the shoulder straps may gap behind your neck, or the load lifters may pull at a useless angle. Start with the pack’s frame and harness, then fine-tune the straps.
Most hiking and backpacking packs are built around torso length, not your full height. To check yours, find the bony bump at the base of your neck, then measure down your spine to the line between the tops of your hip bones. That gives you the torso measurement many brands use for sizing. For a deeper fit walkthrough, see REI’s backpack fit guide.
Before you begin, put real trail weight in the pack. Use your usual water bottles, food, shelter, layers, and small gear. A half-empty pack lies. A loaded pack tells the truth.
- For a daypack, add your normal hiking load.
- For an overnight pack, load it with the gear you actually carry.
- For a store try-on, use sandbags or weighted pillows if available.
- For home fitting, use soft items to fill empty space so the load does not slump.
If the pack has an adjustable torso panel, set that before touching the shoulder straps. On many packs, the shoulder harness slides up or down behind the back panel. Move it until the hip belt can sit on your hip bones while the shoulder straps wrap cleanly over your shoulders.
How to adjust backpack straps step by step?
Adjust the straps from the bottom up.
The order matters because each strap changes the next one. If you crank the shoulder straps first, you pull weight off your hips and onto your neck. That might feel secure for 10 minutes. By mile 3, it feels like a trap.
- Loosen every strap. Loosen the hip belt, shoulder straps, load lifters, sternum strap, and side compression straps. Start neutral so you are fitting the pack, not fighting yesterday’s settings.
- Put the loaded pack on. Bend your knees, lift with your legs, and swing the pack onto your back. Stand tall, then lean slightly forward only enough to settle the load.
- Place the hip belt. Center the padded wings over the top of your hip bones, also called the iliac crest. The belt should wrap your hips, not your waist.
- Tighten the hip belt first. Pull both sides evenly until it feels firm. It should not pinch, fold, or dig into your stomach when you breathe.
- Snug the shoulder straps. Pull down and back on the strap ends. The straps should wrap your shoulders with no big gaps, but your shoulders should not carry most of the load.
- Set the load lifters. Pull the small upper straps forward until the top of the pack comes closer to your back. A common target is a 45-degree angle, as described in REI’s fit instructions.
- Buckle the sternum strap. Slide it to a comfortable position 1-2 in [2.5-5 cm] below your collarbones, then tighten it just enough to keep the shoulder straps from sliding outward.
- Tighten compression straps. Cinch side and front compression straps until the load feels stable. Do not crush your gear or bend the frame.
- Walk for 5 minutes. Go up stairs, step over a curb, or walk a short loop. Then adjust in quarter-inch pulls. Small moves beat big tugs.
After those steps, the pack should feel connected to your body. Not glued. Not dangling. Connected.
Where should the hip belt sit on a hiking backpack?
The hip belt should sit over the top of your hip bones.
That is the sweet spot for carrying weight with your pelvis and legs instead of your shoulders. The padded sections should cup the hip bones, with the buckle centered in front. If the belt rides above the bones, the pack may slide down as you walk. If it sits too low, it can limit your stride and rub the front of your hips.
Tighten the hip belt until it feels secure, then stop. A hip belt that is too tight can create hot spots, bruised-feeling pressure, or numbness along the front of the hips. You want a firm handshake, not a vise.
Use this quick test: after tightening the hip belt and shoulder straps, shrug your shoulders. If the pack rises with your shoulders, the shoulder straps are carrying too much. Loosen them slightly and retighten the hip belt.
Some packs have pull-forward hip belts, where you pull the webbing inward across your body. Others have standard side-pull buckles. Either can work. The goal stays the same: stable contact around the hips with enough room to breathe, climb, and bend.
How tight should backpack shoulder straps be?
Shoulder straps should be snug, not weight-bearing.
Your shoulder straps stabilize the pack and keep it close to your back. They are not meant to carry the full load on a hiking pack with a real hip belt. If your traps, neck, or collarbones start barking, loosen the shoulder straps and shift more load back to the hip belt.
A good shoulder strap fit looks like this:
- The padded strap wraps smoothly over the shoulder.
- There is no large air gap behind the shoulder.
- The strap does not dig into your neck.
- The lower webbing does not pull the pack so tight that your shoulders roll backward.
- Your arms can swing freely without rubbing hard against the straps.
Osprey’s fit guidance says harness straps should wrap fully around the shoulders with no gaps, and the padded section should end roughly 2 in [5 cm] below the armpits on many backpacking packs. You can compare your pack against Osprey’s size and fit guide if your harness feels too short or too long.
If your shoulder straps bottom out before they feel snug, the harness may be too large or the torso setting too long. If the padding ends high in your armpits or rubs your neck, the harness may be too small or too narrow for your body.
What do load lifter straps do on a backpack?
Load lifters pull the upper pack closer to your body.
They are the small straps running from the top of the shoulder straps to the upper frame or pack body. When adjusted well, they reduce backward pull and help the pack ride upright. When overtightened, they can pinch the front of your shoulders and create a harsh gap under the shoulder straps.
| Strap | Best position | Common mistake |
|---|---|---|
| Hip belt | Centered over the top of the hip bones | Wearing it like a pants belt around the waist |
| Shoulder straps | Snug wrap with light pressure | Using them to carry most of the pack weight |
| Load lifters | Snug, often near a 45-degree angle | Cranking them until the shoulder harness gaps |
| Sternum strap | 1-2 in [2.5-5 cm] below collarbones | Pulling it so tight it restricts breathing |
Load lifters work best on framed packs. On frameless ultralight packs, small upper straps may still help with stability, but they cannot transfer weight the same way a structured frame can. If your load lifters form a flat or downward angle, check torso length. The pack may be too short, or the harness may be set too high.
Where should the sternum strap sit?
The sternum strap should sit high on your chest, below your collarbones.
A good starting point is 1-2 in [2.5-5 cm] below the collarbones. REI suggests roughly 1 in [2.5 cm], while Osprey commonly suggests roughly 2 in [5 cm]. Treat that range as a starting zone, then move the slider until the strap feels natural across your chest.
The sternum strap has one main job: keep the shoulder straps in a comfortable lane. It should not cinch your chest like a compression band. If your breathing feels restricted on climbs, loosen it immediately or slide it slightly lower.
For many women and hikers with larger chests, sternum strap position takes extra fiddling. Move it above or below pressure points instead of forcing it across sensitive tissue. If the strap is too short, look for packs with longer sternum straps, extended-fit harnesses, or aftermarket strap extenders from the pack brand.
Why does my backpack hurt my shoulders, neck, or lower back?
Pain usually means the load, fit, or strap tension needs a reset.
Start with the simple fixes first. Loosen everything, reseat the hip belt on your hip bones, then rebuild the fit from the ground up. Many shoulder problems come from a loose hip belt and overtight shoulder straps. Many lower-back problems come from a pack that sags away from your body or gear packed too far from your spine.
Check your packing, too. Strap adjustment cannot fully fix a lopsided load. Dense items should ride close to your back and near the middle of the pack. Water, food, cook kits, and bear canisters can pull hard if they sit too far out or too high.
- Shoulder pain: Retighten the hip belt, then loosen shoulder straps slightly.
- Neck strain: Loosen load lifters and check that shoulder straps are not riding against your neck.
- Lower-back ache: Tighten compression straps and move heavy gear closer to your spine.
- Hip bruising: Loosen the hip belt one notch, smooth clothing layers, and check belt height.
- Arm tingling: Loosen shoulder straps and sternum strap right away.
Do not accept numbness as normal trail discomfort. A strap pressing on nerves or blood vessels can create tingling in the arms or hands. Change the fit, take the pack off at breaks, and stop using any adjustment that makes symptoms return.
How do you adjust a backpack while hiking?
Make small changes before discomfort turns into pain.
Pack fit is not a one-and-done chore. Your body swells slightly in heat, clothing layers change, food weight drops, and fatigue changes posture. Smart hikers keep tuning the pack through the day.
Use micro-adjustments. Pull a strap half an inch [1.3 cm], walk, then decide. If you yank three straps at once, you will not know which change helped.
Try this trail rhythm:
- At the trailhead, set the full fit from scratch.
- After 10 minutes, stop and retighten the hip belt if the load settled.
- On climbs, loosen the sternum strap if breathing feels tight.
- On descents, snug compression straps so the pack does not sway.
- At breaks, take the pack off instead of standing around under load.
- After lunch, reassess balance because food and water weight changed.
Some hikers alternate pressure through the day: hip belt firmer for one stretch, shoulder straps slightly firmer for another, then back again. That is not cheating. That is managing pressure points before they get ugly.
What backpack strap mistakes should you avoid?
Most strap problems come from overtightening.
It feels logical to pull everything tighter. Tight feels controlled. But a pack needs to move with your breathing, hips, and stride. If every strap is maxed out, the suspension cannot float, flex, or spread pressure.
- Starting with shoulder straps: This shifts weight off the hips before the hip belt has a chance to work.
- Wearing the hip belt too low: This can rub the front of your hips and interfere with stepping up.
- Overtightening load lifters: This can pinch the shoulder joints and create gaps under the harness.
- Using the sternum strap as a chest clamp: This can restrict breathing and distort the shoulder harness.
- Ignoring torso length: Straps cannot fix a frame that sits in the wrong place.
- Leaving loose strap tails flying: Tuck or roll them so they do not slap your arms in wind.
If you keep adjusting and the pack still feels wrong, try another size, another harness shape, or an extended-fit model. Bodies are different. Packs are different. The match matters.
When to see a doctor
See a clinician for pain, numbness, weakness, or tingling that does not resolve after removing and readjusting the pack.
Backpack discomfort should fade when the pressure comes off. If symptoms keep returning, spread down a leg, affect balance, or include weakness, get medical advice. For back pain, Mayo Clinic advises prompt care when pain causes weakness, tingling, or numbness in one or both legs, or follows a fall or blow to the back; see Mayo Clinic’s back pain guidance.
MedlinePlus also lists red flags such as loss of bladder or bowel control, fever with back pain, leg weakness or numbness, difficulty walking, and pain that wakes you at night. Review the full list at MedlinePlus acute low back pain.
This is not a diagnosis. A pack can cause pressure and irritation, but persistent symptoms need a professional look.
Related reading
- How to Pack a Hiking Backpack: Weight Zones and a Simple Diagram
- How to Choose a Hiking Backpack: Volume, Torso Length and Fit
- How to Attach a Sleeping Bag to a Backpack
- How to Attach Hiking Poles to a Backpack
FAQ
Should backpack straps be tight or loose?
Backpack straps should be snug, not tight. The hip belt should feel firm, the shoulder straps should touch without carrying most of the weight, and the sternum strap should not restrict breathing.
Why do my shoulders hurt when carrying a backpack?
Your shoulders often hurt because they are carrying weight that should be on your hips. Loosen the shoulder straps, reseat and tighten the hip belt over your hip bones, then snug the shoulder straps again.
How do I stop my backpack from pulling me backward?
Move dense gear closer to your spine and tighten the load lifters until the upper pack comes in toward your back. If the pack still leans away, check torso length and side compression straps.
Where should a hiking backpack sit on your back?
A hiking backpack should sit close to your back with the hip belt over the top of your hip bones. The shoulder straps should wrap smoothly, and the top of the pack should not drag you backward.
Can bad backpack adjustment cause numb hands?
Yes, tight shoulder straps or a tight sternum strap can contribute to tingling or numbness by adding pressure around the shoulders and chest. Loosen the straps, take the pack off, and seek medical advice if numbness persists or returns.