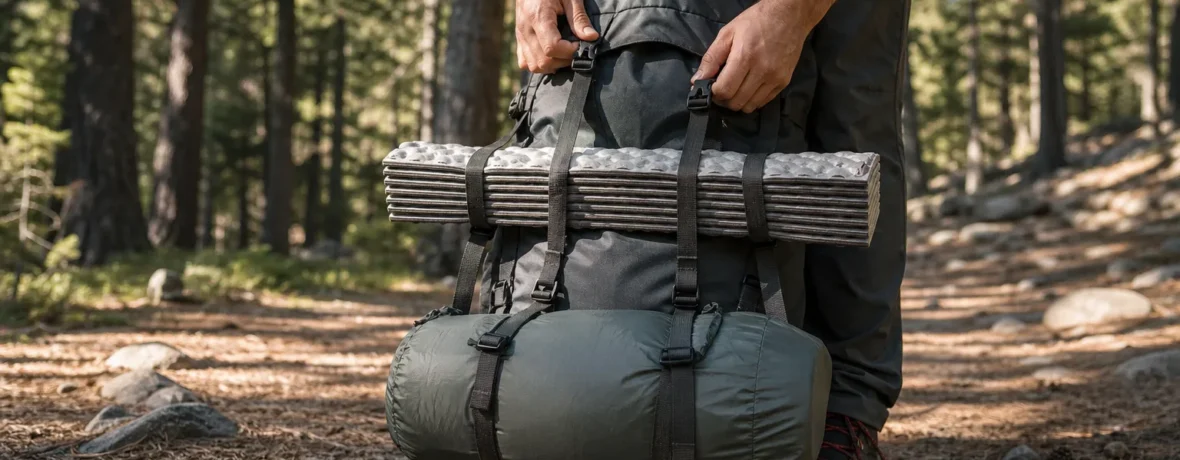
Keep it inside your pack if it fits. If not, seal it in a waterproof stuff sack, compress it to 8–12 in [20–30 cm] thick, then strap it horizontally to the bottom or top with two tight, centered compression straps.
How to attach sleeping bag to backpack: what is the best method?
The best method is inside the backpack, low in the main compartment or sleeping bag compartment.
That keeps your bag dry, balanced, and protected from brush, rock, grit, sparks, and your own muddy shoes when you drop the pack. Most overnight backpacks are built with this in mind. REI’s backpack loading guidance places the sleeping bag in the lower zone of the pack, where light, bulky camp gear belongs: REI Expert Advice on loading a backpack.
But not every setup is tidy. Maybe your pack is small. Maybe you’re carrying a bulky synthetic winter bag. Maybe you borrowed a 45-liter pack for a cold-weather trip and now the sleeping bag is the size of a labradoodle. Fine. Strap it outside, but do it cleanly.
Use this order of preference:
| Method | Best for | Main drawback |
|---|---|---|
| Inside the pack | Most backpacking trips, down bags, wet weather | Uses internal volume |
| Bottom straps | Packs with dedicated lower gear straps | Can hit rocks, mud, or your legs if loose |
| Top strap or lid | Bulky but light sleeping bags | Raises the pack’s center of gravity |
| Side straps | Short walks to camp only | Pulls weight off-center and snags brush |
What gear do you need to strap a sleeping bag to a backpack?
You need a waterproof stuff sack and two secure straps.
That’s the simple kit. Do not rely on the thin drawcord that came on an old sleeping bag sack. It was made to close fabric, not carry trail miles. A sleeping bag dangling from one cord is not rugged. It is a yard sale waiting to happen.
Use this checklist before you lash anything outside:
- Waterproof dry bag or roll-top stuff sack: Best for down bags and wet climates.
- Compression sack: Good for bulky synthetic bags, but do not crush the bag for long-term storage.
- Two backpack compression straps: Usually ¾–1 in [2–2.5 cm] wide.
- Two accessory straps: Useful if your pack lacks bottom straps.
- Pack liner: A trash compactor bag or purpose-built liner adds backup water protection inside the pack.
- Repair item: A spare buckle, cord, or short strap can save your trip if a buckle snaps.
If your sleeping bag is down, treat water like the enemy. Down loses loft when wet, and loft is what traps warm air. Synthetic insulation handles moisture better, but “better” does not mean “happy soaked.” Keep either type dry.
How do you attach a sleeping bag to the bottom of a backpack?
Run two straps around the packed sleeping bag and cinch them evenly through the bottom gear loops.
This is the classic external-carry method. It works well when the backpack has dedicated lower straps or lash points. The goal is a tight horizontal roll that sits close to the pack, not a sagging sausage bouncing behind your knees.
- Pack the sleeping bag first. Stuff it into a dry bag or waterproof compression sack. Push air out before sealing it.
- Shape it into a short cylinder. A compact 8–12 in [20–30 cm] diameter roll rides better than a long, floppy bundle.
- Place it horizontally under the pack. Center it between the left and right sides.
- Thread the straps through real attachment points. Use bottom loops, webbing tabs, or compression buckles. Do not clip to mesh pockets.
- Cinch both sides evenly. Pull left, then right, then left again. The bag should not twist.
- Check heel and calf clearance. Put the pack on and walk 20 steps. If the bag taps your legs, raise it or tighten it.
- Lock down loose strap tails. Tuck or tie them so they do not whip, snag, or slide through buckles.
Bottom carry has one weakness: exposure. The underside of your pack gets dragged over logs, damp ground, granite, mud, and dusty trail. If you use the bottom method, your waterproof sack needs to be tough. Thin ultralight dry bags can abrade fast when strapped outside.
Can you attach a sleeping bag to the top of a backpack?
Yes, you can attach it to the top, but only if it stays low, tight, and centered.
Top carry is useful when the bottom of your pack has no straps, or when the trail is muddy and you want the sleeping bag farther from the ground. Many backpacks have a floating lid, top compression strap, or a “Y” strap that can hold a light roll.
Here’s the trick: keep the sleeping bag from becoming a sail. A big roll perched high on your pack catches branches, shifts on scrambles, and makes balance worse on uneven trail. If you feel the pack tugging backward when you lean forward, the load is too high or too loose.
Use top carry like this:
- Place the sleeping bag crosswise, not lengthwise.
- Keep it behind your head, not above your head.
- Use two contact points if possible: lid strap plus side compression, or two accessory straps.
- Do not block access to rain gear, map, water filter, or snacks you need during the day.
- Duck under branches before they scrape the bag off your pack.
If you’re carrying a bear canister, food, water, or other dense gear, those heavier items should sit closer to your back and around the middle of the pack. The sleeping bag is bulky but light. That makes it a better top or bottom external item than a food bag, stove kit, or water bladder.
Is it bad to hang a sleeping bag on the outside of your backpack?
No, not always, but it is riskier than packing it inside.
The outside of a backpack is a rough neighborhood. Rain hits first there. Dust sticks there. Branches grab there. If you slip during a creek crossing, the outside gear gets dunked first. A sleeping bag is one of the worst items to gamble with because it is your warmth system at night.
The National Park Service lists insulation and emergency shelter among the broader outdoor systems hikers should plan for in the Ten Essentials. Your sleeping bag is not just comfort. On a cold night, it is part of your safety margin.
External carry makes sense when:
- Your backpack is too small for the sleeping bag.
- You’re hiking a dry trail with low snag risk.
- You have a durable waterproof stuff sack.
- You are carrying a large synthetic bag that will not fit inside.
- You need to keep wet shelter parts separate from dry sleep gear.
External carry is a bad idea when:
- Heavy rain is likely.
- You’re bushwhacking through tight brush.
- You’re scrambling on rock where the bag can scrape.
- Your straps are too short or too flimsy.
- The bag hangs wider than your shoulders.
If the sleeping bag must ride outside, protect it like you expect bad weather. Because sooner or later, the trail will provide some.
Should a sleeping bag go inside a stuff sack or loose in the backpack?
Loose inside a lined backpack saves space, while a stuff sack gives cleaner organization and easier external carry.
For internal packing, many hikers skip the stuff sack and push the sleeping bag directly into the bottom of a pack liner. This fills odd corners better than a hard cylinder. Then the tent body, clothes, and other soft items compress it further. It’s efficient. It also reduces the number of small sacks you need to buy, carry, and misplace.
For external packing, use a sack every time. No exceptions. A naked sleeping bag lashed outside will pick up water, grit, pitch, and holes. It also looks ridiculous, which is not a safety issue, but still.
Stuff sack choices:
- Standard stuff sack: Light and simple, but not waterproof unless specified.
- Compression sack: Shrinks bulk with straps; best for short-term packing.
- Waterproof compression sack: Best external option for bad weather.
- Roll-top dry bag: Great water protection, but can trap air unless it has a valve or you burp it before rolling.
Do not store a sleeping bag compressed at home. Long compression can weaken loft over time. For the trail, compression is fine. For the closet, use a large storage sack or hang it if the manufacturer allows.
How do you keep a sleeping bag dry when it is strapped outside?
Use a waterproof sack, then add a second layer of rain protection.
One layer is good. Two layers are better. Trail rain does not fall politely from above. It runs down your pack, splashes from the ground, blows sideways, and sneaks through seams while you’re busy pretending the sky will clear.
Use this dry system:
- Put the sleeping bag in a dry bag. Roll the closure at least three times if using a roll-top design.
- Compress it only after sealing. Keep the waterproof closure clean and flat.
- Strap it tight against the pack. Movement rubs holes into fabric.
- Cover the whole pack with a rain cover. Make sure the cover actually reaches the external sleeping bag.
- Use a pack liner inside too. If the outside system fails, your spare clothes and sleep layers still have backup.
A pack cover alone is not enough for an externally strapped sleeping bag. Covers shift, flap, and leave gaps around straps. Treat the cover as splash protection, not the main waterproof barrier.
Where should the weight sit when packing a backpack with a sleeping bag?
Keep light bulky gear low, and keep dense gear close to your spine.
A sleeping bag is usually light for its size. That means it can sit low in the pack without wrecking your balance. Heavier items—food, stove, fuel, water, bear canister—ride better in the middle of the pack, close to your back. That helps the load move with you instead of pulling you backward.
Think in zones:
- Bottom zone: Sleeping bag, sleep clothes, puffy jacket, soft camp layers.
- Middle zone near your back: Food, cook kit, bear canister, water reservoir, dense gear.
- Outer middle zone: Tent body, rainfly, light cookware, extra layers.
- Top zone: Rain jacket, first-aid kit, water filter, lunch, headlamp.
- Pockets: Map, sunscreen, snacks, trowel, small essentials.
If the sleeping bag is strapped outside, recheck the rest of your load. Do not create a giant empty cavern at the bottom of the pack and then stack all heavy gear high. Fill that bottom space with soft items so the pack keeps its shape.
How do you attach a sleeping bag to a backpack without straps?
Add two accessory straps through solid loops, daisy chains, or the frame area.
No straps? You still have options. Most backpacks have some combination of side compression webbing, daisy chains, ice axe loops, haul loops, or lower tabs. The key is to use structural points, not fragile fabric.
Good attachment points:
- Bottom webbing loops
- Daisy chains sewn into the pack body
- Side compression strap anchors
- Dedicated sleeping pad straps
- Frame-connected webbing
Bad attachment points:
- Mesh water bottle pockets
- Zipper pulls
- Shock cord meant for jackets
- Hydration hose loops
- Loose lid fabric
If you use cord, use it as a backup, not the main system. Thin cord can bite into fabric and loosen as the bag compresses. Flat webbing straps spread pressure better and are easier to tension with gloves or cold hands.
Can you strap a sleeping bag and sleeping pad together?
Yes, but it usually works better to carry the pad outside and the sleeping bag inside.
Closed-cell foam pads are tough. They can ride outside all day and shrug off rain, dust, and abrasion. Sleeping bags are softer, warmer, and more vulnerable. If one item gets the exterior spot, make it the pad.
If you must strap both together, put the sleeping bag in a waterproof sack first, then roll or stack the pad outside it. The pad can act like a partial bumper. Keep the bundle narrow. If it sticks out wider than your pack, it will catch every spruce branch, trail sign, and shelter doorway.
Better combinations:
- Foam pad outside, sleeping bag inside: Best all-around setup.
- Tent poles outside, sleeping bag inside: Good when internal space is tight.
- Sleeping bag outside, pad inside: Use only when the pad is inflatable and fragile.
- Both outside: Acceptable for short, dry approaches; poor for rough backcountry travel.
What mistakes should you avoid when attaching a sleeping bag?
The biggest mistake is letting the sleeping bag hang loose.
A loose load burns energy. It swings, taps, scrapes, and shifts your balance at the exact moment you step over roots or hop rocks. Tighten it until the sleeping bag moves with the pack as one piece.
Avoid these common mistakes:
- Using one strap instead of two. One strap lets the bag rotate.
- Carrying it sideways on one side. Side weight twists your stride.
- Skipping waterproof protection. A trash bag is better than bare fabric, but a real dry bag is cleaner.
- Letting straps drag. Dangling webbing catches brush and mud.
- Blocking pockets you need all day. Don’t bury rain gear under your sleeping bag.
- Crushing the bag too long. Compress for hiking, then let it loft at camp.
- Ignoring local food storage rules. Never strap food or scented items outside casually in bear country.
On trips in bear habitat, food and scented items need proper storage. The National Park Service says backpackers should check local park rules because some areas allow or require bear-resistant containers, lockers, or specific hanging systems: NPS bear safety and food storage guidance. Your sleeping bag is not food storage, but your pack layout may change if a bear canister must ride inside.
How should you pack your backpack after attaching the sleeping bag?
Pack the rest of your gear so the bag stays centered and your essentials stay reachable.
Once the sleeping bag is mounted, load the pack and test it before the trailhead. Not in the parking lot while your friends are ready to leave. At home. With water. With food. With the actual straps. With the exact sleeping bag.
Do this quick shake-down:
- Load the full pack. Include food, water, fuel, layers, and shelter.
- Put it on and tighten the hip belt first. Most weight should transfer to your hips.
- Walk stairs or a sloped driveway. Listen for swinging or creaking.
- Bend forward and side to side. The sleeping bag should not roll or shift.
- Reach for key items. Rain shell, water, map, headlamp, and snacks should remain accessible.
- Set the pack down roughly once. Not abusively. Just like you will at camp. Check whether the bag hits first.
Also think about low-impact camping habits. Keep gear on durable surfaces at camp instead of spreading it across fragile plants, cryptobiotic soil, or wet meadow edges. Leave No Trace explains why durable surfaces matter here: Leave No Trace travel and camp on durable surfaces.
What is the best setup for different backpack styles?
The best setup depends on the pack’s volume, frame, and built-in attachment points.
A 65-liter internal-frame backpack gives you room to keep the sleeping bag inside. A 35-liter frameless pack may force creative strapping. An external-frame pack often has a lower shelf that handles bulky gear well, though those packs are less common on modern trails.
| Backpack type | Best sleeping bag placement | Tip |
|---|---|---|
| 50–70 L internal-frame pack | Inside bottom compartment | Use a pack liner for water protection. |
| 35–45 L weekend pack | Inside if down, outside if bulky synthetic | Choose a compression dry sack. |
| Frameless ultralight pack | Loose inside as part of the pack structure | Let soft gear create shape and padding. |
| External-frame pack | Lower shelf or bottom lash points | Keep the roll tight against the frame. |
If you are buying a pack, bring your sleeping bag to the shop or measure its packed size at home. A pack that looks roomy online can feel tight once you add a bear canister, cold-weather layers, and three days of food.
Related reading
- How to Choose a Sleeping Bag: Temperature Ratings, Fill and Shape
- How to Wash a Sleeping Bag at Home Without Damaging It
- How to Wash a Down Sleeping Bag and Restore the Loft
- What Is a Sleeping Bag Liner and Do You Need One?
FAQ
Can I tie a sleeping bag to a backpack with rope?
Yes, but flat straps are better than rope. Rope can loosen, cut into stuff sack fabric, and create pressure points, while webbing straps hold wider and cinch cleaner.
Should my sleeping bag go on top or bottom of my backpack?
Inside the bottom is best. If it must go outside, bottom carry is more stable, while top carry keeps it farther from mud and puddles but can make the pack feel top-heavy.
How tight should the sleeping bag straps be?
Tight enough that the sleeping bag does not swing, rotate, or bounce when you walk. After 10 minutes on trail, stop and re-tighten because fabric and insulation often compress.
Can I attach a down sleeping bag outside my pack?
Yes, but only inside a reliable waterproof dry bag. Down needs loft to insulate, so getting it wet can turn a warm sleep system into a cold problem fast.
What if my backpack has no loops or bottom straps?
Use two accessory straps through strong side compression anchors or daisy chains. If your pack has no solid attachment points at all, keep the sleeping bag inside or use a larger pack.
Is a compression sack necessary for a sleeping bag?
No, it is not necessary for every trip. A compression sack helps when space is tight or the bag rides outside, but loose packing inside a lined backpack can fill space more efficiently.