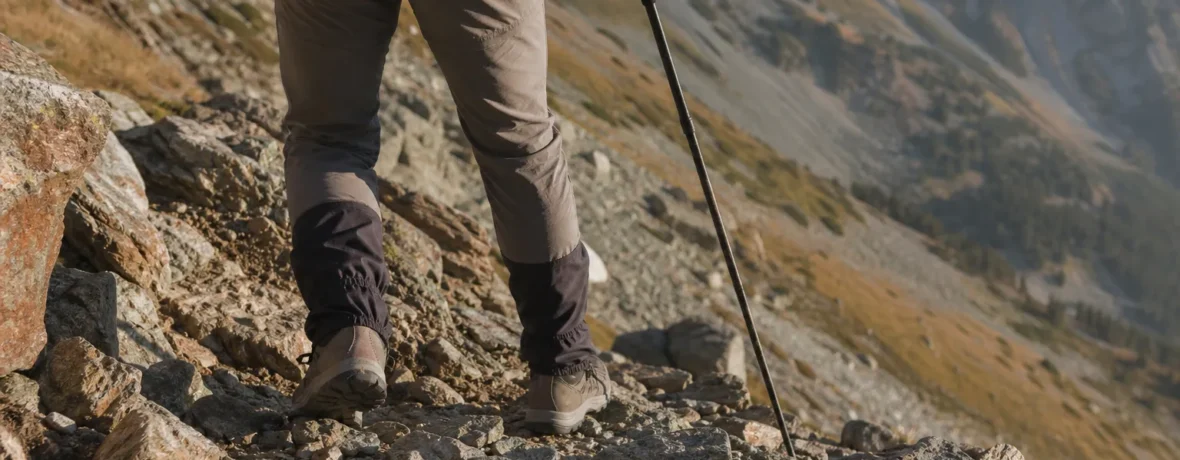
To strengthen knees for downhill hiking, train 2-3 days per week for 6 weeks with step-downs, split squats, glute bridges, calf raises, and balance work. Start with 2 sets of 8-12 reps, add load slowly, and stop if pain changes your stride.
Why do knees hurt more when hiking downhill?
Downhill hiking asks your legs to brake your body again and again.
That braking is the whole story. On the climb, your muscles push you up. On the descent, your quads, glutes, calves, and hips work like shock absorbers. Every step catches your body weight, your pack weight, and the momentum of gravity pulling you down the trail.
If those muscles are undertrained, the knee often becomes the middleman. It takes more force than it should. Add loose gravel, tired legs, long switchbacks, or a heavy overnight pack, and the front of the knee can start talking fast.
The fix is not one magic exercise. You need stronger quads, steadier hips, better ankle control, and downhill-specific practice. Your knee is a joint. It likes help from the muscles above and below it.
What are the best knee strengthening exercises for hiking?
The best knee strengthening exercises for hiking train slow control, single-leg strength, and hip stability.
Do this workout 2-3 days per week with at least 1 day between sessions. The CDC recommends adults do muscle-strengthening activity 2 days each week, and this plan fits that baseline well. If you already lift, use these as your lower-body trail block.
-
Step-downs
Use a 4-8 in [10-20 cm] step, curb, or stair. Stand on one leg, tap the other heel to the floor, then drive back up. Keep your knee tracking over your second and third toes. Do 2-3 sets of 6-10 reps per side.
-
Split squats
Take a long stance, drop straight down, and keep most of your weight through the front heel and midfoot. Start shallow. You do not need to kiss the floor with your back knee. Do 2-3 sets of 8-12 reps per side.
-
Glute bridges
Lie on your back with knees bent and feet flat. Squeeze your glutes, lift your hips, pause for 2 seconds, then lower with control. Do 2-3 sets of 10-15 reps. Progress to single-leg bridges when both sides feel even.
-
Side steps with a band
Place a resistance band above your knees or around your ankles. Soften your knees, keep your chest tall, and step sideways without letting your knees cave inward. Do 2-3 sets of 10-15 steps each way.
-
Calf raises
Stand near a wall or railing. Rise onto the balls of your feet, pause, then lower slowly for 3 seconds. Do 2-3 sets of 12-20 reps. Your calves help control your ankle, and a steadier ankle gives your knee a cleaner line.
-
Single-leg balance
Stand on one foot for 30-45 seconds. Make it harder by turning your head, standing on a folded towel, or holding a light pack. Do 2 rounds per side. This is simple. It also pays off on rocky trail.
The American Academy of Orthopaedic Surgeons knee conditioning program targets the quads, hamstrings, hip abductors, hip adductors, glutes, and calves. That is the same crew you need when your trail drops 2,000 ft [610 m] before lunch.
How should you warm up before knee strengthening exercises?
Warm up for 5-10 minutes before loading your knees.
Cold legs do sloppy work. Walk briskly, pedal an easy bike, climb a few flights of stairs, or do a slow bodyweight circuit before your main sets. Then move through a few gentle reps of the exercise you are about to train.
A good hiking knee warmup looks like this:
- 3 minutes of brisk walking
- 10 bodyweight squats to a comfortable depth
- 10 reverse lunges, alternating sides
- 10 calf raises
- 20 seconds of single-leg balance per side
Keep the warmup easy. You are waking up the system, not winning a parking-lot fitness test.
How do you build a 6-week knee strengthening plan for downhill hiking?
Start easy, add one challenge at a time, and make the final 2 weeks look more like trail movement.
Here is a clean 6-week plan. Use it before a hiking trip, after an off-season, or when descents keep beating up your knees. If you currently have knee pain, get medical guidance before pushing into loaded or deep knee-bend work.
| Weeks | Goal | What to Do | Progression |
|---|---|---|---|
| 1-2 | Control | Step-downs, glute bridges, band side steps, calf raises, balance | 2 sets, slow reps, bodyweight only |
| 3-4 | Strength | Add split squats and taller step-downs if pain-free | 3 sets or hold 5-15 lb [2-7 kg] |
| 5-6 | Trail readiness | Add loaded carries, downhill walking practice, and longer single-leg holds | Wear a light pack and add descent time gradually |
Use this order for each session:
- Warm up for 5-10 minutes.
- Train the hardest movement first, usually step-downs or split squats.
- Move to glute and hip work.
- Finish with calves and balance.
- Walk for 5 minutes to cool down.
Keep two rules tight. First, leave 1-2 reps in the tank on most sets. Second, no limping. If an exercise changes the way you move, shorten the range, reduce the load, or swap it out.
How do you protect your knees while hiking downhill?
Shorter steps protect your knees better than big braking steps.
Most sore-knee descents start with overstriding. You reach far forward, slam the heel, lock the knee, and let the joint catch the force. That feels efficient for 5 minutes. Then the bill arrives.
Use these downhill habits instead:
- Take shorter steps than you want to take.
- Keep a soft bend in your knees.
- Lean slightly forward from the ankles, not backward from the waist.
- Place your foot under your body, not way out in front.
- Use trekking poles to share load with your upper body.
- Loosen your pace before loose rock, wet roots, and big step-downs.
- Rest before your legs shake, not after.
Trekking poles are not a personality type. They are tools. On long descents, plant both poles slightly ahead, step between them, and let your arms take a slice of the work. Your knees will not send a thank-you card, but you will feel the difference by the trailhead.
How much weight training do hikers need for stronger knees?
Most hikers do well with 2 focused lower-body strength sessions per week.
You do not need to live in a gym. You need consistency. Two 30-45 minute sessions can build enough strength for many day hikes and backpacking trips, especially if you also hike, walk hills, or climb stairs during the week.
Use this simple weekly rhythm:
- Monday: strength session
- Tuesday: easy walk or rest
- Wednesday: hill walk or stair session
- Thursday: rest or mobility
- Friday: strength session
- Saturday: hike or longer walk
- Sunday: easy recovery
If you backpack, train with load carefully. Start with an empty or lightly loaded pack for step-ups and downhill walks. Add 5 lb [2 kg] at a time only when your knees feel calm during the workout and the next morning.
Which muscles should you train to strengthen knees?
Train the quads, hamstrings, glutes, hips, calves, and core.
Your quads do the loud downhill work, but they are not solo performers. The hamstrings help control the shin. The glutes keep your thigh from diving inward. The hip muscles steady your pelvis. The calves and ankles smooth out foot placement. Your core keeps your trunk from wobbling under a pack.
Here is the trail translation:
| Muscle Area | Trail Job | Good Exercise |
|---|---|---|
| Quads | Brake downhill steps | Step-downs |
| Glutes | Drive uphill and stabilize descents | Glute bridges |
| Hip abductors | Keep knees from caving inward | Band side steps |
| Calves | Control ankles on uneven ground | Calf raises |
What should you do if your knees hurt during training?
Back off the painful move and adjust the range, load, or speed.
Pain is information, not a dare. A mild muscle burn is normal. Sharp pain, swelling, catching, buckling, or pain that changes your stride is not something to push through.
Use this checklist when a move irritates your knee:
- Reduce the depth of the squat, lunge, or step-down.
- Slow the movement and check knee alignment.
- Remove added weight.
- Switch from forward lunges to reverse lunges.
- Replace deep knee bends with glute bridges, calf raises, and band walks for the day.
- Give yourself 48 hours before testing the same movement again.
The Mayo Clinic notes that strengthening the muscles around the knee can improve stability, but the right exercise depends on the cause of pain. That is your cue to stay practical, not stubborn.
When to see a doctor
See a doctor right away if your knee cannot bear weight, looks deformed, or has fever with redness and swelling.
Do not use this guide to diagnose knee pain. Get medical care after a major injury, a fall, a twisting pop, sudden swelling, or a knee that feels unstable. MedlinePlus lists inability to bear weight, fever, redness, warmth, and significant swelling as reasons to contact a health care provider. Mayo Clinic gives similar red flags for knee pain, including inability to fully extend or flex the knee.
For backcountry trips, be more conservative. A knee that fails on a sidewalk is annoying. A knee that fails 6 miles [9.7 km] from the trailhead can become a rescue problem. Wilderness medicine guidance commonly treats inability to bear weight and unstable joints as serious field concerns; if you cannot walk safely, stop, protect the joint, keep warm, and seek help.
What gear helps reduce knee strain on descents?
Trekking poles, stable shoes, and a lighter pack can reduce strain on downhill miles.
Gear will not replace strength. Still, the right setup makes each step less punishing.
- Trekking poles: Use them on long descents, creek crossings, snow patches, and loose rock.
- Footwear with secure heel hold: Sliding inside your shoe makes braking harder.
- Reasonable pack weight: Carry what you need, not every fear you have ever had.
- Knee sleeves: Some hikers like the warmth and compression, but sleeves do not fix poor strength or bad mechanics.
- Insoles or orthotics: If you have recurring foot or knee issues, ask a qualified clinician instead of guessing from an aisle display.
If a piece of gear helps you move better and stay pain-free, use it. If it lets you ignore a problem that keeps getting worse, do not hide behind it.
How do you know your knees are ready for a steep hike?
Your knees are ready when you can descend stairs, train single-leg strength, and hike downhill without next-day swelling or limping.
Run this quick readiness check 1-2 weeks before a hard hike:
- You can do 10 controlled step-downs per side from an 8 in [20 cm] step.
- You can do 12 split squats per side without knee collapse.
- You can balance on each leg for 45 seconds.
- You can walk downhill for 20-30 minutes with a light pack and feel normal the next day.
- You can climb and descend stairs without grabbing the rail because of pain.
Miss one test? That does not mean you are banned from hiking. It means you should pick a gentler route, shorten the day, carry less, use poles, or give your training more time.
Related reading
- How Many Steps in a Mile (Walking vs Hiking)?
- What Is the Best Cardio for Hikers?
- What Is VO2 Max and Why It Matters for Hikers
- Calf Stretches for Hikers
FAQ
Can you actually strengthen your knees?
Yes, but you strengthen the muscles and movement patterns around the knee, not the joint like a biceps curl. Stronger quads, hamstrings, glutes, hips, and calves help the knee track better and absorb downhill force.
How long does it take to strengthen knees for hiking?
Give yourself 6 weeks for a noticeable change. Many hikers feel better sooner, but tendons, balance, and downhill control need repeated practice, not one heroic workout.
Are squats good for hikers with knee pain?
Squats can help if they are pain-free and done with good control. If squats hurt, use a shallower range, try box squats, or train step-downs, bridges, and band walks while you get medical or physical therapy guidance.
Should I wear a knee brace for downhill hiking?
A brace may help some hikers feel supported, but it is not a substitute for strength or medical care. If you need a brace to finish routine hikes, get the knee evaluated before you take on steeper terrain.
Do trekking poles really help knees downhill?
Yes, trekking poles can help by sharing some braking work with your arms and improving balance. They work best when you shorten your stride, keep your knees soft, and plant the poles before each downhill step.
What should I avoid when strengthening knees?
Avoid sharp pain, sudden jumps in weight, deep ranges you cannot control, and downhill workouts when your legs are already cooked. Build gradually and stop any exercise that causes swelling, buckling, or limping.