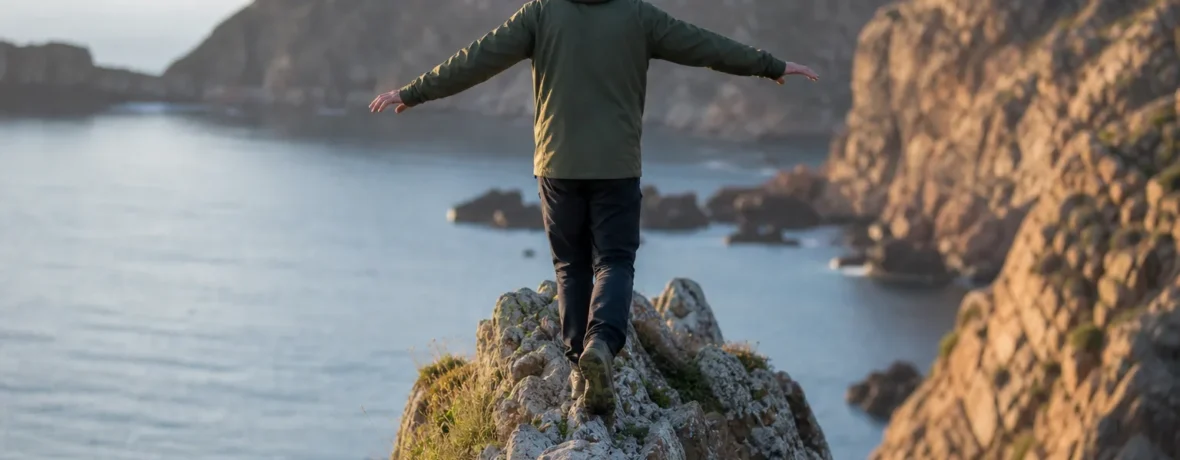
To improve balance for rocky trails, train 3 times per week for 10–20 minutes, mixing single-leg holds, slow step-downs, lateral hops, loaded carries, and trail-specific footwork. Keep one hand near support at first. Progress only when you can hold clean form for 30 seconds.
Rocky trail does not care how strong your legs feel on pavement. It asks a different question every step: Can you place your foot, control your hips, react fast, and stay relaxed while the ground tilts under you?
That is trainable. You do not need circus tricks. You need stronger feet and ankles, better hip control, sharper body awareness, and smarter trail habits.
Why do rocky trails make you lose balance?
Rocky trails challenge balance because every step changes height, angle, grip, and timing.
Your balance comes from several systems working together: eyes, inner ear, nerves, muscles, joints, heart, and blood vessels. Mayo Clinic describes balance as a whole-body job, not just an ankle job, which matches what you feel on a boulder field: one loose rock can demand instant input from your feet, knees, hips, core, eyes, and brain. Read Mayo Clinic’s overview of balance problems and body systems for the medical side.
On rock, four things usually break down first:
- Foot placement: you step on the edge of a rock instead of its flattest surface.
- Ankle stiffness: your ankle cannot adapt fast enough to slanted ground.
- Hip control: your knee caves inward and your center of mass drifts off the foot.
- Rushed vision: you stare at the hazard under your toes instead of reading 6–10 ft [1.8–3 m] ahead.
Fatigue makes all of this worse. So does a pack that swings, shoes that slide, trekking poles that are too long, and downhill speed that outruns your reaction time.
How to improve balance for rocky trails?
Build balance in layers: stable first, then moving, then loaded, then trail-like.
Use this progression 3 days per week. Stop each drill when your form gets sloppy. Wobbling is fine. Flailing is not training; it is a warning light.
- Start with a single-leg stand. Stand near a counter or wall. Lift one foot. Hold 20–30 seconds per side. Keep your big toe, little toe, and heel pressing into the floor.
- Add head turns. Hold the single-leg position and slowly turn your head left and right 5 times. Rocky trails force you to look around without tipping over.
- Add a slow reach. Stand on one leg and reach the other foot forward, sideways, and back. Tap the floor lightly. Do 5 taps in each direction per side.
- Train step-down control. Stand on a stair or sturdy box 6–8 in [15–20 cm] high. Lower one heel toward the floor for 3 seconds, tap, then stand back up. Do 6–8 reps per side.
- Carry weight. Hold a loaded daypack or one dumbbell in one hand. Walk 30–60 seconds. Switch hands. Keep your ribs stacked over your hips.
- Make it trail-like. Place cushions, folded towels, or flat garden pavers on the floor. Step slowly from target to target. Quiet feet. Soft knees. No rushing.
Do not skip the easy-looking drills. The cleaner you are on simple ground, the more spare attention you have when the trail gets messy.
What are the best balance exercises for hiking?
The best balance exercises for hiking train ankles, hips, core, and reaction time together.
Here is a simple menu. Pick 4–5 drills per session. The goal is crisp control, not exhaustion.
| Exercise | Trail skill it builds | How to do it |
|---|---|---|
| Single-leg stand | Steady foot placement | Hold 20–30 seconds per side near support. |
| Slow step-down | Downhill rock control | Lower for 3 seconds from a 6–8 in [15–20 cm] step. |
| Lateral lunge | Side-to-side stability | Step wide, sit hips back, push to center. Do 6–10 per side. |
| Heel-to-toe walk | Narrow trail confidence | Walk 10–20 slow steps as if on a line. |
| Farmer carry | Pack stability | Carry weight 30–60 seconds without leaning. |
| Low lateral hop | Quick recovery | Hop 6–12 in [15–30 cm] side to side. Land soft. |
If hopping bothers your joints or makes you feel unsafe, skip it. Use quick side steps instead. You can still train reaction without impact.
How often should you do balance training for hiking?
Train balance 3 times per week, then touch it lightly before every rocky hike.
Balance responds well to frequent, short practice. Long sessions can turn sloppy fast because your nervous system gets tired. Keep most sessions under 20 minutes.
| Day | Session | Time |
|---|---|---|
| Monday | Single-leg holds, step-downs, carries | 15–20 minutes |
| Wednesday | Reach taps, lateral lunges, heel-to-toe walk | 10–15 minutes |
| Friday | Trail-like stepping, low hops or quick side steps | 15–20 minutes |
| Before a hike | Calf raises, ankle circles, 10 step-downs per side | 5 minutes |
The CDC recommends that older adults include balance activities along with aerobic and muscle-strengthening activity each week; that guidance is aimed at fall prevention, but the training principle still fits rocky trail prep. See the CDC’s physical activity guidance for older adults.
How can you train your ankles for uneven ground?
Train ankles with strength, mobility, and controlled wobble.
Your ankles need to do two opposite jobs on rocky trail. They must be mobile enough to adapt to slanted stone, then strong enough to stop the roll before it becomes a fall.
- Calf raises: Do 2 sets of 10–15. Rise for 1 second, lower for 3 seconds.
- Tibialis raises: Stand with your back against a wall, heels 6–10 in [15–25 cm] from it. Lift toes toward shins. Do 2 sets of 12–20.
- Ankle alphabet: Lift one foot and “write” A through Z with your toes. Switch sides.
- Band side pulls: Use a light resistance band to pull the foot inward and outward. Do 10–15 reps each direction.
- Barefoot short-foot drill: On a safe indoor surface, gently draw the ball of your foot toward your heel without curling toes. Hold 5 seconds. Do 8–10 reps.
Do these slowly. If your feet cramp, reduce the effort and take longer rests. Tiny foot muscles do not need drama to get stronger.
Can trekking poles help balance on rocky trails?
Yes, trekking poles can help when you use them as light points of contact, not crutches.
On rocky ground, poles give you extra feedback. They can test mud depth, brace a downhill step, and steady you while crossing loose talus. They also help you slow down, which is half the battle.
Use them like this:
- Shorten poles for steep climbs.
- Lengthen poles slightly for long descents.
- Plant the pole before committing full weight to the next foot.
- Keep elbows relaxed, not locked.
- Use rubber tips on bare rock when they grip better than carbide tips.
Do not let poles replace footwork. If every step depends on a hard pole plant, slow down and choose better footholds.
What footwork keeps you steady on loose rocks?
Quiet, deliberate footwork beats big heroic steps.
Rocky trails reward patience. The best hikers on rough ground often look boring: short steps, soft knees, eyes scanning ahead, torso calm. That is the look you want.
- Scan ahead. Look 6–10 ft [1.8–3 m] forward, then flick your eyes down for exact placement.
- Step on flats. Aim for the broadest, driest surface on each rock.
- Keep steps short. Short steps keep your weight closer to your base of support.
- Commit smoothly. Test questionable rocks before loading them fully.
- Stay loose. Bent knees and relaxed ankles absorb surprises.
- Pause before big moves. If the next step looks sketchy, stop. Pick a line. Then move.
Downhill, resist the urge to lean back hard. That can make your feet skid forward. Instead, hinge slightly at the hips, keep your knees soft, and place each foot under you.
What gear helps you stay balanced on rocky trails?
Good gear cannot give you balance, but bad gear can steal it fast.
Start with footwear. You want secure heel hold, enough toe room for descents, and outsoles that match the terrain. A stiff boot may feel secure on sharp rock; a lower, more flexible shoe may give better ground feel. The right choice depends on your feet, pack weight, trail surface, and ankle history.
Run this quick gear check before rocky hikes:
- Shoes: laces snug at the heel, toes not jammed, tread still defined.
- Socks: no bunching, no heel slip, no thick seams pressing toes.
- Pack: heavy items close to your spine, not swinging off the back.
- Poles: locks tight, straps adjusted, tips matched to the surface.
- Glasses: clean lenses; depth perception suffers when lenses are smeared.
Pack balance matters more than many hikers think. A half-full bottle swinging in an outer pocket can pull you sideways right when you need clean foot placement. Cinch it down.
How do you practice balance safely at home?
Practice near support and make the drill harder only after you own the easier version.
A safe setup lets you train consistently. You should be able to touch a wall, counter, railing, or sturdy chair without taking a step. Clear pets, rugs, cords, and dumbbells from the area before you begin.
- Use a firm floor before trying foam or pillows.
- Keep shoes on if barefoot work feels unstable.
- Do not close your eyes until you can hold the drill cleanly with eyes open.
- End the set when your knee caves in, your foot grabs the floor, or your shoulders tense up.
- Use 30–60 seconds of rest between drills.
If you are returning after injury, use pain as a hard boundary. Mild muscle work is normal. Sharp pain, swelling, numbness, dizziness, or a feeling that the joint may give way is not a training target.
When to see a doctor
See a doctor if balance problems are repeated, sudden, severe, or tied to dizziness, faintness, weakness, hearing changes, or falls.
Trail balance is one thing. Medical balance trouble is another. NIH’s National Institute on Aging says dizziness, vertigo, staggering, blurred vision, confusion, and falling can be symptoms of a balance disorder, and it recommends talking with a doctor if you think you have a balance problem. Read NIH’s guide to older adults and balance problems.
Get urgent medical care if new severe dizziness or vertigo comes with chest pain, trouble breathing, fainting, severe headache, numbness, weakness, confusion, slurred speech, trouble walking, or vision changes. Mayo Clinic lists these as warning signs in its guide to dizziness and when to seek care.
If you fall on trail and hit your head, cannot bear weight, see obvious deformity, lose feeling, or cannot walk out safely, treat it as more than a training problem. Get help.
Related reading
- How to Improve VO2 Max for Mountain Hiking
- How to Improve Cardio Endurance for Hiking
- How Many Steps in a Mile (Walking vs Hiking)?
- What Is the Best Cardio for Hikers?
FAQ
How long does it take to improve balance for hiking?
You can feel steadier in 2–4 weeks with 3 short sessions per week. Bigger changes for rocky descents usually take 6–8 weeks because strength, reaction time, and confidence need repetition.
Should I train balance barefoot or in hiking shoes?
Use both, but start with shoes if you feel unstable. Barefoot drills can strengthen foot control at home, while shoe-based drills better match the trail.
Are balance boards good for hikers?
They can help, but they are not required. A step, towel, stair, curb, and loaded backpack can build plenty of trail-ready balance without turning your living room into a gym.
Why do I lose balance more on downhill trails?
Downhill hiking demands braking strength and faster foot decisions. Your quads, calves, ankles, and hips must slow your body while your eyes choose safe landing spots.
Can weak hips cause poor balance on rocky trails?
Yes, weak hips can let your knee drift inward and your pelvis tip when you stand on one leg. Lateral lunges, step-downs, and loaded carries help build the hip control you need for rough ground.
What should I do if I feel dizzy during balance exercises?
Stop the exercise and sit or stand with support. If dizziness is repeated, severe, sudden, or paired with other symptoms, talk with a healthcare professional before continuing.