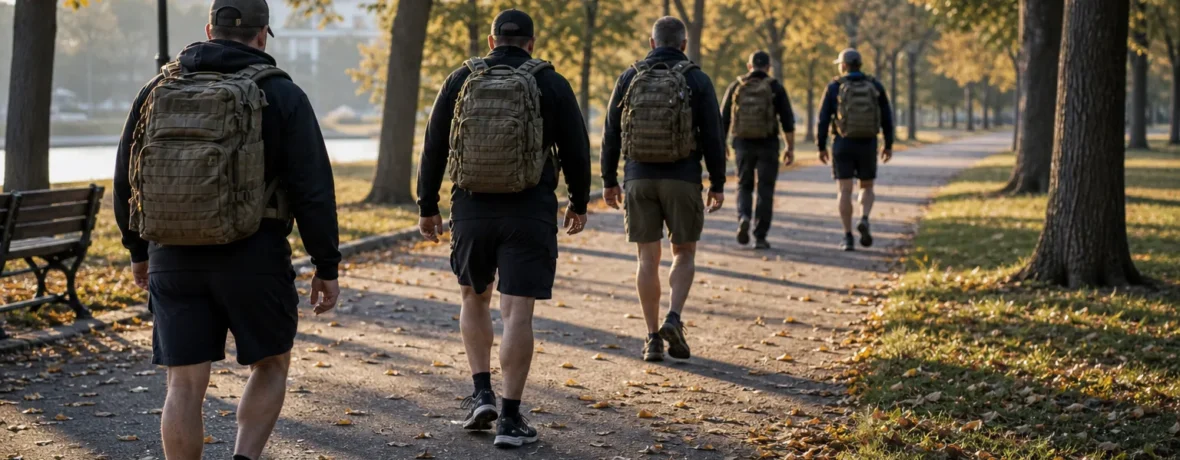
What is a rucking workout? It is a loaded walking session: you put weight in a backpack, walk at a steady pace, and train your legs, trunk, feet, and lungs together. Start with 10 to 20 lb [4.5 to 9 kg], walk 20 to 45 minutes, and add weight only when your form stays solid.
What is a rucking workout, and why does it help hikers?
A rucking workout is walking with a weighted pack on purpose, not just hauling gear because the trail demands it.
That difference matters. On a backpacking trip, the load, terrain, and mileage are fixed by the route. In training, you control the load, time, grade, and pace. That lets you build up instead of getting worked over by the first big climb of the season.
Rucking sits in the sweet spot between hiking and strength training. You get aerobic work from the walking, strength endurance from carrying weight, and trail-specific practice from moving under load. For hikers, that is gold. Squats and lunges help, but they do not teach your shoulders, hips, calves, and feet how to share a pack for miles.
The CDC recommends adults get 150 minutes of moderate-intensity physical activity per week plus 2 days of muscle-strengthening activity; loaded walking can contribute to your weekly movement plan when you build it gradually and recover well. See the CDC adult physical activity guidelines. (cdc.gov)
How heavy should your pack be for a rucking workout?
Start lighter than your ego wants: 10 to 20 lb [4.5 to 9 kg] works for many beginners.
If you are brand new to rucking, use the first 2 weeks to learn the feel of loaded walking. Your first goal is not suffering. Your first goal is clean movement: tall posture, quiet feet, even steps, and no hot spots forming on your heels.
| Experience level | Starting load | Best first session |
|---|---|---|
| New to hiking fitness | 10 lb [4.5 kg] | 20 minutes on flat ground |
| Regular day hiker | 15 to 20 lb [6.8 to 9 kg] | 30 minutes on rolling terrain |
| Backpacker with base fitness | 20 to 30 lb [9 to 13.6 kg] | 45 minutes with gentle hills |
Once the load feels normal, increase only one thing at a time: weight, distance, pace, or elevation. Add 5 lb [2.3 kg] to the pack, or add 10 minutes, or choose a hillier route. Do not stack all three in one week unless you enjoy limping to the coffee maker.
How do you set up your pack for rucking?
Pack weight high, snug, and stable so it rides close to your back.
A sloppy pack turns a clean training session into a shoulder-yanking mess. Use a real hiking daypack or backpacking pack with padded shoulder straps. A hip belt helps once loads pass 20 lb [9 kg], though some short urban rucks are fine without one.
Use dense weight that will not bounce. Water jugs, rice bags, sandbags, weight plates wrapped in a towel, or tightly packed gear all work. Keep hard edges away from your spine. If you use plates, pad them. If you use water, remember that it can slosh unless the container is full.
- Place the heaviest item high in the pack, between your shoulder blades.
- Tighten shoulder straps until the pack sits close, not dangling.
- Use the sternum strap if the shoulder straps drift outward.
- Use the hip belt for heavier or longer sessions.
- Wear the socks and shoes you plan to hike in.
- Carry water separately if you need to drink it during the session.
How should you warm up before a rucking workout?
Warm up for 5 to 8 minutes before you add speed or hills.
Loaded walking asks more from your calves, hips, feet, and trunk than an unloaded stroll. Give those parts a short warning. You do not need a circus routine in the trailhead parking lot. Keep it simple and repeatable.
- Walk unloaded for 2 minutes at an easy pace.
- Do 10 bodyweight squats with your feet flat.
- Do 10 reverse lunges, 5 per side.
- Do 10 calf raises, pausing at the top.
- Put on the pack and walk easy for 3 minutes.
- Then start the planned session.
During the workout, use the talk test. If you can speak in short sentences, you are working. If you can only grunt, back off unless the session specifically calls for a short hard climb.
What are the best rucking workouts for hikers?
The best rucking workouts match trail demands: steady climbs, rolling terrain, tired-leg strength, and controlled descents.
Here are five sessions to rotate through your week. Pick one or two at first. More is not automatically better. The magic is in repeating the work long enough for your feet, connective tissue, and lungs to adapt.
1. The Easy Base Ruck
This is the foundation session.
Use 10 to 25 lb [4.5 to 11.3 kg]. Walk 30 to 60 minutes on flat or gently rolling ground. Keep the pace brisk but calm. You should finish feeling like you could do another 15 minutes.
- Best for: beginners, aerobic base, pack comfort
- Route: sidewalk, gravel path, mellow trail
- Effort: 4 to 5 out of 10
- Progression: add 5 to 10 minutes before adding weight
This is the session most hikers should do most often. It teaches your body that carrying a pack is normal, not a crisis.
2. The Hill Repeat Ruck
This session builds climbing strength without needing a full mountain.
Use 10 to 20 lb [4.5 to 9 kg] for your first few hill sessions. Find a hill that takes 2 to 4 minutes to climb. Walk up with steady pressure, then walk down slowly to recover. Repeat 4 to 8 times.
- Best for: long ascents, switchbacks, steep trail days
- Route: hill, bridge, stadium stairs, fire road climb
- Effort: 7 out of 10 uphill, 2 to 3 downhill
- Progression: add one repeat, then add load later
Keep your steps short on the climb. Drive through the whole foot, not just the toes. On the descent, do not bomb downhill. Controlled descending is training too.
3. The Tempo Ruck
This workout teaches you to move with purpose under load.
Use a light to moderate pack, usually 10 to 20 lb [4.5 to 9 kg]. Warm up, then walk 20 to 30 minutes at a pace that feels firm but sustainable. You are not jogging. You are hiking like the weather is turning and the car is still 3 miles away.
- Best for: faster day hikes, efficient pacing, cardio
- Route: flat path or gentle rolling trail
- Effort: 6 to 7 out of 10
- Progression: add 5 minutes to the tempo block
If your shins, knees, or hips complain, slow down before you lighten the pack. Speed creates impact. Load adds stress. Together, they need respect.
4. The Pack Strength Circuit
This session mixes rucking with simple strength moves.
Use 10 to 25 lb [4.5 to 11.3 kg]. Walk 5 minutes, then stop and do a short strength circuit. Repeat the whole pattern 3 to 5 times.
- 5 minutes brisk ruck
- 8 pack squats
- 8 step-ups per leg on a stable bench, curb, or rock
- 10 standing pack rows, if your pack has a safe handle
- 30-second suitcase carry per side if you can safely hold the pack at your side
Skip any move that feels awkward with your pack. This is not gym theater. The goal is stronger hiking muscles: quads, glutes, calves, upper back, grip, and trunk.
5. The Long Trail Simulation Ruck
This is the most hike-specific session, so save it for when your base is ready.
Use the pack weight you expect to carry on a day hike or a trimmed-down backpacking load. Walk 75 to 150 minutes on terrain that resembles your goal hike. Include climbs, descents, uneven tread, and planned snack or water breaks.
- Best for: backpacking prep, mountain hikes, gear shakedowns
- Route: real trail whenever possible
- Effort: 5 to 6 out of 10
- Progression: add terrain difficulty before adding speed
This session exposes problems early: rubbing straps, bad sock choices, weak pacing, bouncing water bottles, and snacks that turn to paste in your mouth. Better to find that out 20 minutes from home than 8 miles [12.9 km] from the trailhead.
How often should you do rucking workouts?
Most hikers should start with 1 to 2 rucking sessions per week.
That is enough to build the habit without turning every walk into a loaded grind. If you already hike, lift, run, or bike, count rucking as real training. It has a cost. Your feet and calves know the bill is due even when your lungs feel fine.
A simple week could look like this:
- Tuesday: Easy Base Ruck, 30 to 45 minutes
- Thursday: strength training or mobility, unloaded
- Saturday: Hill Repeat Ruck or Long Trail Simulation
- Sunday: easy walk, light hike, or full rest
After 4 to 6 weeks, you can add a third ruck if recovery is good. Good recovery means no sharp pain, no worsening foot soreness, no deep fatigue, and no dread when you see the pack by the door.
What gear do you need for rucking workouts?
You need a comfortable pack, stable weight, good socks, and shoes that match the surface.
Do not overbuy. The best setup is the one you can use twice a week without fiddling for 20 minutes. A hiking daypack works for light loads. A backpacking pack works better for heavier loads and hilly terrain because the frame and hip belt spread weight more comfortably.
- Pack: 15 to 35 L for most training sessions.
- Weight: water, sandbag, rice bag, wrapped plate, or real hiking gear.
- Footwear: trail runners, hiking shoes, or boots you already trust.
- Socks: moisture-wicking hiking socks, not cotton gym socks.
- Safety: reflective gear for roads, headlamp for low light, phone, and water.
Foot care matters. Wilderness Medical Society guidance on basic wound management describes blister prevention as proper footwear plus keeping the foot environment dry, including a wicking sock system. See the Wilderness Medical Society wound management guidelines. (journals.sagepub.com)
How do you avoid injury while rucking?
Build slowly, keep the pack stable, and stop small problems before they become trip-ending problems.
Loaded walking is simple, but simple does not mean harmless. The common mistakes are easy to spot: too much weight, too much downhill pounding, shoes that rub, and pace that turns into a shuffle-jog.
- Add weight in 5 lb [2.3 kg] jumps, not giant leaps.
- Keep most sessions at a pace where your stride stays smooth.
- Shorten your stride on climbs and descents.
- Treat hot spots as soon as you feel them.
- Take at least one non-rucking day between hard rucks.
- Back off if soreness changes your gait.
Heat also changes the risk picture. NIH MedlinePlus lists heat illness warning signs that can include dizziness, nausea, confusion, and a rapid pulse; if heat symptoms show up, get out of the heat and seek medical help when symptoms are severe or do not improve. See NIH MedlinePlus heat illness guidance. (medlineplus.gov)
When to see a doctor
See a doctor if pain is sharp, worsening, localized to bone, or does not improve with rest.
Do not try to “ruck through” pain that changes how you walk. That is not grit. That is a warning light. Mayo Clinic describes stress fracture pain as something you might barely notice at first, then worsening over time; their guidance says to contact a health care professional if pain becomes severe or persists after rest. Read the Mayo Clinic stress fracture overview. (mayoclinic.org)
Get medical advice before starting loaded training if you have a heart condition, recent surgery, a current foot or joint injury, unexplained chest pain, dizziness with exercise, or a medical condition that limits activity. For heat illness symptoms with confusion, fainting, or severe weakness, seek urgent care.
Related reading
- What Is Rucking? A Beginner's Guide
- What Is the 12-3-30 Workout and Does It Help Hikers?
- Stair Climbing Workout for Hikers
- Is Rucking Good for You? Benefits and Risks
FAQ
Is rucking better than walking?
Rucking is harder than regular walking because the pack adds load. Walking is better for recovery days, while rucking is better when you want hiking-specific strength and aerobic work in the same session.
Can beginners do rucking workouts?
Yes, beginners can ruck if they start light and keep sessions short. Begin with 10 lb [4.5 kg] for 20 minutes on flat ground, then build time before weight.
Should you ruck every day?
No, most hikers should not ruck every day. Loaded walking stresses feet, calves, knees, hips, and back, so start with 1 to 2 sessions per week and use easy walking or rest between harder days.
Is running with a ruck a good idea?
Usually no. Running with a loaded pack increases impact and can beat up your joints and feet; hikers get plenty of benefit from brisk walking, hills, and longer trail sessions.
What is a good rucking pace?
A good rucking pace is brisk but controlled. For many hikers, that means moving fast enough to breathe harder while still speaking in short sentences and keeping a smooth stride.
Can rucking replace leg day?
Rucking can support leg strength, but it does not fully replace strength training. Keep squats, hinges, step-ups, calf raises, and core work in your week if you want stronger climbs and safer descents.