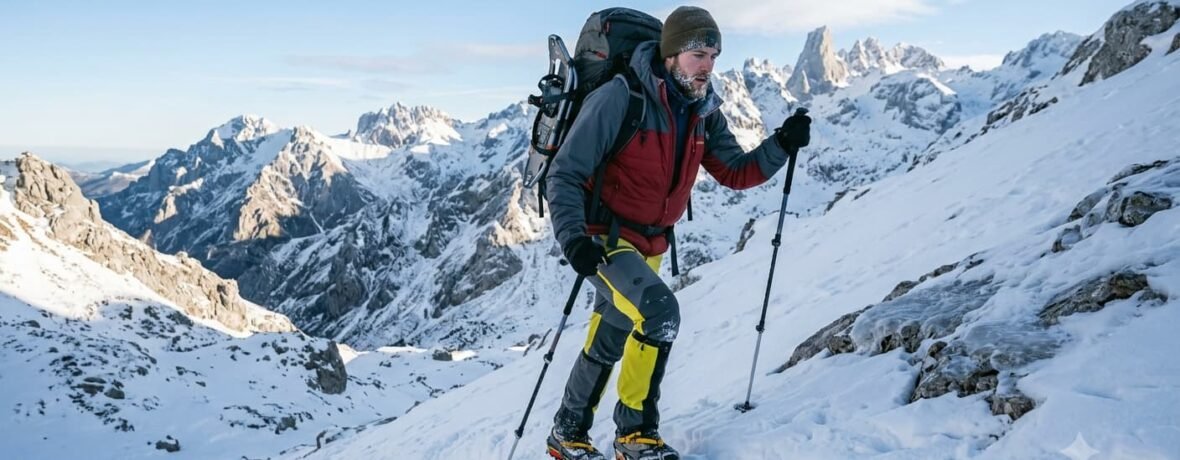
Snow turns a familiar three-hour trail into a five-hour day. Train for that, not for the summer version.
Breaking trail in deep snow can triple the energy cost of the same route in summer.
Winter hiking is not summer hiking with a warmer jacket. Deep snow can triple the energy cost of a route, daylight is short, and the consequences of a small mistake escalate quickly when the temperature is below freezing. The conditioning that carries you comfortably through a summer day will not necessarily carry you through the same route in February, and that gap catches out experienced hikers every season.
The training question therefore has three parts: aerobic capacity for a slower, longer day; specific strength for postholing and snowshoeing; and the practical skills that keep cold from becoming a problem. All three are trainable, and none require a mountaineering course to begin.
Conditioning specifically for snow travel
Breaking trail through 30 cm of snow raises energy cost by roughly 50 to 100 per cent compared with the same gradient on dry ground; in deep, unconsolidated snow it can be far more. The practical training response is volume at low intensity — longer, slower sessions that build the aerobic base you need to sustain effort for six or seven hours rather than four.
Add hip flexor and adductor work, because lifting a snowshoe-laden foot clear of deep snow uses muscles that summer hiking barely touches. High-knee marches, weighted step-ups and lateral lunges all transfer well. Core stability matters more too, since uneven, collapsing snow constantly challenges balance in a way that a firm trail does not.
Choosing traction: microspikes, crampons or snowshoes
Match the device to the snow. Microspikes handle packed trails and ice on rolling terrain and are the most commonly useful winter item for hikers. Snowshoes are for unconsolidated snow more than about 20 cm deep, where flotation is the problem rather than grip. Full crampons and an ice axe belong on firm snow and ice on steep terrain, and they require training — an axe you cannot self-arrest with is dead weight with a sharp end.
Layering and the cold-management system
The winter rule is to start cold. Begin walking slightly under-dressed so you do not sweat during the first climb, then add layers the moment you stop. Carry a genuinely warm insulated jacket that lives in the pack and only comes out at rest stops. Keep spare gloves and a hat in a dry bag, and eat regularly — cold accelerates calorie burn, and shivering is expensive in energy terms.
Daylight, pace and turnaround discipline
A route that takes four hours in July may take seven in January, at a time of year when there are only eight hours of usable light. Plan on roughly half your summer pace in unbroken snow, set an early turnaround and carry two light sources. Navigation is harder because trails disappear under snow — carry a GPS track, and be prepared for the fact that the return leg you assumed would be quick may be the slowest part of the day.
Winter traction devices compared
| Pick | Model / Option | Best for | Price | Weight | Rating |
|---|---|---|---|---|---|
| Microspikes | Packed trail and ice | Kahtoola MICROspikes | $75 | 320 g | 4.8/5 |
| Snowshoes | Deep unconsolidated snow | MSR Lightning Ascent | $330 | 1,860 g | 4.7/5 |
| Trail crampons | Firm snow, moderate slopes | Hillsound Trail Crampon | $85 | 560 g | 4.6/5 |
| Full crampons | Steep snow and ice | Petzl Vasak | $210 | 980 g | 4.5/5 |
| Gaiters | Keeping snow out of boots | Outdoor Research Crocodile | $95 | 460 g | 4.4/5 |
| Insulated boots | Sub-zero standing time | Oboz Bridger 9 Insulated | $210 | 1,340 g | 4.5/5 |
Snowshoe weights are per pair. Crampons require compatible stiff boots and, ideally, formal training before use on steep ground.
Building a winter season safely
Progression is the whole strategy. Start with familiar summer trails in light snow, learn how your traction devices behave, and only then move to longer or higher routes. Add one variable at a time — new terrain or new conditions, never both. Winter rewards conservatism, and the hikers who accumulate decades of safe winter days are the ones who turn around often and early.
Avalanche terrain deserves explicit mention. If your route crosses or sits beneath slopes between roughly 30 and 45 degrees, you are in avalanche terrain and need training, a forecast, and the standard rescue equipment carried by everyone in the party. Many excellent winter hikes avoid this entirely by staying on valley floors, ridges and low-angle ground, and choosing those routes is a legitimate skill rather than a compromise.
Hydration is the quiet winter failure. Cold suppresses thirst, and dry winter air increases respiratory water loss, so most people arrive at the car mildly dehydrated without noticing. Carry an insulated bottle or a thermos of something warm, drink on a schedule rather than on thirst, and keep bottles upside down so ice forms at the base rather than in the neck.
Recovery after cold days
Cold exposure adds to overall training stress even when the effort felt moderate. Refuel with something warm within an hour, prioritise sleep, and expect that two consecutive winter days will feel harder than two summer days at the same distance. Build recovery into the schedule rather than discovering the deficit halfway through the second outing.
Geo guide: winter hiking conditions by region
Winter is not one condition. It is several very different problems depending on where you are.
- Scottish Highlands — Wind and freeze-thaw ice rather than deep snow; microspikes and full winter skills for higher ground.
- New England and the Adirondacks — Deep powder and severe wind chill above treeline; snowshoes plus serious insulation.
- Colorado Rockies — Continental snowpack with persistent weak layers — avalanche education is essential above treeline.
- European Alps — Excellent winter walking trails maintained at valley level, with clearly marked avalanche zones above.
- Japanese Alps and Hokkaido — Extraordinary snowfall totals; flotation matters more than traction on most approach routes.
Conditions change fast in the mountains: always check the local land-manager forecast before you leave the trailhead.
Frequently Asked Questions
What are the best snow shoes for hiking in deep snow?
Look for models with adequate surface area for your loaded weight, an ascent bar for sustained climbs and aggressive underfoot crampons. The MSR Lightning Ascent remains the benchmark for steep, deep conditions.
Do I need crampons or microspikes for winter hiking?
Microspikes cover packed trails and icy patches on rolling terrain, which is most winter hiking. Crampons are for firm snow and ice on steep ground and should be paired with an ice axe and proper training.
How do I train for winter hiking?
Add low-intensity aerobic volume for longer days, plus hip flexor, adductor and core work for deep-snow travel. Practise with your winter pack and traction devices on familiar terrain first.
How much slower is hiking in snow?
Plan for roughly half your summer pace when breaking trail in unconsolidated snow, and slower still in deep powder. Combined with short daylight, this is why winter turnaround times must be set early.
How do I stay warm without sweating?
Start slightly cold, remove layers before you begin to sweat on climbs, and add an insulated jacket immediately when you stop. Damp base layers are the fastest route to being cold in winter.